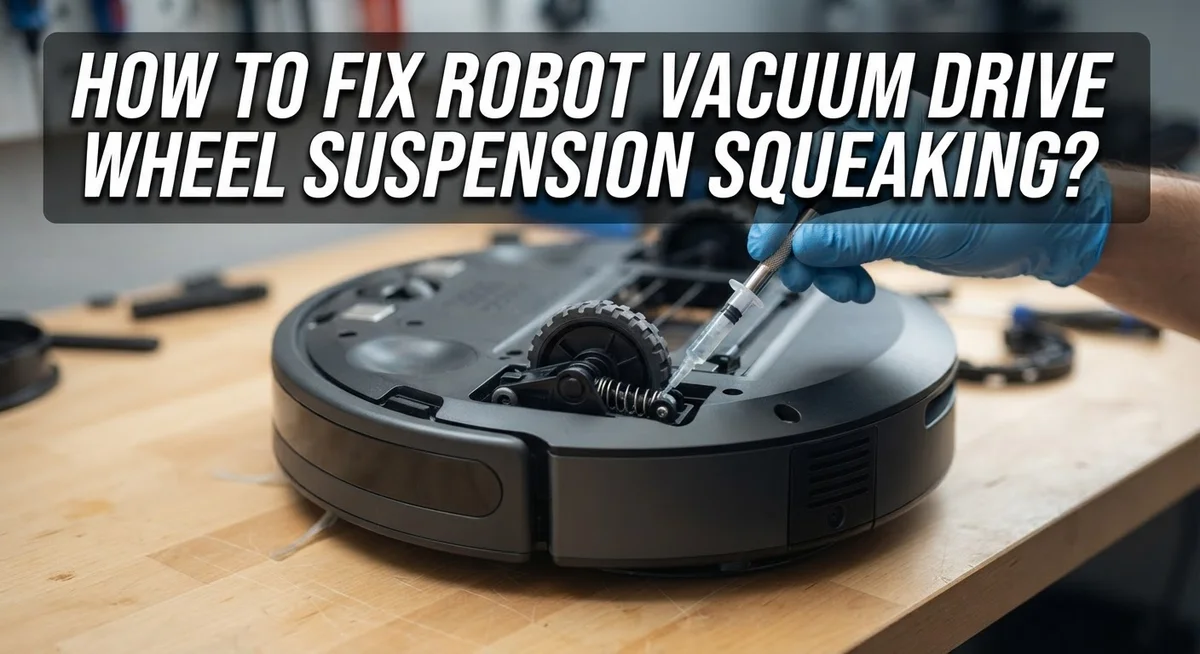
How To Fix Robot Vacuum Drive Wheel Suspension Squeaking?
Does your robot vacuum sound like a tiny mouse every time it moves? That squeaky noise from the drive wheel suspension can be annoying. It often signals a small problem that needs quick attention.
Dirty wheels, worn suspension parts, or debris stuck in the axles usually cause this sound. Left alone, this issue can affect how well your robot navigates your home. It may even struggle to dock properly for charging.
The good news? You can fix this squeaking sound at home. You do not need special tools or expert help.
In a Nutshell
- Power off your robot vacuum first. This keeps you safe while you check the wheels.
- Test the drive wheels by pressing down and sliding them. Smooth rotation and rebound mean healthy wheels.
- Pull out the caster wheel by gripping it firmly. Clean the wheel, axle, and nearby sensors well.
- Check the rolling brush too. Remove the guard and brush, then run the vacuum in single sweep mode to test for noise.
- Inspect cliff sensors carefully. Dirty or damaged sensors can cause squeaking and affect navigation.
- Reinstall all parts once cleaning is done. Make sure everything clicks back into place properly.
What Causes Drive Wheel Suspension Squeaking
Robot vacuums make squeaking sounds for several reasons. Understanding the root cause helps you fix the problem quickly.
Dirty wheels are the most common culprit. Your vacuum rolls through dust, pet hair, and debris daily. Over time, this buildup accumulates around the wheel axles and suspension joints. The friction creates that annoying squeaking noise you hear.
Worn suspension components also trigger squeaking. The suspension system absorbs impact as your vacuum moves across floors. Rubber bushings and joints wear down with regular use. When they deteriorate, metal parts rub against each other and produce squeaks.
Debris trapped in axles causes similar problems. Small particles like hair strands, dust, and crumbs get wedged into tight spaces around the drive wheels. This debris prevents smooth rotation and creates friction that squeaks.
Lack of lubrication in moving joints contributes too. The suspension parts need proper lubrication to move silently. Without it, parts grind together and squeak with each movement.
Wheel bearing issues can develop over time. Bearings help wheels spin freely. When bearings wear out or accumulate dirt, they resist smooth rotation and produce noise.
Rolling brush problems sometimes cause sounds that seem like suspension squeaking. A dirty or damaged brush can rub against the vacuum body. This creates noise that mimics drive wheel suspension issues.
The good news? Most squeaking problems are fixable with basic cleaning and maintenance. Regular inspection of your wheels, suspension joints, and brush prevents these issues from developing. Catching the problem early saves you time and keeps your vacuum running quietly for years.
Tools You Need Before You Start
Before you start fixing that squeaking sound, gather the right tools. Having everything ready makes the job faster and easier.
You will need a soft brush or old toothbrush to clean wheel components. This removes dirt and dust without scratching surfaces. A microfiber cloth works great for wiping down wheels and axles after brushing.
Get a small container of water nearby. You may need to dampen your cloth for stubborn debris. Avoid soaking parts, as excess moisture can damage electronic sensors.
A flashlight or headlamp helps you see inside tight spaces. Drive wheel areas can be dark, and good lighting prevents you from missing debris or damage.
Grab a dry towel for final cleanup. This prevents water spots and allows parts to dry completely before reassembly.
Consider keeping a small screwdriver set handy. Most robot vacuums use standard Phillips or flathead screws. You might need these for removing wheel guards or accessing suspension components.
A simple notepad serves an important purpose. Write down the order of parts you remove. This reference prevents confusion during reassembly.
Wear work gloves if you prefer. They protect your hands from sharp edges and provide better grip on stubborn wheels.
Finally, clear your work surface. A clean, flat area prevents losing small parts. Lay out your tools before starting so nothing gets misplaced.
Taking time to prepare saves frustration later. You avoid stopping mid repair to hunt for supplies. Everything stays organized, and the repair process flows smoothly. Once your tools are ready, you can move forward with confidence and complete the fix efficiently.
Step-by-Step Guide to Diagnosing the Squeak
Start by turning off your robot vacuum completely. This keeps you safe and prevents accidental activation during diagnosis.
Next, locate the drive wheels on both sides of your vacuum. Press down firmly on one wheel with your hand. Slide it forward and backward to feel how it moves. A smooth wheel should glide easily without resistance. If the wheel feels sticky or stiff, debris or wear is present.
Listen carefully as you move the wheel. Does the squeak happen during forward motion, backward motion, or both? Note when the sound occurs. This detail helps you identify the exact problem area.
Now test the wheel’s rebound. Push down on the wheel and release it quickly. The wheel should bounce back up smoothly. If it moves slowly or feels stuck, suspension components need attention.
Repeat this process with the other drive wheel. Compare how both wheels feel and sound. Uneven performance between wheels points to a specific problem on one side.
Inspect the wheel axle closely with a flashlight. Look for visible dirt, hair, or debris wrapped around the axle. Spin the wheel by hand while watching the axle. Does it rotate freely or does it catch?
Check the area where the wheel connects to the vacuum body. Dust accumulation in this joint often causes squeaking. Wipe away any visible debris with a dry cloth.
Finally, listen to the squeaking sound itself. Is it a high pitched squeak or a lower grinding noise? High pitched sounds usually indicate friction from debris. Lower grinding sounds suggest worn components or lack of lubrication.
Document your findings before moving forward with cleaning.
How To Clean and Reassemble the Wheel Assembly
Start by powering off your robot vacuum completely. This keeps you safe while working on the internal components.
Remove the drive wheel by locating the attachment point on your vacuum’s side. Most wheels slide or clip into place. Grip the wheel firmly and pull straight outward. If it resists, check for any locking tabs or screws holding it in position.
Once removed, inspect the wheel itself. Look for dirt, hair, and debris wrapped around the rubber. Use your soft brush or old toothbrush to scrub away buildup. Pay special attention to the wheel’s edges where hair tends to accumulate.
Next, clean the axle where the wheel attaches. This metal rod often collects dust and dried residue. Wipe it thoroughly with a damp cloth. Use your flashlight to see inside the cavity. Make sure no debris remains in the opening.
Clean the wheel sensors located near the attachment point. These small components help your vacuum navigate properly. Gently wipe them with a dry cloth. Avoid pressing too hard on delicate sensor surfaces.
Inspect the suspension components around the wheel cavity. Look for any visible damage, cracks, or worn rubber. Check if any parts appear bent or misaligned.
After cleaning, apply a tiny amount of appropriate lubricant to the axle if needed. Wipe away excess oil to prevent attracting more dirt.
Reattach the wheel by sliding or clicking it back into position. Ensure it sits flush and secure. Test the wheel’s rotation by hand. It should spin freely without resistance or grinding sounds.
Repeat this entire process with the other drive wheel. Consistency matters when fixing suspension squeaking.
Testing the Rolling Brush for Related Noise Issues
The rolling brush often creates sounds that mimic suspension squeaking. Testing it separately helps you pinpoint the real source of the noise.
Start by powering off your robot vacuum completely. Locate the rolling brush guard on the bottom of your device. Most guards release with a simple twist or slide motion. Remove the guard carefully and set it aside.
Next, pull out the rolling brush itself. Inspect it for hair, dirt, or debris wrapped around the bristles. Debris buildup is a common culprit for squeaking sounds that seem to come from the suspension area.
Clean the brush thoroughly under running water. Use your fingers to remove tangled hair and lint. Let it dry completely before reinstalling. While the brush is out, wipe down the brush cavity with a dry cloth.
Now comes the important test. Reinstall the brush and guard, then power on your vacuum in single sweep mode if available. Listen carefully as the brush rotates. Does the squeaking sound disappear or change? If yes, you found the problem. If the noise remains unchanged, the issue lies elsewhere in the suspension system.
Check the brush cavity for debris or damage. Sometimes small objects lodge in this space and cause noise. Remove any particles you find.
Regular brush maintenance prevents this issue from returning. Clean your brush weekly if you have pets or long hair in your home. This simple habit stops most squeaking problems before they start.
If squeaking continues after cleaning the brush thoroughly, move forward with other suspension components. The noise likely originates from worn wheel bearings or dirty axles instead.
Tips To Prevent Squeaking From Coming Back
Regular maintenance is your best defense against squeaking wheels. Clean your drive wheels every two weeks to stop dirt and debris from building up. A simple wipe with a dry cloth removes dust quickly.
Check your wheel sensors monthly. These small components collect particles that cause friction. A quick cleaning with a soft cloth keeps them functioning properly.
Inspect your suspension components regularly by pressing down on each wheel. It should bounce back smoothly without resistance. If you feel stiffness, clean the axle area immediately.
Empty your robot’s dustbin after every cleaning cycle. A full bin forces your vacuum to work harder. This extra strain puts pressure on drive wheels and suspension parts.
Keep your floors clear of large debris before running your vacuum. Strings, hair, and small objects jam wheels and create stress on suspension systems. A quick sweep prevents most mechanical issues.
Store your robot in a dry location. Moisture causes rust on metal axles and suspension components. This rust creates friction and squeaking sounds.
Test your robot weekly by pressing the wheels and listening for noise. Catching squeaks early means simple cleaning fixes the problem. Waiting longer might require part replacement.
Replace your rolling brush every three to six months depending on usage. A worn brush strains the entire wheel assembly. Fresh brushes reduce stress on suspension systems.
Document your cleaning schedule to stay consistent. Set phone reminders for weekly wheel checks and monthly sensor cleaning. Consistency prevents squeaking from returning.
These simple habits take just minutes but save you from expensive repairs. Your robot vacuum runs quieter and lasts longer when you maintain it regularly.
Common Mistakes That Make the Problem Worse
People often make mistakes that turn a small squeaking problem into a bigger issue. Understanding these errors helps you avoid costly repairs.
Skipping the power off step is the first major mistake. Many owners try to clean wheels while the vacuum runs or stays powered on. This creates safety risks and prevents you from properly testing wheel movement. Always disconnect power completely before starting any maintenance.
Not testing wheel rebound after cleaning is another common error. You clean the wheel and axle, reinstall everything, then assume the problem is solved. The squeaking returns within days. After cleaning, press down on each drive wheel and release it. The wheel should bounce back smoothly without resistance. If it doesn’t, debris remains inside or suspension components need replacement.
Neglecting sensor cleaning makes navigation problems worse. Dirty wheel sensors confuse your robot’s movement tracking. The vacuum compensates by working harder, which increases suspension stress and squeaking. Wipe sensors with a dry cloth during every maintenance session.
Ignoring the rolling brush cavity is another frequent mistake. People clean the wheels but forget that brush debris accumulates in the surrounding area. This debris migrates to wheel axles and causes renewed squeaking. Always inspect and clean the entire brush compartment, not just the brush itself.
Rushing the reassembly process causes improper wheel seating. Wheels that aren’t fully clicked or seated correctly will squeak immediately. Take time to ensure components snap into place properly. Listen for the click or feel for the firm connection.
These mistakes compound the original problem. Taking your time and following each step completely prevents frustration and extends your vacuum’s lifespan.
Troubleshooting Persistent or Returning Squeaks
When squeaking returns after you’ve cleaned your robot vacuum, the problem usually involves something you missed during the first repair attempt. Start by identifying where the noise comes from. Press down firmly on each drive wheel and listen carefully. Does the squeak happen during compression or when the wheel rebounds?
If the noise persists, debris may still be trapped in the axle or suspension joint. Remove the drive wheel again and inspect the axle shaft closely. Look for hair, dust, or small particles wrapped around the connection point. These items compress over time and create friction. Use a dry cloth to wipe the entire axle thoroughly. Pay special attention to where the wheel connects to the suspension arm.
Check your wheel sensors next. Dirty sensors can cause the robot to move unevenly, which stresses the suspension and creates noise. Gently clean each sensor with a soft, dry cloth. Remove any dust buildup around the sensor lens.
Test the wheel rebound after cleaning. Press down on the wheel and release it. It should bounce back smoothly and quickly. If it moves slowly or feels sticky, the suspension may need lubrication or replacement. Some suspension components wear out completely and cannot be fixed by cleaning alone.
Listen for squeaking while your robot moves in a straight line. Uneven squeaking during movement suggests one wheel has more wear than the other. This causes imbalanced pressure on the suspension system.
If squeaking returns within a few days, the suspension component likely needs replacement. Worn springs or bushings cannot be restored through cleaning. Document when the noise returns to help determine if this is a recurring wear issue.
Final Thoughts
Squeaking drive wheels do not mean your robot vacuum is broken. In most cases, it just needs some simple cleaning and attention.
You now know the steps to fix this problem. Power off the robot first. Check the wheels for smooth rotation and rebound. Clean the axle, wheel, and sensors carefully.
Regular maintenance keeps your robot vacuum running quietly. A few minutes each week can prevent bigger problems later. This small habit saves you time and money.
Do not ignore the squeaking noise. It often signals dirt, debris, or wear in the wheel suspension. Left unchecked, it can affect navigation and docking performance.
If cleaning does not solve the issue, check the suspension components again. Sometimes a worn part needs replacement rather than cleaning. This is normal after months of regular use.
Testing your robot after each fix is important. Press down on the wheels and listen for noise. Smooth rotation without resistance means the fix worked.
Remember that squeaking can return if maintenance stops. Keep cleaning the wheels, axles, and sensors on a regular schedule. This keeps your vacuum working like new.
Most squeaking problems are fixable at home without needing a technician. With patience and the right steps, you can solve this issue yourself.
Your robot vacuum works hard to keep your floors clean. Giving it a little care in return keeps it running longer and quieter.
In the end, fixing a squeaking drive wheel is simple once you know what to check. Follow the steps, stay consistent, and your robot vacuum will thank you with smooth, silent performance.
Frequently Asked Questions
Why does my robot vacuum’s drive wheel squeak?
Squeaking happens when dirt builds up inside the wheel axle or suspension joint. Debris creates friction as the wheel rotates. Sometimes the suspension component itself wears out and needs replacement. Moisture and dust combine to make the noise worse over time.
How do I know if it’s the wheel or something else?
Press down on the drive wheel and slide it back and forth. It should move smoothly and bounce back into place. If it feels stiff or doesn’t rebound, that’s your problem. Remove the rolling brush and test the robot in single sweep mode. If the noise stops, the brush was causing the issue instead.
Can I fix squeaking without taking the vacuum apart?
Not really. You need to access the wheel axle and suspension components. Start by powering off your robot. Grip the drive wheel firmly and pull it straight out. Clean the wheel, axle, and the surrounding area with a dry cloth. Wipe away all visible dust and debris before reinstalling it.
What if cleaning doesn’t stop the squeaking?
Check your wheel sensors next. Dirty sensors can cause navigation problems and odd noises. Wipe them gently with a soft cloth. If squeaking returns within days after cleaning, your suspension component likely has internal wear. At that point, you may need to replace the suspension assembly rather than repair it.
How often should I clean my drive wheels?
Clean them every two to four weeks depending on floor type. Carpeted homes need more frequent cleaning than hard floors. Regular maintenance stops squeaking from returning and keeps your robot working smoothly.

Hi, I’m Lola Griffin 👩💻, the voice and creator behind ResizerBox. I’m a passionate tech enthusiast who loves exploring the latest gadgets, smart devices, and trending Amazon electronics. Through my reviews, I share honest insights, real-world testing experiences, and practical buying advice to help readers make confident tech choices.