How To Fix Over-Saturation On HDR10+ Content On Smart TVs?
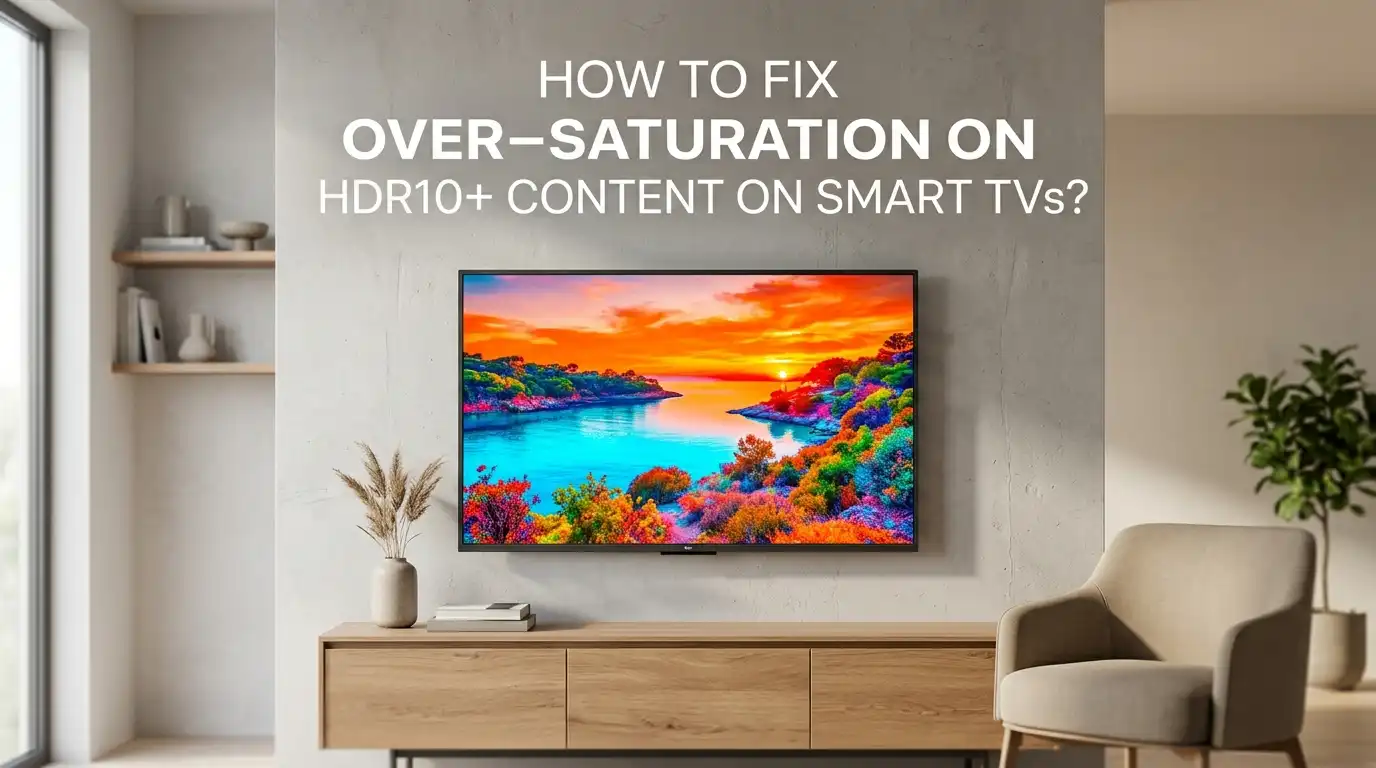
You sit down for movie night, hit play on a stunning HDR10+ title, and the screen explodes with neon reds, glowing skin tones, and grass that looks radioactive.
The colors feel wrong, almost cartoonish. This is the over-saturation problem, and it bothers thousands of smart TV owners every day.
This guide walks you through every cause and every solution, from picture mode tweaks to firmware updates. By the end, you will see HDR10+ content the way the creators intended.
Key Takeaways
- Wrong picture mode is the top cause. Vivid or Dynamic modes boost colors way past natural levels. Switching to Movie, Cinema, or Filmmaker Mode fixes most over-saturation issues instantly.
- Color space settings matter a lot. If your TV is set to Native or wide gamut while showing SDR-mapped HDR10+ content, colors look unnatural. Setting it to Auto helps the panel match the signal correctly.
- Dynamic tone mapping can over push colors. Turning it off or switching to HGIG often calms aggressive color expansion in HDR10+ scenes.
- HDMI input labels affect signal handling. Setting the HDMI port to Enhanced or UHD Color ensures full 10 bit signals pass through without forced color stretching.
- Firmware bugs are real. Many Samsung, LG, and Sony models have shipped with HDR10+ saturation bugs. Updating the TV firmware and streaming app fixes these.
- Calibration tools save you time. Free patterns from RTINGS or AVS Forum, or paid services, give you reference accurate colors quickly.
What Causes Over-Saturation On HDR10+ Content?
Over-saturation happens when colors look more intense than they should. Skin tones turn orange, reds glow, and greens look fake. With HDR10+, this often comes from three sources: incorrect picture mode, wrong color space mapping, and aggressive dynamic tone mapping by the TV.
HDR10+ uses dynamic metadata. Your TV reads that metadata frame by frame and adjusts brightness and color. If the TV misreads the metadata or applies extra processing, colors push past the BT.2020 limits. Some streaming apps also send the wrong color signal, which forces the TV to stretch hues.
Cheap HDMI cables and incorrect HDMI port settings add to the issue. Pros: knowing the cause helps target the fix fast. Cons: the same symptom can come from many sources, so you may need to test a few solutions.
Switch To The Right Picture Mode First
The fastest fix is changing your picture preset. Vivid, Dynamic, and Standard modes oversaturate HDR10+ content on purpose to grab attention in stores. They crank up color, contrast, and sharpness past natural levels.
Switch to Movie, Cinema, or Filmmaker Mode. These presets follow industry standards. They use a 6500K white point and a color gamut that matches what directors approved. On Samsung TVs, look for Movie mode. On LG, choose Cinema or Filmmaker. On Sony, pick Custom or Cinema.
Pros: this single change solves over-saturation for most viewers in seconds. It also reduces eye strain. Cons: the image may look slightly dimmer at first. Your eyes adjust within a few minutes, and you start seeing real detail instead of fake punch.
Adjust The Color Space Setting Correctly
Color space tells your TV how wide a range of colors to display. HDR10+ uses the BT.2020 container with most content mastered to DCI P3. If your TV maps these signals to a wider native gamut, reds and greens explode beyond reference.
On Samsung TVs, go to Settings, Picture, Expert Settings, and Color Space Settings. Set it to Auto. Avoid Native unless you know your content uses the full BT.2020 range. On LG, look under Picture, Advanced Settings, Color, and choose Auto Detect. On Sony Bravia, set Color Space to Auto.
Pros: Auto mode matches the source signal, giving you accurate colors. Cons: some Samsung models have a known auto color space bug. If Auto fails, try Custom and select BT.2020 for HDR10+ titles, then switch back to Auto. This workaround resets the buggy state on many QLED and OLED panels.
Turn Off Dynamic Tone Mapping When Needed
Dynamic tone mapping helps TVs show HDR content brighter than the panel can handle natively. But it sometimes pushes color saturation too far in HDR10+ scenes, especially bright outdoor or fire scenes.
On LG, go to Picture, Advanced Settings, Brightness, and find Dynamic Tone Mapping. Set it to Off or HGIG. On Samsung, this setting may appear as Contrast Enhancer or HDR+ Mode. Turn both off. Sony users can find it under Picture, Advanced Settings, Contrast Enhancer.
Pros: turning it off respects the original HDR10+ metadata more faithfully. Colors become more natural. Cons: very dark scenes may look slightly darker. HGIG mode offers a middle ground, keeping color accuracy while preserving shadow detail. Test each option with the same scene to find your preferred balance.
Check HDMI Input Settings And Cables
A weak HDMI signal can cause the TV to apply error correction that distorts color. Most smart TVs default HDMI ports to a basic 8 bit mode, which then forces the TV to upscale HDR10+ signals incorrectly.
On Samsung, go to Settings, Connection, External Device Manager, and turn on Input Signal Plus or HDMI UHD Color for the port you use. On LG, choose HDMI Deep Color and set it to 4K or On. On Sony, enable HDMI Enhanced Format.
Use a certified HDMI 2.0b or HDMI 2.1 cable. Cheap cables can drop bits and trigger color compression. Pros: enabling the right port mode unlocks full 10 bit and 12 bit HDR signals. Cons: older devices connected to that port may not work afterward, so test each device. Label your ports clearly to avoid mix ups.
Calibrate Color Temperature And White Balance
Color temperature shifts every color on your screen. A cool setting pushes blue and makes reds feel warmer and oversaturated. A warm setting pulls everything yellow. The reference standard is 6500K, often labeled Warm 2 or Warm 50.
Open your TV menu and go to Picture, Advanced Settings, White Balance, or Color Temperature. Select Warm 2, Warm 50, or Expert (Warm). This single change tones down the harsh blue tint many TVs ship with and balances out perceived color punch.
Use a free test pattern from RTINGS or AVS Forum on a USB drive or YouTube. Compare a known skin tone scene before and after the change. Pros: white balance correction is free and quick. Cons: the image looks yellowish at first. Your eyes adapt within ten to fifteen minutes, and HDR10+ skin tones look right again.
Update Your TV Firmware And Streaming Apps
Many over-saturation reports trace back to software bugs. Samsung pushed updates in 2023 and 2024 that fixed HDR10+ color glitches on multiple QLED models. LG and Sony released similar patches. If you skipped these updates, your TV may still suffer from old bugs.
Go to Settings, Support, Software Update, and choose Update Now. Turn on Auto Update so you never miss a fix. Also update your Netflix, Prime Video, Apple TV, and Disney Plus apps. Streaming apps handle HDR10+ decoding differently across versions.
Pros: a firmware update often solves saturation issues without any manual tweaking. Cons: rare updates introduce new bugs. Check community forums before installing if you depend on a specific feature. Restart the TV after each update by unplugging it for thirty seconds. This clears the picture engine cache.
Disable Extra Picture Enhancement Features
Smart TVs come loaded with picture enhancement features that often hurt HDR10+ accuracy. Examples include Dynamic Contrast, Color Enhancer, Vivid Color, Black Frame Insertion, and Auto Motion Plus. Each one adds processing that can pump up saturation.
On Samsung, switch off Contrast Enhancer, Color Tone effects, and Intelligent Mode. On LG, disable Dynamic Color, Color Gamut tricks, and TruMotion settings for color critical viewing. On Sony, turn off Reality Creation and Live Color when watching HDR10+ films.
Pros: removing these filters lets HDR10+ metadata drive the picture, which is the whole point of the format. Cons: sports and animation may look slightly less punchy. You can save two picture profiles, one for movies with everything off, and one for sports with light enhancements on. Switch between them as needed.
Use Filmmaker Mode For HDR10+ Movies
Filmmaker Mode is the gold standard preset for accurate HDR viewing. It disables motion smoothing, sets correct color temperature, and locks color space to the source. UHD Alliance designed it with directors like Christopher Nolan and Martin Scorsese.
Most 2020 and newer Samsung, LG, Vizio, Hisense, and Panasonic TVs support Filmmaker Mode. Press the settings button while HDR10+ content plays and select it. Some TVs auto switch to Filmmaker Mode when they detect a compatible signal. Enable Auto Filmmaker Mode in settings if available.
Pros: zero tweaking needed, and it works across all HDR formats including HDR10+. Cons: the image looks darker than Vivid mode. Watch in a dim room for the best result. If the room is too bright, increase OLED Pixel Brightness or Backlight slightly without changing other settings.
Try Manual Color And Tint Adjustments
When presets do not fully fix the problem, manual tweaks help. Lower the Color slider by three to five steps. This pulls all hues back toward natural. Keep Tint at zero unless you see a clear green or red push in faces.
Find these settings under Picture, Expert Settings, or Advanced Picture. Make small changes and test with a familiar scene like a face close up or a nature shot. Avoid touching Sharpness above ten, as it adds fake edge color that mimics over-saturation.
Pros: gives you full control to match your room and panel quirks. Cons: it takes patience and trial and error. Write down your before and after values in case you want to revert. Some TVs also let you save these tweaks as a Custom or User picture mode. Use that to lock in your perfect HDR10+ settings.
Check The Source Device Output Settings
Sometimes the TV is innocent, and the source device is the culprit. Apple TV 4K, Nvidia Shield, Xbox Series X, and PS5 each handle HDR10+ output differently. A wrong output setting forces the TV to over correct color.
On Apple TV, go to Settings, Video and Audio, and turn off Match Content if HDR10+ looks wrong, or turn it on if it is set to 4K SDR by default. On Xbox, run the HDR calibration tool. On Nvidia Shield, set the output to match the display capability, not force RGB.
Pros: fixing the source often solves saturation across all apps at once. Cons: each device has different menus. Use 4K Dolby Vision or 4K HDR output modes, not forced 4K SDR. Forcing SDR on an HDR signal causes the TV to expand colors badly when HDR kicks in later.
Reset Picture Settings If Nothing Else Works
If you have tried many tweaks and the picture still looks wrong, do a full reset. A reset clears any conflicting settings you may have changed by accident. It also fixes glitches caused by interrupted firmware updates.
Go to Settings, Picture, Expert Settings, and select Reset Picture on Samsung, or Picture Reset on LG and Sony. Confirm the action. Then redo only the essential steps: pick Filmmaker or Movie mode, set color temperature to Warm 2, and enable HDMI Enhanced on the right port.
Pros: a clean slate often solves problems faster than chasing each setting. Cons: you lose any custom tweaks you liked. Take a phone photo of your menu screens before resetting so you can rebuild your preferred look. A factory reset of the whole TV is a last resort if the picture reset alone fails.
When To Call A Professional Calibrator
Some saturation issues come from panel level variation or aging components. A trained ISF or THX calibrator uses a colorimeter and reference patterns to dial in your specific TV. They can also adjust the 20 point grayscale and color management system, which most users cannot reach through the standard menus.
Expect to pay between 250 and 500 dollars for a home visit. The calibrator measures your panel and creates two profiles, one for SDR and one for HDR10+. They save the values to your TV and give you a printout.
Pros: you get reference accurate colors that no menu tweak can match. Cons: the cost is real, and panel drift means you may need a follow up after a few years. Ask for calibrator credentials and sample reports before booking. If your TV is high end, this investment pays back in years of accurate viewing.
FAQs
Why does HDR10+ look more saturated than Dolby Vision on the same TV?
HDR10+ uses open dynamic metadata, while Dolby Vision uses a stricter Dolby controlled pipeline. Many TVs apply more aggressive color processing to HDR10+ signals, which leads to oversaturation. Switching to Filmmaker Mode and turning off extra enhancements usually narrows the gap between the two formats.
Does HDR10+ over-saturation damage my TV?
No, over-saturation is a software and settings issue, not a hardware problem. Your panel is not at risk. However, very high brightness combined with static images can cause burn in on OLED panels. Keep OLED Pixel Brightness moderate and use screensavers to stay safe.
Should I use HGIG or Dynamic Tone Mapping for HDR10+?
HGIG works best when the source sends accurate HDR metadata, like games and modern streaming apps. Dynamic Tone Mapping helps when content is mastered for brighter displays than yours. Test both with the same scene and pick the one that gives natural skin tones without crushed shadows.
Will a soundbar or AV receiver cause HDR10+ color issues?
Yes, if the receiver does not pass HDR10+ metadata correctly. Check that your receiver supports HDR10+ passthrough. Update its firmware and use the eARC port on your TV. If problems continue, connect the source device directly to the TV and route audio separately.
How often should I recalibrate my smart TV?
Most panels stay accurate for two to three years before drifting. OLED panels drift faster than LED in the first year, then stabilize. Recalibrate after major firmware updates or when you notice colors looking off. A quick eyeball check with a familiar movie scene every six months is a good habit.

Hi, I’m Lola Griffin 👩💻, the voice and creator behind ResizerBox. I’m a passionate tech enthusiast who loves exploring the latest gadgets, smart devices, and trending Amazon electronics. Through my reviews, I share honest insights, real-world testing experiences, and practical buying advice to help readers make confident tech choices.