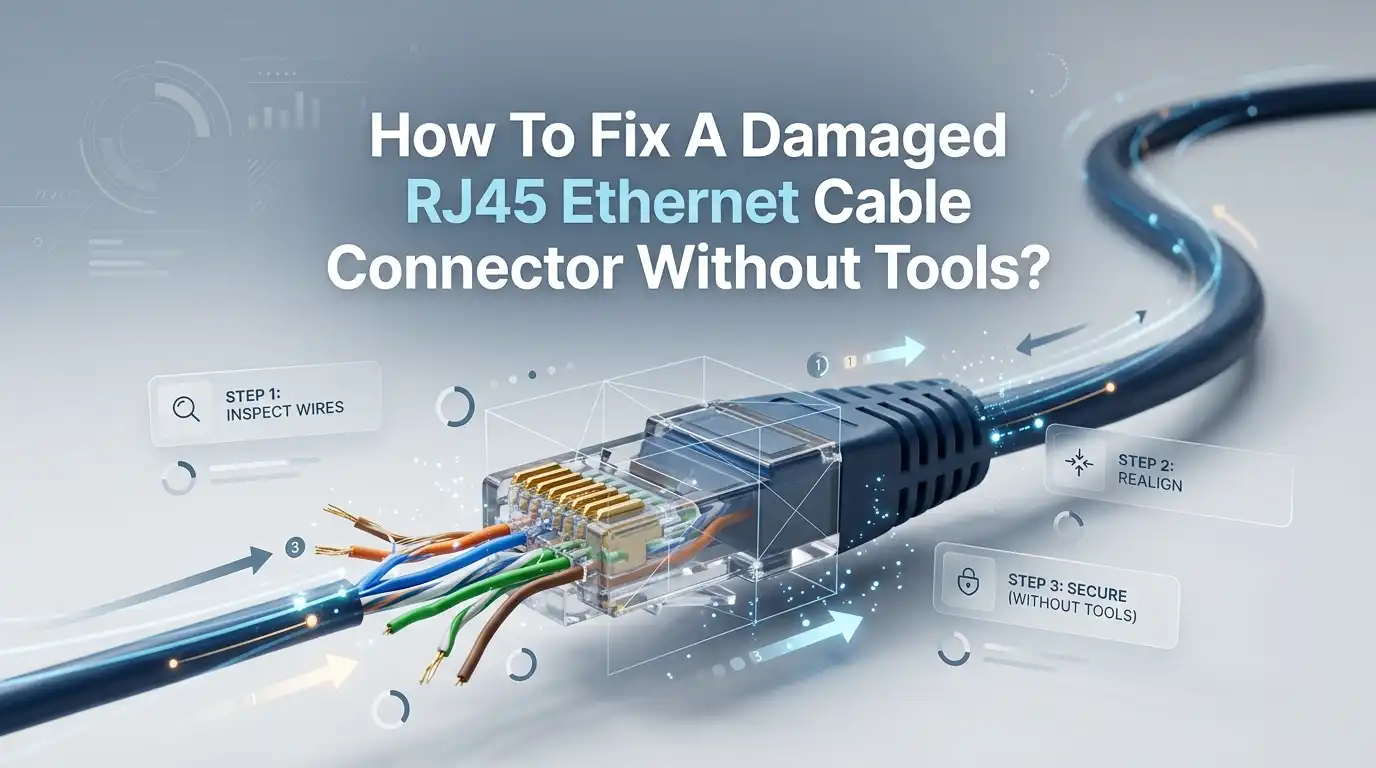
How To Fix A Damaged RJ45 Ethernet Cable Connector Without Tools?
A broken Ethernet connector always shows up at the worst moment. You sit down to game, join a video call, or upload a big file, and suddenly your cable will not lock into the port.
Most of the time, the little plastic clip on the RJ45 plug has snapped off. That tiny tab does a big job, and once it breaks, the cable slips out or loses connection.
This guide walks you through every method step by step. You will learn what works, what lasts, and what to avoid. By the end, you will know exactly how to bring a dead cable back to life without spending a cent on tools.
Key Takeaways
- The broken clip is usually the only problem. The internal wires often stay fine, so the cable still carries data. You mainly need to hold the plug firmly inside the port.
- Rubber bands and zip ties are the fastest no tool fixes. They press the plug upward against the port and recreate the grip the broken tab used to give.
- Tape works as an emergency patch when you have nothing else. Masking tape or electrical tape can hold a plug in place for short use.
- Clean the port and plug first. Dust and bent pins sometimes cause loose connections that look like clip damage but are not.
- No tool fixes are temporary, not permanent. They keep you online today, but a fresh connector or new cable gives you a lasting result.
- Test your connection after every fix. A working link light tells you the repair holds before you go back to work or play.
Why The RJ45 Clip Breaks So Easily
The plastic tab on an RJ45 plug is thin by design. It needs to flex every time you plug in or pull out the cable. That flexing wears the plastic down over years of use. A single hard tug at the wrong angle can snap it clean off.
Pets, vacuum cleaners, and rolling chair wheels also catch cables and stress the clip. Cheap connectors break faster because the plastic is softer and thinner. Heat near radiators or sunny windows makes plastic brittle too.
The clip is the weakest part of the whole cable. The copper wires inside are usually still perfect. That is why a no tool fix makes sense. You are not repairing data wires. You are just replacing the grip that the broken tab used to provide. Understanding this saves you stress and money.
Check The Cable Before You Try Any Fix
Do not assume the clip is the only issue. Take thirty seconds to inspect the whole connector first. Look closely at the clear plastic plug under good light. You want to spot the real problem before you waste effort.
Check if the little gold pins inside the plug look flat and even. Bent or pushed in pins can stop the connection even when the clip is fine. Wiggle the cable near the plug and watch for any loose wires poking out.
Plug the cable into your router and look for a link light. If the light flickers on when you press the plug, the wires work and only the clip needs help. If you see no light at all, the damage may go deeper. This quick check tells you which fix to use next.
Clean The Connector And Port First
Sometimes a cable that will not click is not broken at all. Dust, lint, and tiny debris build up inside ports and on plugs. This buildup blocks the plug from seating fully and locking.
Turn off the device if you can. Then blow gently into the port to clear loose dust. A quick puff of air often clears the problem in seconds. You can also use a dry cotton swab to wipe the plug pins, but never use water or liquid.
Look at the plug face and brush away any fluff stuck around the pins. A clean plug slides in deeper and grips better. This step costs nothing and takes under a minute. Many people fix their loose connection here and never need a clip repair at all. Always clean before you reach for tape or rubber bands.
The Rubber Band Fix For A Cracked Clip
This trick works best when the clip is cracked but still attached. A rubber band lifts the broken tab and presses the plug against the port wall. That pressure recreates the locking grip you lost.
Take a thin rubber band and slide it under the cracked clip from behind. Stretch it along the cable so it pulls the clip upward. Wrap any extra length around the cable so it stays tight and tidy.
Now push the plug into the port. The rubber band should hold the plug snug inside. Give the cable a light tug to test the hold. If it stays put, you are back online.
Pros: it is free, fast, and uses no tools. Cons: rubber bands dry out and snap over weeks, so check it now and then.
The Zip Tie Method For A Missing Tab
When the clip has snapped off completely, zip ties are your best no tool answer. Two thin nylon zip ties can rebuild the locking action perfectly. This method is popular because it holds firm and lasts a long time.
Place one zip tie flat on top of the plug where the old clip used to sit. Point the locking head of the tie toward the front of the plug so it catches inside the port. Use a second zip tie around the cable to hold the first one in place.
Tighten both ties by hand and trim the loose ends with scissors. The raised head of the front zip tie acts like a new clip. Push the plug into the port and feel for the grip.
Pros: strong, cheap, and long lasting. Cons: it takes a few tries to get the tie head positioned just right.
The Tape Wrap Emergency Fix
Tape is the fix you reach for when you have nothing else. Masking tape, electrical tape, or even strong sticky tape can hold a plug in place. It is not pretty, but it gets you online fast in a pinch.
Push the plug fully into the port first. Then wrap tape around the plug and the device port together to lock them as one unit. Press the tape down firmly so it sticks well.
You can also fold a small wedge of tape and stick it on top of the plug to mimic the missing clip. This adds height so the plug presses against the port and stays snug.
Pros: anyone has tape, and it works instantly. Cons: tape leaves sticky residue, loosens with heat, and looks messy. Use it only as a short term patch until you find a better fix.
The Twist Tie Or Bread Tie Trick
Twist ties from bread bags or garbage bags make a surprisingly good clip replacement. The bendable wire inside lets you shape a custom hook for the plug. This fix is handy because almost every kitchen has these ties.
Take one twist tie and lay it over the top of the plug. Bend the front end upward into a small bump so it catches inside the port like a real clip. Twist the back end around the cable to anchor it tightly.
Test the shape by sliding the plug into the port. Adjust the bend until the plug locks and stays put. A little fine tuning makes a big difference here.
Pros: free, reusable, and easy to reshape. Cons: the paper coating can tear, and the thin wire may bend out of shape over time. Replace it if it loosens.
How To Reseat And Hold The Plug Manually
Sometimes the simplest action is the smartest one. If you only need the connection for a short call or task, you can hold the plug yourself. This sounds basic, but it confirms whether the wires still carry data.
Push the plug in and press it down gently toward the clip side. Watch the link light come on while you hold it. If the connection works, you know a band or tie fix will solve the problem long term.
You can prop the cable up with a small object like a folded card or a book. Anything that keeps upward pressure on the plug will keep the link alive.
Pros: instant, no materials needed, and a great test. Cons: you cannot hold it forever, and any movement breaks the link. Treat this as a quick check, not a real repair.
Using A Keystone Jack Or Coupler As A Workaround
If you have a spare coupler or keystone jack at home, you have a clean no crimp option. A coupler joins two cables end to end, so a broken plug becomes less of a problem. You plug your damaged cable into the coupler and run a short good cable to your device.
This shifts the locking job to the second cable. The broken plug sits inside the coupler where the missing clip matters less. The good cable handles the grip on the device side.
Keystone jacks work the same way if you mount one in a wall plate or box. You snap the cable in and connect a healthy patch cable to it.
Pros: tidy, reliable, and no tools needed if you already own the parts. Cons: you must have a coupler or jack on hand, and it adds an extra link point.
Test Your Connection After The Repair
Never trust a fix until you test it. A quick test tells you if your no tool repair actually holds. Skipping this step leads to dropped calls and lost work later.
Plug the repaired cable into your router and your device. Look for the steady green or amber link light near the port. A solid light means the connection is live and stable.
Next, open a webpage or run a quick speed test. If pages load and speeds look normal, your fix works. Gently wiggle the cable to check that the grip stays firm during small movements.
If the connection drops when you move it, tighten your band or tie. A good repair should survive a light tug. Testing now saves you from frustration during an important task later. Always confirm before you walk away.
Habits That Stop The Clip From Breaking Again
A little care keeps your next cable safe for years. The clip breaks most when you pull cables the wrong way. Building a few simple habits protects every connector in your home.
Always press the clip down before you pull a plug out. Never yank a cable straight out while the tab is still locked. Hold the plug body, not the wire, when you connect or remove it.
Route cables away from chair wheels, doorways, and foot traffic. Use clips or hooks to guide cables along walls and desks. Keep cables out of direct sun and away from heat sources that make plastic brittle.
Add a rubber boot cover over the plug if you have one. These covers cushion the clip and stop it from snagging. Small habits like these mean you may never face a broken clip again.
When A No Tool Fix Is Not Enough
No tool fixes are great, but they have limits. If your cable drops connection often or shows no link light, the wires may be damaged. In that case, bands and ties will not help you.
A bent or broken internal wire needs the connector replaced properly. This usually means cutting off the old plug and attaching a new one with a crimping tool. No home hack fully replaces a clean crimp for damaged wiring.
For very long or expensive cables, a proper new connector is worth it. For cheap short cables, simply swapping in a new cable often makes more sense.
Pros of upgrading: a lasting, solid repair. Cons: you need a tool or a new cable, which costs money. Know when a quick fix has done its job and when it is time to step up.
Frequently Asked Questions
Can I fix an RJ45 connector without buying any tools?
Yes, you can. Rubber bands, zip ties, twist ties, and tape all work as no tool fixes. They hold the plug firmly inside the port and replace the grip of the broken clip. These methods keep you online without spending money, though they work best as temporary solutions.
Will my Ethernet cable still work if the clip is broken?
In most cases, yes. The clip only locks the plug in place. It does not carry any data. The copper wires inside the plug do the real work. If those wires are fine, your cable still transfers data. You just need a way to hold the loose plug in the port.
How long does a zip tie or rubber band fix last?
A zip tie fix can last many months if you position it well. Rubber bands dry out faster and may snap within a few weeks. Check your fix from time to time and replace the band or tie when it loosens. For a truly permanent result, a new connector is the better choice.
Why does my cable not click into the port even though the clip looks fine?
Dust and debris often block a clean lock. Clean the port and plug with a puff of air and a dry swab first. Bent pins inside the plug can also stop the click. If cleaning does not help, inspect the pins and the clip closely for hidden damage.
Is tape a safe way to hold an Ethernet plug?
Tape is safe for short term use. It holds the plug in place but leaves sticky residue and loosens in heat. Use masking or electrical tape as an emergency patch only. Once you have a rubber band or zip tie handy, switch to that method for a cleaner and longer lasting hold.
When should I replace the connector instead of fixing it?
Replace the connector when the internal wires are damaged or the link drops often. No tool fixes only solve clip problems, not wire problems. If you see no link light or constant disconnects, cutting off the old plug and crimping a new one gives you a reliable repair that lasts for years.

Hi, I’m Lola Griffin 👩💻, the voice and creator behind ResizerBox. I’m a passionate tech enthusiast who loves exploring the latest gadgets, smart devices, and trending Amazon electronics. Through my reviews, I share honest insights, real-world testing experiences, and practical buying advice to help readers make confident tech choices.