How To Fix Electric Wheelchair Joystick Gaiter Rubber Tearing?
Your electric wheelchair joystick keeps you moving. But that small rubber gaiter around the joystick handle takes a lot of daily wear.
Over time, it can crack, stretch, or tear. This exposes the sensitive parts underneath to dust, moisture, and dirt.
A torn gaiter is more than just an eyesore. It can lead to bigger problems like joystick malfunction or unresponsive controls.
In a Nutshell
- Clean before you bond. Wipe the rubber backing and PCB area with household alcohol. This removes dust and grease so the adhesive sticks well.
- Pick the right adhesive. Use electronic grade non-corrosive silicone or rubber cement. Avoid random glues, since corrosive types can damage the circuit board.
- Check for hidden lock modes. Many joysticks have a lock feature. If it won’t respond, this might be the real issue, not the gaiter itself.
- Look at cable connections. Swingaway mounts sometimes crimp cables by mistake. This can cause problems that look like gaiter damage.
- Maintain regularly. Clean connector plugs twice a year and keep your battery charge steady. This helps prevent future tearing.
- Reinforce if needed. A 3D printed cage can add extra protection around the gaiter and reduce wear over time.
Understanding the Joystick Gaiter and Why It Tears
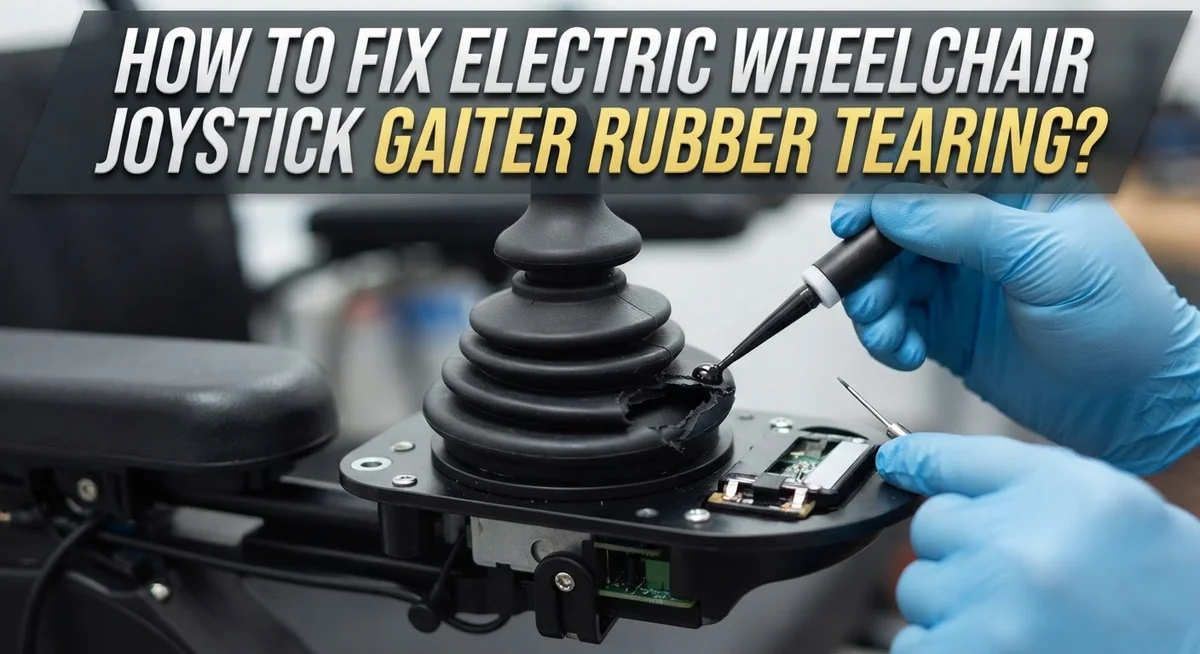
Your electric wheelchair joystick sits at the center of your mobility. The gaiter is the rubber covering that protects the joystick mechanism from dust, moisture, and debris. Think of it as a shield for sensitive electronics inside.
The gaiter rubber tears for several reasons. Constant use wears it down over time. Sweat and moisture from your hands speed up deterioration. Accidental drops or bumps can create cracks. Temperature changes make rubber brittle and less flexible.
Why this matters to you: A torn gaiter exposes internal parts to dirt and water. This leads to joystick malfunction or complete failure. Your wheelchair becomes harder to control or stops responding altogether. Fixing it early prevents expensive repairs later.
The gaiter sits between your hand and the joystick stem. It keeps moisture away from the printed circuit board (PCB) and contact points. When rubber tears, water seeps in and corrodes electronics. Dust particles get stuck in the mechanism and cause sticking or dead zones.
Common tear patterns: Most gaiters tear at the base where the rubber meets the joystick stem. This is the stress point where bending happens most. Side tears occur from squeezing too hard. Top cracks develop from sun exposure and age.
Understanding these patterns helps you spot problems early. Regular inspection catches small tears before they become big issues. You can prevent major damage by addressing tears quickly.
The good news? Many tears are fixable at home with basic materials. You don’t need professional help for small to moderate damage. With the right approach, you can restore your joystick’s protection and keep it working smoothly.
Signs Your Joystick Gaiter Needs Repair
Your joystick gaiter shows visible signs of wear before it completely fails. Catching these signs early helps you avoid bigger problems down the road.
Look for visible cracks and tears in the rubber. Small splits often start at the base where the rubber meets the joystick stem. These cracks grow larger over time if you ignore them. Run your finger along the gaiter surface to feel for rough spots or openings.
Watch for rubber that feels sticky or stiff. The gaiter should feel flexible when you move the joystick. If it feels hard or doesn’t bend smoothly, the rubber is breaking down internally. Stiff rubber tears more easily with normal use.
Check if dirt or moisture gets inside the joystick. A torn gaiter lets water and dust reach the internal circuits. You might notice sticky residue around the joystick base or see discoloration on the stem. This means moisture has already entered.
Notice if your joystick responds slowly or inconsistently. A torn gaiter allows debris to coat the contact points inside. Your joystick might feel jumpy, lag, or stop responding in certain directions.
Feel for loose or separated rubber edges. The gaiter should stay firmly attached to the joystick stem. If edges peel away or feel loose, the adhesive is failing. This happens before the rubber actually tears.
Listen for unusual sounds. A clicking or rattling noise when you move the joystick suggests loose internal parts. This often means the gaiter no longer protects the mechanisms inside.
Act quickly when you spot these signs. Early repairs prevent moisture damage and keep your joystick working smoothly for longer.
Tools and Materials You Will Need
Before you start fixing your joystick gaiter, gather the right tools and materials. Having everything ready makes the repair faster and more successful.
Cleaning supplies come first. You need household alcohol to remove dirt and old adhesive from the rubber and circuit board. A soft cloth or cotton swabs work well for detailed cleaning. Don’t skip this step because dirty surfaces prevent proper bonding.
Adhesive is your main material. Electronic grade non corrosive silicone works best for this job. Rubber cement is another solid option. Both materials bond rubber to plastic without damaging the internal electronics. Regular super glue or contact cement can corrode circuit boards, so avoid those completely.
Small tools make the work easier. A small brush helps apply adhesive evenly. Tweezers let you position rubber pieces precisely. A screwdriver removes the joystick from your wheelchair so you can work on it comfortably at a table or desk.
Optional reinforcement materials include a 3D printed cage that wraps around the gaiter. This cage reduces future wear and tear by protecting the rubber from constant bending.
Safety items matter too. Wear nitrile gloves to keep adhesive off your skin. Work in a well ventilated space because adhesive fumes can be strong. Have paper towels nearby for quick cleanups.
Storage and timing require planning. Most adhesives work best at room temperature. Don’t start repairs in cold conditions because adhesive bonds poorly in low temperatures.
Gathering these materials takes just minutes. Organizing them on a flat surface prevents mistakes during repair. You’re now ready to move forward with confidence.
Step-by-Step Guide to Repairing a Torn Gaiter
Start by powering off your wheelchair completely. This keeps you safe while working with the joystick and prevents accidental movements.
Remove the joystick from your wheelchair if possible. Most joysticks pull straight up or unscrew from the mounting base. Check your user manual for your specific model’s removal method.
Clean the torn rubber gaiter thoroughly with household alcohol and a soft cloth. Wipe away all dirt, dust, and old adhesive residue. Pay special attention to the base where the rubber meets the joystick stem. Let the rubber dry completely for at least 10 minutes.
Next, clean the circuit board area around the joystick connection point. Use a fresh cloth with alcohol to remove any debris. Ensure the PCB contact areas are completely dry before proceeding.
Apply electronic grade adhesive to the torn area. Use a small brush to spread the adhesive evenly along the tear. Don’t use too much adhesive, as excess can drip onto the circuit board and cause damage.
Press the torn rubber edges together firmly. Hold them in place for the time recommended by your adhesive product, usually 5 to 10 minutes. Wipe away any excess adhesive with a clean cloth immediately.
Allow the repair to cure fully before reattaching the joystick. Most electronic adhesives need 24 hours to set completely. Check your specific adhesive instructions for exact curing times.
Reattach the joystick to your wheelchair once the adhesive is fully cured. Test the joystick movement in all directions to ensure it works smoothly. Your repair should restore normal operation and protect internal components from moisture and debris.
Choosing the Right Adhesive for a Durable Bond
Choosing the right adhesive makes the difference between a repair that lasts and one that fails quickly. Electronic grade non corrosive silicone is your best choice for this job. This adhesive works well on rubber and won’t damage the circuit board underneath.
Rubber cement is another solid option. It bonds rubber surfaces effectively and dries clear. Both options resist moisture, which is critical since your joystick sits in an area exposed to hand sweat and environmental humidity.
Avoid using regular super glue or general purpose adhesives. These products contain corrosive chemicals that eat through circuit board components. They also become brittle over time and crack under the constant movement your joystick experiences.
Check that your adhesive is specifically labeled for electronics use. This label tells you the product won’t harm sensitive components. The adhesive should also be flexible after it dries. Rigid adhesives crack when the joystick moves, and your repair fails again.
Before applying any adhesive, make sure both surfaces are completely clean and dry. Dirt and moisture prevent proper bonding. Wipe the torn rubber edges with household alcohol on a soft cloth. Clean the circuit board area thoroughly as well.
Apply adhesive thinly and evenly. Too much adhesive creates a messy repair and takes longer to cure. Use a small brush or applicator stick for precision. Press the torn edges together firmly and hold them for the time your adhesive requires.
Let the adhesive cure completely before using your joystick again. Most electronic grade products need 24 hours for full strength. Rushing this step undermines your entire repair. A properly bonded gaiter with the right adhesive will serve you reliably for months to come.
Reinforcing the Repair with a 3D Printed Cage
A 3D printed cage provides extra support for your gaiter rubber repair. This reinforcement wraps around the joystick stem and holds the torn rubber in place while adhesive cures. The cage prevents the gaiter from shifting or tearing again at the same weak point.
Designing your cage requires basic measurements. You need the diameter of your joystick stem and the height of your gaiter. Most wheelchair joysticks have stems between 8mm and 12mm wide. Measure from the base of the gaiter to its top edge to get the correct cage height.
The cage design should feature vertical slots or ribs. These slots allow your adhesive to flow through and bond the gaiter to the stem underneath. Slots also reduce the overall weight of the cage, which matters for smooth joystick movement.
Material choice affects performance. Standard plastic filament works well for this application. The cage does not need to be rigid or heavy. A flexible plastic material actually performs better because it allows slight movement without cracking.
Installation happens after your adhesive sets completely. Slide the printed cage over your joystick stem and position it so the torn area sits inside. The cage should fit snugly but not so tight that it restricts joystick motion.
Test your joystick movement carefully. Move it in all directions to confirm the cage does not interfere with controls. Your wheelchair should respond normally to all joystick inputs.
The cage typically lasts two to three years before wearing out. When it shows signs of cracking or splitting, you can print a replacement. This approach extends your gaiter life significantly compared to adhesive repair alone.
Common Mistakes to Avoid During Repair
When repairing your wheelchair joystick gaiter, several common mistakes can ruin your repair or damage your wheelchair’s electronics. Understanding what to avoid saves you time and money.
Using the wrong adhesive is the biggest mistake. Many people grab regular super glue or general purpose adhesives from their home. These products contain corrosive chemicals that eat through circuit boards and destroy the electronics inside your joystick. Always choose electronic grade adhesive specifically labeled safe for electronics use.
Skipping the cleaning step causes repairs to fail. Some people apply adhesive directly to dirty rubber without preparing the surface first. Dust, dirt, and old adhesive residue prevent new adhesive from bonding properly. Your repair will peel apart within days. Clean both the rubber backing and the circuit board area thoroughly with household alcohol and a soft cloth before bonding anything.
Ignoring the joystick lock feature leads to confusion. Many wheelchair models have a hidden lock mechanism. If this lock is accidentally engaged, your joystick won’t respond to your commands. You might think your repair failed when actually the lock is activated. Check your wheelchair manual for your specific lock and unlock procedure.
Rushing the curing time weakens the bond. Applying adhesive and immediately reattaching your joystick prevents proper bonding. Electronic grade adhesives need full curing time, usually several hours. Using your wheelchair too soon causes the repair to fail.
Neglecting connector maintenance creates additional problems. Dirty connectors between your joystick and wheelchair can cause poor electrical contact. Clean these plugs twice yearly to prevent connection issues that complicate troubleshooting.
Troubleshooting Joystick Issues After Repair
After you repair your joystick gaiter rubber, testing is essential. Your wheelchair needs to work correctly before you rely on it for daily use.
Start by checking joystick movement in all four directions. Push the stick forward, backward, left, and right. The movement should feel smooth and responsive. Listen for any unusual sounds or grinding noises that might indicate adhesive interference.
Test the pressure sensitivity if your wheelchair has it. Press the joystick at different angles and speeds. Your wheelchair should respond proportionally to how hard you push. Slow movements should produce slow speeds, and quick movements should produce faster speeds.
Check for any sticking or resistance. The joystick should return to center position automatically when you release it. If it feels sluggish or catches, your repair may need adjustment.
Inspect the gaiter rubber carefully during testing. Look for any new tears or separation points. If you see adhesive oozing out or the rubber lifting again, stop using the joystick immediately and let it cure longer.
Test your wheelchair in a safe, open space away from obstacles. Drive forward, backward, and make turns. Pay attention to how the joystick responds to your commands.
Watch for unexpected stops or jerky movements. These problems suggest your repair needs more time to set properly. Some adhesives require 24 hours of full curing before handling stress.
If everything works smoothly after 24 hours, your repair is successful. Continue monitoring your joystick for the next week. Some repairs settle and strengthen over time. If problems develop later, you may need to apply additional adhesive or reinforce the repair with extra support.
Final Thoughts
Fixing a torn joystick gaiter rubber does not need to be hard. With the right adhesive and clean surfaces, you can restore your wheelchair’s control system quickly.
Patience matters most during this repair. Rushing the cleaning step or skipping cure time causes most failures. Take your time with each stage.
Remember to use only electronic grade silicone or rubber cement. Regular super glue or general adhesives can damage your PCB and other electronic parts. This mistake costs more than the repair itself.
Always clean the rubber backing and PCB area with alcohol before bonding anything. Dirt and grease stop adhesive from sticking properly. This simple step makes a big difference.
If your joystick feels unresponsive after repair, check the lock feature first. Many wheelchairs have a hidden lock mode that confuses users into thinking their repair failed.
A 3D printed cage adds extra protection to your repair. It is optional, but it helps the gaiter rubber last longer against daily wear and tear.
Testing your wheelchair after repair is not optional. Move the joystick in all directions. Watch for jerky movements or sticking before you trust it fully.
Small maintenance habits prevent future tearing. Clean your connector plugs twice a year. Keep your battery charge steady. These habits protect your joystick long term.
Most importantly, do not panic if your first repair attempt does not work perfectly. You can redo the adhesive bonding if needed. Learning this skill saves you money and time.
With proper cleaning, the right adhesive, and careful testing, your joystick gaiter repair can last for years. Trust the process and take it step by step.
Frequently Asked Questions
What causes joystick gaiter rubber to tear in the first place?
Gaiter rubber tears from regular wear and tear. Your joystick moves constantly, which flexes the rubber covering. Heat and moisture speed up the deterioration. Battery issues and electrical stress can also weaken the rubber over time. Environmental factors like dust and humidity play a role too.
Can I use regular super glue to fix the torn gaiter?
No, do not use regular super glue. Standard adhesives contain corrosive materials that damage the electronics inside your joystick. You need electronic grade adhesive instead. Electronic grade silicone or rubber cement work best. These products protect your circuit board while bonding the rubber securely.
Why does my joystick still not respond after I fixed the gaiter?
The gaiter tear may not be your actual problem. Many wheelchair models have a hidden lock mechanism that users accidentally activate. Check if your joystick has a lock feature and try unlocking it first. If that does not work, your issue might be a loose cable or connector problem rather than the rubber tear itself.
How long should I wait before using my wheelchair after the repair?
Wait at least 24 hours for the adhesive to cure completely. Rushing this step weakens the bond and causes the repair to fail quickly. Different adhesives have different curing times, so check your product instructions. Full strength takes longer than initial tackiness, so patience pays off here.
What maintenance prevents future gaiter tears?
Keep your battery consistently charged. Maintain your connector plugs by cleaning them twice yearly. Avoid crimping cables on swingaway mounts. Wipe down your joystick regularly to remove dust and moisture buildup.

Hi, I’m Lola Griffin 👩💻, the voice and creator behind ResizerBox. I’m a passionate tech enthusiast who loves exploring the latest gadgets, smart devices, and trending Amazon electronics. Through my reviews, I share honest insights, real-world testing experiences, and practical buying advice to help readers make confident tech choices.