How To Fix Motorized Cooler Lid Latch Snapping?
Your motorized cooler keeps your food cold and your drinks fresh. But a snapping lid latch can ruin that experience fast.
This problem happens to many cooler brands. Yeti, Magellan, and Lifetime coolers all report the same issue.
The latch might crack, bend, or simply stop holding the lid shut. Sometimes it snaps off completely. Other times it just won’t engage no matter how hard you try.
In a Nutshell
- Snapping latches happen often. Brands like Yeti, Magellan, and Lifetime all deal with this issue. Wear, damage, and misalignment are the top causes.
- Replacement kits fix the problem fast. Most manufacturers sell these kits in 2-packs. Swapping the broken latch is usually your best solution.
- Check your hinge pins first. Bent or loose pins can cause latches to fail again. Always inspect them before you replace anything.
- Lid warping stops latches from closing. If your lid looks bent, gently warm it to help it return to shape. Never force a warped lid shut.
- Don’t skip the gasket check. A damaged gasket can still cause closure issues even after you fix the latch. Look it over during every repair.
- Cooler extensions may add stress. Some users report more latch problems after adding extensions. Keep this in mind if your cooler has one.
Why Cooler Lid Latches Snap or Fail
Cooler lid latches snap or fail for several straightforward reasons. Understanding these causes helps you prevent future damage and fix the problem correctly.
Wear and tear is the most common culprit. Every time you open and close your cooler, the latch experiences stress. Over months or years of regular use, plastic or metal components weaken and eventually break.
Impact damage happens quickly. Dropping your cooler, slamming the lid too hard, or bumping it against objects can crack the latch instantly. Even minor collisions add up if they happen repeatedly.
Misalignment creates serious problems. When your lid sits crooked or doesn’t close evenly, the latch bears uneven pressure. This forces one side to work harder than the other, leading to premature failure.
Bent hinge pins often go unnoticed but cause major issues. If pins bend even slightly, your lid won’t close properly. The latch then strains to compensate, which speeds up breakage.
Lid warping prevents proper closure. Heat, sun exposure, or pressure can warp the lid shape. When the lid no longer aligns correctly with the cooler body, the latch can’t engage fully and snaps under tension.
Gasket problems contribute too. A damaged or compressed gasket forces the lid to sit lower than intended. This misalignment puts extra stress on latches.
Cooler extensions add weight and stress. When you attach extensions to your cooler, they increase the load on latches. The extra strain makes snapping more likely over time.
Poor manufacturing occasionally happens. Defective latches fail sooner than expected, even with normal use. This is less common but still occurs across various brands.
Tools and Replacement Parts You’ll Need
You’ll need a few basic items to fix your motorized cooler lid latch. Gathering everything first makes the repair go smoothly.
Basic hand tools are essential. A screwdriver set with both Phillips and flathead options works best. You may need different sizes depending on your cooler model. A wrench or adjustable wrench helps loosen bolts around the latch assembly. Keep a small hammer nearby for gentle tapping if needed.
Replacement latch kits come from the cooler manufacturer. Most brands sell these in 2 packs, which gives you an extra in case you need it later. Check your cooler’s manual or the manufacturer’s website to find the exact part number. Order the kit before you start so you have it ready.
Inspection tools matter too. A flashlight helps you see inside the cooler frame and check hinge pins clearly. A measuring tape lets you verify that the lid sits evenly. This catches alignment problems before they cause more damage.
Additional supplies round out your toolkit. Keep a clean cloth nearby to wipe away dirt and debris. You may want some mild soap and water to clean the latch area. If your lid is warped, have warm water ready (not boiling). A towel works well for gently reshaping the lid.
Safety items shouldn’t be forgotten. Wear work gloves to protect your hands from sharp plastic edges or metal parts. Safety glasses keep debris out of your eyes during removal and installation.
Most repairs take under an hour once you have these items ready. Start by gathering everything in one place. This prevents frustration and keeps your repair moving forward efficiently.
Step-by-Step Guide to Replacing a Broken Latch
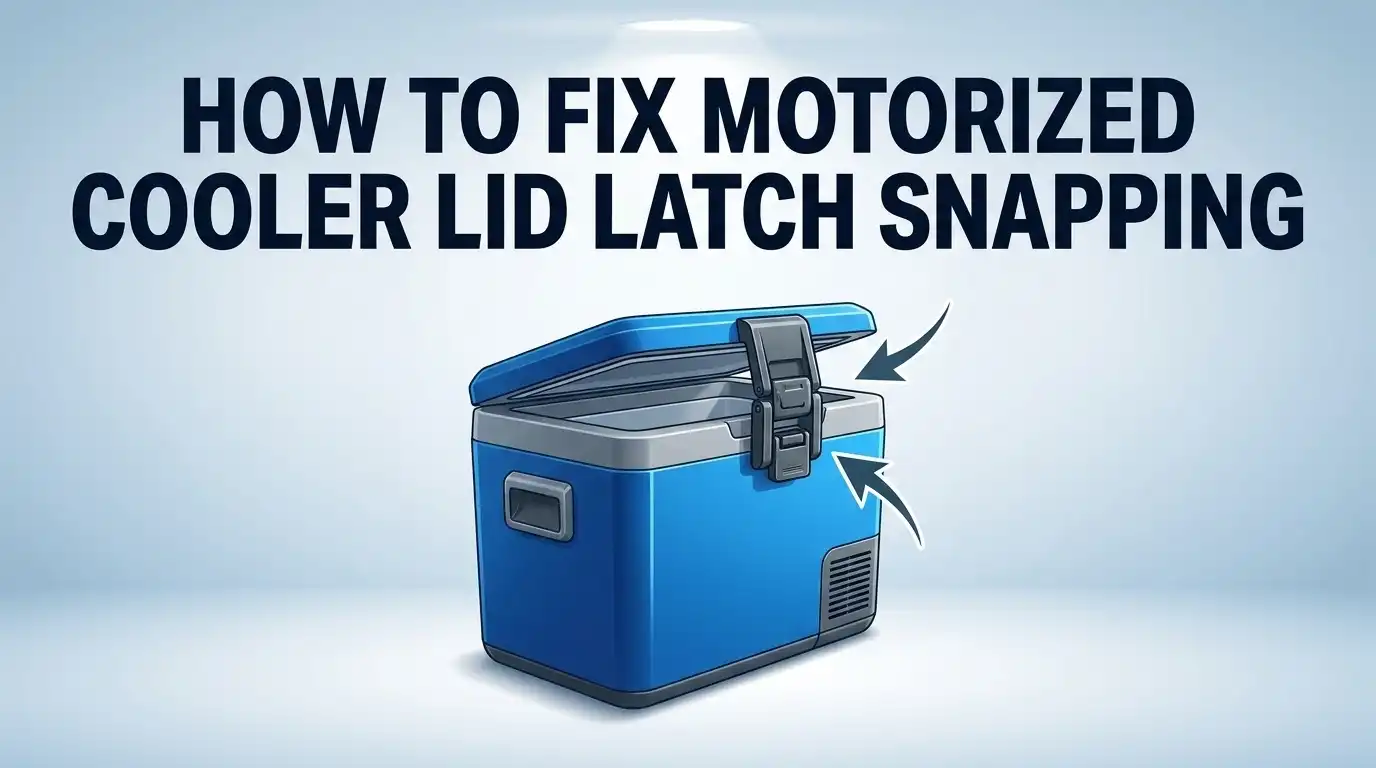
Start by unplugging your cooler if it has power features. Remove the broken latch by locating the fasteners that hold it to the lid. Most latches use screws or bolts that you can access from inside the cooler lid. Keep these fasteners in a safe place so you don’t lose them.
Before installing the new latch, inspect the mounting area carefully. Look for cracks, stripped threads, or damage to the plastic or metal surface. If you find damage, you may need to reinforce the area before proceeding.
Position your replacement latch exactly where the old one sat. Align it so the latch arm moves freely without hitting the cooler body. Insert the fasteners and tighten them firmly, but don’t over tighten as this can crack the lid material.
Test the latch by closing and opening the lid several times. The latch should engage smoothly and hold the lid shut without forcing. If it feels stiff or won’t catch, stop and check your alignment.
While you have the lid open, inspect the hinge pins on both sides. Look for bending, rust, or looseness. Bent pins will cause the lid to sit unevenly and make your new latch fail quickly.
Check the rubber gasket around the lid edge. Press on it with your finger to see if it springs back. A flattened or cracked gasket won’t seal properly even with a working latch.
If the lid looks warped or twisted, gently apply warmth using a hair dryer on low setting. This helps restore the original shape so your new latch works correctly.
How to Inspect and Fix Hinge Pin Damage
When you open your cooler lid and notice the latch won’t hold, the problem often traces back to the hinge pins. These small metal rods support your lid’s weight and movement. Bent or damaged hinge pins make it impossible for latches to work properly, even after replacement.
Start by examining both hinge pins closely. Look for visible bending, rust, or discoloration. A bent pin will appear crooked or twisted compared to its pair. Gently wiggle the lid side to side to feel if pins move loosely. Loose pins slip out of alignment and prevent latches from engaging correctly.
If a pin shows minor bending, you may straighten it carefully. Support the cooler firmly so it won’t tip. Use a small hammer and a block of wood to gently tap the pin back into position. Work slowly and check your progress frequently. Forcing the pin too hard risks breaking it completely.
Severely bent or broken pins require replacement. Most cooler manufacturers sell hinge pin kits that include everything you need. Remove the old pin by tapping it out from the side. Slide the new pin in carefully until it sits flush with the hinge bracket.
After replacing or straightening pins, test the lid movement several times. It should open and close smoothly without resistance. The latch should engage cleanly without forcing. If the lid still feels stiff or the latch won’t hold, the gasket or lid alignment may need attention.
Check hinge pins before assuming your latch is the only problem. Many people replace latches unnecessarily when bent pins were the real culprit. Taking time to inspect pins saves you money and frustration.
Realigning a Warped Lid for Proper Closure
A warped lid is one of the main reasons your latch won’t close properly. Heat, pressure, or age can bend the lid out of shape. When this happens, the latch may not align with its catch point.
Start by visually inspecting your lid from different angles. Place it on a flat surface and look for gaps or uneven edges. A warped lid will rock slightly instead of sitting flat.
Gently warming the lid helps restore its original shape. Use a hair dryer on low heat and move it slowly across the warped area. Keep the dryer about 6 inches away from the lid surface. This process softens the material without causing damage.
Apply heat for 2 to 3 minutes at a time. Let the lid cool naturally between applications. Repeat until the warping improves. This method works best on lids made from flexible plastic materials.
After warming, place the lid back on your cooler and test the closure. The latch should now engage smoothly without forcing. If the lid still won’t close, the warping may be too severe for heat alone.
Check the gasket seal around the lid edge while you have it open. A damaged or compressed gasket can also prevent proper closure. The gasket should feel firm and sit evenly all the way around.
If warming doesn’t fix the issue, your lid may need replacement. Some cooler manufacturers offer replacement lids as separate parts. Contact the manufacturer with your cooler model number to check availability.
Always avoid forcing a misaligned lid shut. This puts extra stress on the latch and hinge pins, creating additional damage.
Checking and Restoring Gasket Seal Integrity
A damaged gasket seal is often overlooked when fixing motorized cooler lids. This rubber strip runs around your lid’s edge and keeps cold air inside. When your latch snaps, the gasket condition becomes even more important to check.
Start by removing your lid completely. Look at the rubber gasket all the way around. Press your finger gently against it. The gasket should feel firm and springy, not hard or crumbly. If it feels mushy or shows cracks, it needs attention.
Check for gaps between the gasket and lid. A healthy gasket sits flush against the surface with no visible spaces. If you see separation, the gasket may have shrunk or pulled loose from its groove.
Clean the gasket thoroughly with mild soap and water. Dirt and debris can prevent a proper seal. Dry it completely before testing. Sometimes cleaning alone restores function.
Inspect the groove where the gasket sits. Look for cracks, splits, or warping in the plastic channel. If the groove is damaged, the gasket cannot seal properly no matter how new it is.
Test the seal by closing your lid firmly. Listen for air leaks or hissing sounds. Feel around the edges with your hand to detect escaping air.
If your gasket is permanently damaged, it requires replacement. Most manufacturers sell gasket kits separately. Installation usually involves removing the old gasket from its groove and pressing a new one in place.
A good gasket seal works together with a functioning latch. Even a perfect latch won’t keep your cooler cold if the gasket fails. Always inspect both components during your repair process.
Troubleshooting: When the Lid Still Won’t Latch
If your lid still won’t latch after inspecting hinge pins and gaskets, the latch itself may be broken. A snapped or cracked latch is the most common culprit when closure fails completely. The good news is that replacement kits are widely available from cooler manufacturers.
Start by examining the latch mechanism closely. Look for visible cracks, chips, or breaks in the plastic or metal components. A broken latch won’t engage properly no matter how hard you push the lid down. If you see damage, replacement is your best option. Trying to glue or tape a broken latch rarely works long term.
Order a replacement kit from your cooler’s manufacturer. Most kits include two latches since coolers typically have matching pairs on each side. Installation usually takes just a few minutes with basic tools. Follow the manufacturer’s instructions for your specific model, as attachment methods vary.
Before installing new latches, double check that your lid alignment is correct. A warped lid can put stress on brand new latches and cause them to fail again. Test the lid position without forcing it down.
If the latch still won’t hold after replacement, the problem may be deeper. Your lid could be severely warped, or the cooler body itself might be damaged. Check whether you’re using cooler extensions, as these sometimes cause latch failures by changing how the lid sits.
Contact your cooler’s customer service if replacement latches don’t solve the issue. They can advise whether your lid needs replacement or if other components are damaged. Some manufacturers offer warranty coverage for defective latches and hardware.
Mistakes to Avoid During Latch Repair
When repairing a motorized cooler lid latch, certain mistakes can make your problem worse. Understanding what NOT to do saves time and money.
Forcing a misaligned lid shut is the biggest error people make. Your lid may look closed, but pushing it down hard can bend the hinge pins further and damage the latch mechanism more. Stop immediately if you feel resistance. A lid that doesn’t close smoothly needs realignment first, not force.
Skipping the gasket inspection during latch replacement is another common mistake. Many people assume the latch is the only problem and swap it out without checking the rubber seal. If your gasket is cracked or compressed, a new latch won’t help. The lid still won’t seal properly. Always inspect your gasket before ordering replacement parts.
Ignoring bent hinge pins leads to repeated latch failures. People replace the latch, then the same problem happens weeks later. The real culprit was a bent pin all along. Check your hinge pins carefully before you buy anything. Bent pins must be straightened or replaced, or your new latch will fail too.
Don’t assume cooler extensions caused your latch to snap without investigating other causes first. While extensions do add stress, a broken latch usually means something else is wrong. Check your lid alignment and gasket condition before blaming the extension.
Finally, avoid ordering the wrong replacement kit. Latch kits vary by cooler brand and model. Installing an incompatible latch wastes money and creates frustration. Verify your exact cooler model before purchasing. Taking time to identify the real problem prevents costly mistakes and gets your cooler working again faster.
Final Thoughts
Fixing a snapped latch on your motorized cooler doesn’t have to feel overwhelming. Most problems come down to three things. These are worn latches, bent hinge pins, or a warped lid.
Once you identify the real cause, the fix becomes simple. Replacement kits solve most latch problems quickly. Just make sure you order the correct kit for your specific cooler model.
Take time to inspect your hinge pins before you blame the latch. A bent pin can throw off your entire lid alignment. This causes repeated snapping even with new latches installed.
Don’t forget about your gasket during this process. A damaged gasket often works alongside latch problems to prevent proper closure. Check both parts together for the best results.
Patience matters more than speed here. Warming a warped lid takes time to work correctly. Rushing this step can cause more damage to your cooler.
If your cooler has extensions attached, keep them in mind too. Some users report latch strain increases with added extensions. This doesn’t mean extensions always cause the problem though.
Always test your repairs before considering the job done. Close your lid firmly and check for gaps or air leaks. A proper seal means your repair worked well.
When diy fixes don’t solve your latch problem, reach out to customer service. Manufacturers understand these issues and can guide you further. They may offer solutions specific to your cooler brand.
Your motorized cooler can work like new again with the right approach. Careful inspection and proper parts make all the difference. Take your time, follow these steps, and your latch problems should become a thing of the past.
Frequently Asked Questions
Why does my motorized cooler latch keep snapping?
Latches snap for several reasons. Wear and tear is the most common cause. Your latch experiences stress every time you open and close your cooler. Metal fatigue builds up over time. Damage from impacts or drops also breaks latches. Sometimes the latch fails because your lid is misaligned, forcing it to work harder than it should.
Extensions attached to your cooler can increase stress on the latch mechanism too. This extra weight pushes the latch beyond its normal limits.
Can I repair a broken latch or do I need to replace it?
Replacement is your best option. Broken latches cannot be successfully repaired by gluing or welding them back together. The structural integrity is compromised. A replacement kit from your cooler’s manufacturer works much better than any repair attempt.
Most manufacturers sell replacement latches in 2 packs. This gives you spares for future use.
What should I check before ordering a replacement latch?
Inspect your hinge pins first. Bent or loose pins prevent your lid from closing properly, even with a new latch. Gently examine the gasket seal around your lid. A damaged gasket causes air leaks that make your latch work harder.
Check if your lid is warped. Gently warm a warped lid to restore its shape. Verify that your lid aligns correctly with your cooler body. Misalignment forces the latch to compensate, leading to failure.
Will a new latch fix my problem if my lid still won’t close?
Not always. After installing a replacement latch, test the closure carefully. If your lid still won’t latch, your gasket may need replacement. Your lid could be severely warped. Contact your cooler’s customer service for additional troubleshooting.

Hi, I’m Lola Griffin 👩💻, the voice and creator behind ResizerBox. I’m a passionate tech enthusiast who loves exploring the latest gadgets, smart devices, and trending Amazon electronics. Through my reviews, I share honest insights, real-world testing experiences, and practical buying advice to help readers make confident tech choices.