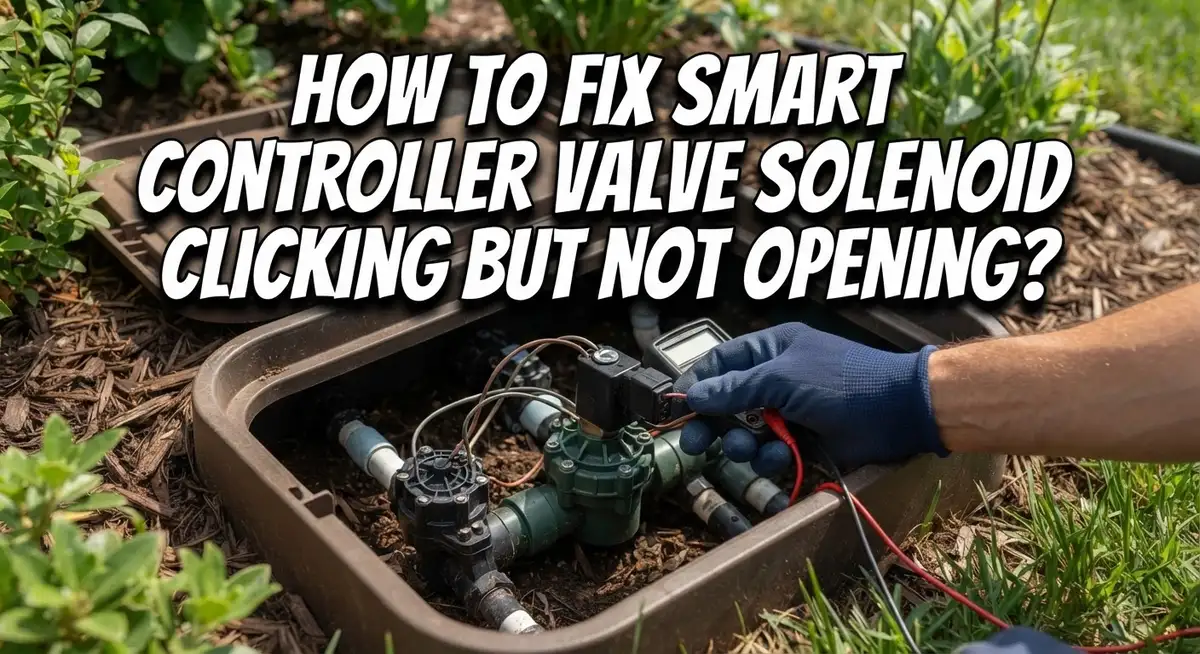
How To Fix Smart Sprinkler Controller Valve Solenoid Clicking But Not Opening?
Your smart sprinkler system clicks right on schedule. You hear the solenoid activate. But the valve stays shut and water never flows.
This problem frustrates many homeowners. The controller seems to work fine. The solenoid makes noise like it should. Yet your lawn stays dry.
The good news is this issue has clear causes. A clicking solenoid that won’t open usually points to a stuck plunger, debris blockage, or diaphragm failure. Sometimes the problem sits inside the valve, not the controller itself.
In a Nutshell
- Clicking without opening usually means a stuck plunger or a torn diaphragm inside the valve. The controller sends power fine, but the valve body can’t respond.
- Test manual override first. Turn the solenoid knob by hand. If water flows now, your controller and wiring work fine. The problem sits inside the valve itself.
- Check voltage with a multimeter at the wire connection. Low or no voltage means a controller or wiring issue, not a solenoid problem.
- Remove the solenoid and inspect the chamber. Debris, mineral buildup, or a jammed plunger often blocks smooth movement.
- Shut off your main water supply before you open anything. This step keeps you safe and prevents flooding while you work.
- Common fixes include cleaning the solenoid chamber, replacing a worn diaphragm, and clearing debris from the valve seat. Most homeowners fix this without calling a professional.
Understanding How a Sprinkler Valve Solenoid Works
A sprinkler valve solenoid is an electromagnetic device that opens and closes your water valve on command. Think of it as a remote control for water flow.
Here’s how it works in simple terms. The solenoid sits on top of the valve body. When your controller sends an electrical signal, the solenoid coil receives power. This power creates a magnetic field inside the solenoid.
The magnetic field pulls a metal plunger upward. This plunger movement lifts a rubber diaphragm inside the valve. When the diaphragm lifts, it opens a small opening called the pilot port. Water pressure then pushes the main valve open, and water flows through your sprinkler line.
When the controller stops sending power, the magnetic field disappears. A spring pushes the plunger back down. The diaphragm seals the pilot port again. Water pressure closes the main valve, and flow stops.
The clicking sound you hear is the solenoid coil energizing. This click happens every time power reaches the solenoid. If you hear a click but water doesn’t flow, something is blocking this process. The plunger might be stuck in place. The diaphragm could be torn or stuck. Debris might clog the pilot port or chamber.
Understanding this sequence helps you diagnose the problem. A working solenoid always clicks when powered. If it clicks but the valve stays closed, the issue is mechanical, not electrical. The plunger, diaphragm, or internal passages need attention.
This knowledge guides your troubleshooting. You’ll know where to look and what to inspect. You’ll also understand why certain fixes work and others don’t.
Why the Solenoid Clicks But the Valve Won’t Open
When your solenoid clicks but the valve stays closed, something is physically blocking the water flow. The clicking sound tells you the solenoid coil is working correctly. The real problem lies elsewhere in the valve assembly.
Debris and mineral buildup are common culprits. Hard water deposits accumulate inside the solenoid chamber over time. These particles prevent the plunger from moving freely. Sediment can also lodge in the valve seat, creating a seal that won’t break even when the solenoid pulls upward.
A stuck plunger is another frequent cause. The metal plunger should move smoothly up and down inside the solenoid chamber. When it gets stuck, the solenoid coil energizes and clicks, but the plunger cannot lift the diaphragm. Corrosion or dried mineral deposits freeze the plunger in place.
Diaphragm failure creates a different scenario. The rubber diaphragm inside your valve can tear or crack from age and constant pressure changes. Even if the solenoid pulls the plunger upward successfully, a damaged diaphragm cannot seal properly or allow water through.
Low water pressure sometimes causes this issue too. If pressure drops below the minimum threshold, the diaphragm cannot open fully. The solenoid works, but insufficient pressure prevents the valve from functioning.
Exhaust port blockage is less obvious but equally problematic. Your solenoid has a small exhaust opening that allows water to drain from the chamber. When this port clogs with debris, pressure builds incorrectly inside the solenoid. The valve cannot open despite the solenoid clicking.
The good news? Most of these problems are fixable. Understanding which issue you face guides your repair approach. Start by testing the controller voltage and manually checking the plunger movement.
Tools and Safety Prep Before You Start
Before you start troubleshooting your sprinkler valve solenoid, gather the right tools and take safety steps. This preparation prevents injuries and helps you work efficiently.
Essential Tools You’ll Need
A multimeter is your most important tool. You’ll use it to test voltage at the solenoid wire connection. This tells you if the controller is sending power correctly.
Get a flathead screwdriver for removing the solenoid bonnet and accessing the internal chamber. A small brush or pipe cleaner helps you clean debris from tight spaces. Keep a bucket or towel nearby because water will spill when you open the valve.
A wrench fits the solenoid nut if you need to remove it completely. Have a flashlight ready to inspect inside the valve chamber. You’ll see blockages and plunger movement more clearly with good lighting.
Safety Steps Before Starting
Turn off your main water supply valve first. This prevents water from spraying everywhere when you open components. Locate this valve and switch it to the off position.
Let the system depressurize by opening a nearby faucet. Wait a few seconds for water to stop flowing.
Wear work gloves to protect your hands from sharp edges and mineral deposits inside the valve. Safety glasses shield your eyes if water or debris splashes out.
Workspace Setup
Work in a dry area near your valve. Lay down towels to catch water drips. Keep your tools organized and within arm’s reach.
This preparation takes five minutes but saves you time and frustration during the actual repair.
Step-by-Step: Diagnosing Voltage and Controller Signal
A multimeter is your best friend when diagnosing solenoid problems. This simple tool measures electrical voltage and tells you whether power actually reaches your solenoid coil.
Start by turning off your controller at the main power switch. Locate the two wires connected to your solenoid. These wires carry the signal from your controller to the valve. Gently disconnect them from the solenoid terminals.
Set your multimeter to measure DC voltage. Most smart sprinkler controllers send between 12 and 24 volts to the solenoid. Check your controller manual to confirm the correct voltage for your system.
Turn the controller back on and activate the zone that controls this valve. Hold the multimeter probes against the two wire terminals. The meter should display voltage. If it shows zero volts, your controller is not sending power to this zone.
No voltage reading means the problem is in your controller or wiring, not the solenoid itself. Check for loose wire connections at the controller terminals. Inspect the wires for damage, cuts, or corrosion along their entire length.
If your multimeter shows proper voltage, reconnect the wires to the solenoid. The problem likely exists inside the solenoid or valve body. This points toward a stuck plunger, debris blockage, or diaphragm failure.
Test the solenoid manually by lifting the small red knob or plunger on top of the solenoid. If water flows when you lift it, your solenoid coil is bad. If no water flows even with manual lifting, debris or a damaged diaphragm is blocking the valve internally.
Document your findings. This information guides your next repair steps and prevents unnecessary part replacement.
Step-by-Step: Inspecting the Solenoid, Plunger, and Diaphragm
Start by turning off your main water supply completely. This prevents accidental water discharge when you open the valve chamber. Let the system sit for a few minutes to release all pressure.
Locate the solenoid bonnet, which is the cylindrical cap sitting on top of your valve body. Use a flathead screwdriver to carefully remove it. You’ll see the plunger inside, which looks like a small metal rod or pin. Check if it moves freely by gently pushing it up and down with your finger. A stuck plunger won’t rise to open the valve, even when the solenoid receives power.
Next, inspect the plunger for debris, mineral buildup, or corrosion. White crusty deposits indicate mineral accumulation. Gently clean the plunger with a soft cloth or soft brush. Avoid using harsh scrubbing tools that scratch the metal surface. A scratched plunger can cause future leaks or sticking.
Look inside the solenoid chamber for visible blockages. Sediment or debris often collects here and prevents the plunger from moving upward. Use a small flashlight to see inside clearly. If you spot debris, carefully remove it with tweezers or a small brush.
Check the diaphragm next. This rubber or silicone disc sits below the solenoid and controls water flow. If it appears cracked, torn, or permanently deformed, it needs replacement. A failed diaphragm prevents the valve from opening even when the plunger moves correctly.
Reassemble the solenoid bonnet carefully. Make sure it sits flush against the valve body. Reconnect your wires and test the system. Document what you found during inspection. This information helps you decide whether cleaning, replacement parts, or professional service is needed next.
Cleaning and Reassembling the Valve Correctly
Once you’ve identified the problem inside your valve, cleaning and reassembling it correctly makes the difference between a working system and a failed repair.
Start by removing any visible debris from the solenoid chamber. Use a small brush or compressed air to gently dislodge mineral deposits and dirt. Never use harsh chemicals that could damage internal seals. A soft cloth works well for wiping down the plunger and chamber walls.
The diaphragm sits inside the valve body and controls water flow. If it’s cracked, torn, or stiff, water won’t move through the valve even when the solenoid clicks. Inspect it closely under good lighting. A damaged diaphragm must be replaced. If it looks intact, clean around it gently without applying pressure.
The plunger should move freely up and down inside the solenoid. Push it manually several times to confirm smooth operation. If it sticks or feels gritty, continue cleaning until it moves easily.
When reassembling, pay close attention to the order of components. The bonnet screws down first over the diaphragm and plunger assembly. Tighten it firmly but don’t overtighten, which can crack the bonnet or damage internal seals. Hand tight plus a quarter turn usually works well.
Reconnect the solenoid wires to their terminals. Make sure they’re snug and won’t vibrate loose. Turn your water supply back on slowly and listen for clicking. Activate the zone through your controller. Water should now flow when the solenoid receives a signal.
If the valve still doesn’t open after cleaning and reassembly, the diaphragm likely needs replacement or the solenoid itself has failed internally.
Common Mistakes That Delay a Proper Fix
Many people rush to replace the solenoid without checking what’s actually wrong. This mistake costs time and money. The solenoid clicks because it receives power. The valve doesn’t open because something else blocks it.
The biggest error is skipping voltage testing. You must verify the controller sends the correct voltage to the solenoid wires. Use a multimeter set to DC voltage. Turn on the zone and check the wire terminals. No voltage means your controller or wiring failed, not the solenoid. If voltage is present, the problem sits inside the valve itself.
Another common mistake is assuming the plunger moves freely without checking. People skip the manual test where you lift the red knob on top of the solenoid. This test tells you if the plunger is stuck or if the diaphragm is broken. A stuck plunger means debris or mineral buildup blocks movement inside the chamber.
Don’t ignore the exhaust pathway. The solenoid needs a clear path to release water pressure from the diaphragm chamber. A clogged exhaust opening prevents the valve from opening even if the solenoid works perfectly.
People also fail to shut off the main water supply before opening the valve. This creates leaks and makes diagnosis harder. Always depressurize the system first by opening a nearby faucet.
Finally, many skip cleaning the valve chamber and plunger before replacing parts. Mineral deposits and sediment often cause the clicking without opening issue. A simple cleaning solves the problem in many cases. Take time to inspect what’s inside before buying replacement components.
Troubleshooting Persistent or Recurring Issues
When your smart sprinkler solenoid keeps clicking but the valve won’t open, persistent problems often point to specific issues that need systematic attention.
Recurring clicking without water flow usually means the solenoid plunger gets stuck repeatedly. This happens when mineral deposits or debris accumulate in the solenoid chamber over time. Each click represents the solenoid trying to lift the plunger, but something blocks its movement.
Start by checking your water pressure. Low pressure can prevent the valve from opening even when the solenoid works correctly. Test the manual override knob on your solenoid multiple times. If it opens manually but fails when triggered by your controller, the problem lies with voltage delivery or wiring, not the solenoid itself.
For recurring issues after cleaning, the diaphragm likely has internal damage. Diaphragms wear out gradually and may function intermittently before failing completely. Small tears or thin spots allow water pressure to escape, preventing proper valve operation.
Inspect your exhaust pathway next. The solenoid needs a clear vent line to release pressure from the diaphragm chamber. Clogged exhaust tubing forces the solenoid to work harder and can cause repeated clicking failures.
If problems return within weeks after cleaning, plan for diaphragm replacement rather than repeated cleaning attempts. This saves time and frustration. Keep your main water supply valve accessible so you can shut it off quickly if issues develop.
Document when clicking occurs most often. Does it happen during specific watering zones or times? This information helps identify whether the problem stems from controller programming, water pressure fluctuations, or actual valve deterioration.
Final Thoughts
A clicking solenoid that won’t open the valve almost always points to a mechanical issue, not a controller failure. Your controller sends the signal correctly. The problem lives inside the valve itself.
Debris, a stuck plunger, or a worn diaphragm cause most of these failures. Testing voltage first saves you time and guesswork. It tells you whether to look inside the valve or check your wiring instead.
Patience matters more than speed during this repair. Rushing to swap parts before diagnosing the real problem wastes money and effort. Take apart the valve carefully and inspect each piece.
Clean components thoroughly before you decide anything needs replacing. Many valves work fine again after a simple cleaning. Others need a new diaphragm to seal properly.
Always shut off your main water supply before opening any valve. This step protects you from unexpected water flow and keeps the repair area dry. Skipping it creates unnecessary mess and risk.
Reassemble parts in the correct order every time. A misplaced diaphragm or plunger causes the same clicking problem again. Double check your work before turning water back on.
If clicking returns within weeks, don’t repeat the same cleaning process. Recurring failures usually mean the diaphragm has internal damage that cleaning cannot fix. Replace it instead of troubleshooting the same issue repeatedly.
Smart sprinkler systems make lawn care easier, but they still rely on basic mechanical parts. Understanding how the solenoid and valve work together helps you fix problems faster.
With the right diagnostic steps, most clicking issues get resolved without calling a professional. Careful inspection and proper reassembly solve the majority of these valve problems on your own.
Frequently Asked Questions
Why does my solenoid click but the valve still won’t open?
A clicking sound means your solenoid plunger is moving, but the valve diaphragm isn’t responding. This happens when debris blocks the valve seat or the diaphragm has failed internally. The solenoid itself is usually working fine. The real problem sits inside the valve chamber, not in your controller or wiring.
Start by turning off your main water supply. Then manually open the valve using the solenoid knob on top. If water flows when you do this, your controller isn’t sending power correctly. If nothing happens, you have a mechanical blockage or damaged diaphragm.
How do I know if it’s a controller problem or a valve problem?
Use your multimeter to test voltage at the solenoid wire connection while the timer runs. You should see the correct voltage (usually 24 volts for smart systems). If voltage is present but the valve doesn’t open, the problem is mechanical.
If your multimeter shows zero voltage, check your wiring connections next. Loose wires or corroded terminals stop power from reaching the solenoid. Verify voltage delivery before you assume the valve is broken.
What should I check inside the solenoid chamber?
Remove the solenoid carefully after shutting off water. Look inside the chamber for dirt, sand, or mineral buildup. The plunger should move freely up and down without resistance. Push it gently with your finger to test movement.
Clean the chamber and plunger with clean water. Remove any visible debris. Check that the exhaust pathway (small hole) isn’t clogged. A blocked exhaust prevents water pressure from releasing, which keeps the diaphragm stuck.
When should I replace the diaphragm instead of cleaning?
If clicking continues after you’ve cleaned everything thoroughly, your diaphragm likely has internal damage. Diaphragms wear out over time and can’t seal properly anymore. Replace the diaphragm if clicking returns within weeks after cleaning.
Order a replacement diaphragm kit for your specific valve model. Installation takes just a few minutes and costs far less than professional service.

Hi, I’m Lola Griffin 👩💻, the voice and creator behind ResizerBox. I’m a passionate tech enthusiast who loves exploring the latest gadgets, smart devices, and trending Amazon electronics. Through my reviews, I share honest insights, real-world testing experiences, and practical buying advice to help readers make confident tech choices.