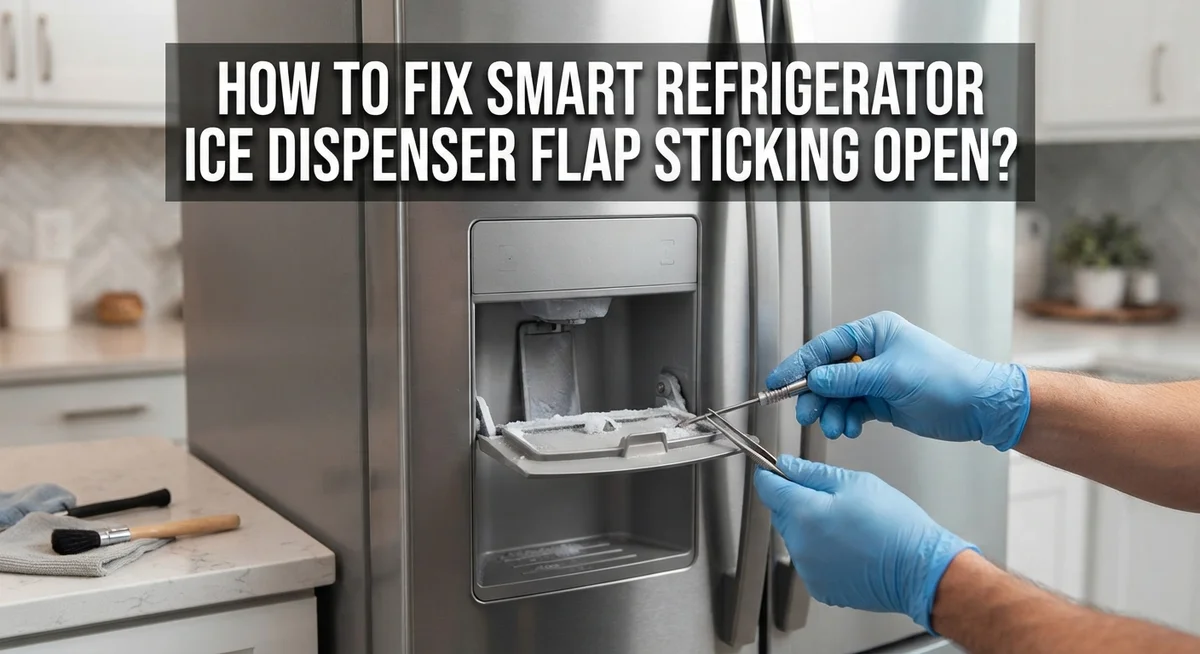
How To Fix Smart Refrigerator Ice Dispenser Flap Sticking Open?
Does your smart refrigerator ice dispenser flap stay stuck open? This small problem can cause big trouble. Cold air escapes, ice melts, and your energy bills climb higher.
You are not alone in this frustration. Many smart refrigerator owners face this exact issue. The good news? You can often fix it yourself.
This sticking flap usually points to a mechanical problem. Broken hinge pins, warped plastic, or frost buildup are common culprits. Sometimes a faulty control board causes the glitch too.
In a Nutshell
- Unplug the fridge first. Safety comes before any repair. This step protects you and the appliance.
- Check the flap assembly closely. Look for broken or loose hinge pins. These small parts often cause the flap to stay open.
- Look for warped plastic. Melted or bent plastic will not seal shut. This usually means you need a replacement part.
- Clear out frost and debris. Ice buildup in the chute can block the flap. A simple cleaning often solves this.
- Skip the hair dryer. Heat tools warp plastic components even more. This mistake makes the problem worse, not better.
- Consider the control board. On some Samsung models, a faulty control board causes flap issues. This fix needs professional help.
- Clean your water filter often. Regular maintenance prevents many dispenser problems. This simple habit saves you future headaches.
Why Ice Dispenser Flaps Stick Open: Common Causes
Ice dispenser flaps stick open for several clear reasons. Understanding these causes helps you fix the problem faster and avoid future issues.
Melted or warped plastic is the most common culprit. Your flap is made of plastic that softens when exposed to heat or warm air. If warm air circulates inside the dispenser area, the plastic bends out of shape. Once warped, the flap cannot close properly anymore.
Broken hinge pins cause flaps to hang loose or stay open. These small metal pins hold the flap in place and let it swing smoothly. Over time, pins crack, bend, or fall out completely. A loose flap has nothing to support it, so it stays stuck in the open position.
Frost and debris buildup blocks the flap from closing. Ice accumulates in the chute where the flap sits. This frozen buildup acts like a wedge, forcing the flap open. Debris like plastic bits or food particles can get stuck there too.
Faulty control boards affect some smart models. The board sends electrical signals to motors that operate the flap. When the board fails, it cannot trigger the flap to close. This happens more often in certain brands like Samsung refrigerators.
Worn or misaligned flap assembly also plays a role. The entire flap mechanism can shift out of alignment after years of use. Wear and tear loosen connections between parts.
Each cause requires a different fix. Some need simple cleaning, while others need replacement parts. The good news is that most causes are fixable with basic inspection and maintenance. Start by identifying which problem matches your situation.
Safety First: Preparing Your Refrigerator for Inspection
Before you touch anything inside your refrigerator, safety must come first. A smart refrigerator contains electrical components that can cause serious injury if you are not careful.
Start by unplugging your refrigerator from the wall outlet. This simple step removes all electrical power and protects you from potential shocks. Wait a few minutes after unplugging to let any residual power drain completely.
Next, gather the tools you will need. You should have a flashlight, a small bowl or container, and clean towels nearby. The flashlight helps you see inside the dispenser area clearly. The bowl catches any water or ice that may fall during inspection.
Clear the area around your refrigerator. Move items away so you have easy access to the dispenser. This gives you room to work safely without bumping into things.
Let the refrigerator sit for about 15 to 20 minutes after unplugging. This allows any ice buildup inside the dispenser to soften slightly. Softer ice is easier to remove without forcing the flap or causing damage.
Check your refrigerator manual before proceeding. Different smart models have slightly different layouts. Your manual shows you exactly where the flap assembly is located and how it operates.
Wear gloves when you inspect the dispenser area. Ice and metal edges can be sharp and cold. Gloves protect your hands from cuts and frostbite.
Make sure the kitchen is well lit. Good lighting helps you spot problems like broken pins or warped plastic. You need to see every detail clearly to diagnose the issue correctly.
Keep paper towels within reach. Any frost or water will drip as you work. Having towels ready prevents water from spreading across your kitchen floor.
Step-by-Step Diagnosis of the Flap Assembly
Start your diagnosis by examining the flap assembly from the outside. Open the ice dispenser door and look directly at the flap mechanism. Check if the flap moves freely or feels stuck in one position. Press gently on the flap with your finger to feel its resistance.
Next, inspect the hinge pins that hold the flap in place. These small metal pins can break, bend, or slip out of their slots. Look for any visible damage, gaps, or misalignment. If a pin appears loose or missing, this explains why your flap stays open.
Examine the flap itself for warping or melting. Run your hand along the edges to feel for bends or soft spots. Warped plastic will not seal properly against the dispenser opening. Compare both sides of the flap to see if one side sits higher than the other.
Check inside the dispenser chute for frost buildup and ice debris. Use a flashlight to see deep into the opening. Frost accumulation can prevent the flap from closing completely. Remove any visible ice chunks or frozen debris carefully.
Test the flap movement again after clearing the chute. Push it open and let it close naturally. Listen for any grinding sounds or feel for unusual resistance. Smooth, quiet operation means the mechanism works correctly.
Document what you find by taking photos or notes. This information helps you decide whether you need replacement parts or professional service. Record which hinge pins look damaged, where warping occurs, and how much frost you removed.
This systematic inspection reveals the root cause of your sticking flap and guides your next repair steps.
How To Fix a Warped or Melted Dispenser Flap
A warped or melted dispenser flap is one of the most common reasons your ice dispenser stays open. Plastic components inside your refrigerator can warp when exposed to heat sources or temperature fluctuations.
Identifying warping damage is straightforward. Look at the flap from multiple angles. If it no longer sits flat or has visible bends, warping has occurred. The plastic may also show discoloration or a slightly melted appearance around the edges.
Why plastic warps in the first place matters for prevention. Warm air leaking into the dispenser area causes gradual softening. Direct sunlight hitting the refrigerator exterior can transfer heat to internal components. Sometimes ice buildup creates pressure that deforms the flap shape over time.
Checking for melting requires careful inspection. Run your fingers gently along the flap edges. Melted plastic feels rough or bumpy instead of smooth. You may notice the flap no longer aligns properly with its frame.
What you can do about warping depends on severity. Minor warping sometimes allows the flap to close with gentle repositioning. However, significant warping usually means replacement is necessary. A warped flap cannot seal properly and will stick open repeatedly.
Preventing future warping involves simple steps. Keep your refrigerator away from direct heat sources and sunlight. Ensure proper ventilation around the unit. Avoid placing warm items near the dispenser area.
If your flap shows moderate to severe warping, replacement is the most reliable solution. A new flap assembly restores proper function and prevents recurring problems. This fix addresses the root cause rather than providing temporary relief.
Repairing or Replacing Broken Hinge Pins
Hinge pins are small metal fasteners that allow your ice dispenser flap to swing open and closed smoothly. When these pins break or loosen, the flap loses its proper alignment and may stick in the open position.
Identifying broken hinge pins requires a close look at the flap assembly. You’ll find the pins on both sides of where the flap connects to the refrigerator body. Look for visible cracks, bending, or complete separation. A broken pin often leaves a gap where the flap no longer sits flush against the dispenser opening.
Loose pins are equally problematic. Vibration from the refrigerator compressor can cause pins to gradually work their way out. If you notice the flap rattles or moves side to side, loose pins are likely the culprit. Gently try to wiggle the flap to test for excessive movement.
Removing the old pins is your first step toward repair. Most hinge pins simply slide out once you lift the flap to the right angle. Some models use a small clip or retaining ring that you’ll need to remove first. Take a photo before disassembly so you remember the exact configuration.
Installing new pins follows the reverse process. Slide the replacement pin through the hinge holes until it seats fully. The flap should move smoothly without wobbling or resistance. Test the movement several times to confirm proper installation.
When replacement isn’t enough, the hinge holes themselves may be stripped or enlarged. In this case, the entire flap assembly or dispenser door requires replacement. This is a more involved repair but ensures your ice dispenser functions correctly long term.
Clearing Frost and Debris From the Dispenser Chute
Frost and debris buildup inside your dispenser chute is a common culprit behind a sticking flap. When ice crystals and particles accumulate, they block the flap from closing properly.
Start by unplugging your refrigerator. This keeps you safe during inspection and cleaning. Wait 15 to 20 minutes for any remaining frost to soften slightly.
Open the freezer door and locate the dispenser chute opening. Use a flashlight to peer inside. Look for white frost coating the walls or chunks of ice blocking the passage. You may also see crumbled ice pieces or debris stuck in corners.
Grab a soft cloth or plastic scraper. Never use sharp metal tools that can damage the plastic chute walls. Gently wipe away frost buildup from the interior surfaces. Work slowly to avoid scratching the dispenser mechanism.
If ice chunks are lodged inside, apply warm (not hot) water to loosen them. Use a spray bottle or damp cloth. Let the water sit for a few minutes. Then carefully remove the softened ice with your cloth or plastic scraper.
Pay special attention to the bottom of the chute where debris collects. Wipe thoroughly to remove all frost residue and particles.
After cleaning, plug your refrigerator back in. Wait 30 minutes, then test the flap. Press it gently to see if it moves freely and closes completely.
Repeat this cleaning process monthly to prevent future frost and debris buildup. Regular maintenance keeps your dispenser chute clear and your flap operating smoothly. If the flap still sticks after thorough cleaning, the issue likely involves mechanical damage like warped plastic or broken pins.
When To Suspect a Faulty Control Board
A faulty control board becomes a suspect when your ice dispenser flap sticks open and mechanical fixes don’t work. The control board is the brain that sends electrical signals to open and close your flap. If it malfunctions, those signals get scrambled or stop entirely.
Start by ruling out simpler causes first. Check if the flap moves freely by hand when unplugged. If it does, the problem is likely mechanical, not electrical. A stuck flap from warping or debris usually responds to physical inspection and cleaning.
The control board becomes suspect when:
Your flap stays open even after you clear debris and inspect for damage. The flap moves smoothly but won’t close on its own. Your refrigerator displays error codes on the display panel. Other ice dispenser functions fail alongside the sticking flap.
Smart refrigerators rely heavily on circuit boards to coordinate multiple functions. Samsung models especially use main control boards that manage ice dispensing sequences. When these boards fail, they can’t trigger the solenoid that operates your flap mechanism.
Before assuming board failure, check your water filter status. A clogged filter reduces water flow and can trigger protective shutdowns that affect the dispenser. Also inspect the dispenser motor itself. A weak motor might not generate enough force to close the flap completely.
If you’ve confirmed the flap assembly has no physical damage and the chute is clean, document your findings with photos. This information helps technicians diagnose whether replacement parts or board service is necessary. Most control board issues require professional replacement rather than DIY repair.
Preventive Maintenance Tips To Avoid Future Sticking
Keeping your ice dispenser flap in good working order starts with simple, regular habits. Prevention is far easier than fixing problems later.
Clean your water filter every six months. A clogged filter forces your refrigerator to work harder, which can strain the dispenser system. When water doesn’t flow smoothly, ice can build up inside the chute and cause your flap to stick.
Check the dispenser chute monthly for frost and debris. Open your freezer and shine a light into the opening. Remove any visible ice chunks or dust using a soft cloth. This quick inspection takes just five minutes but prevents major blockages.
Avoid using heat sources near the dispenser. Hair dryers, heat guns, and even direct sunlight can warp the plastic flap over time. Keep your refrigerator away from windows and heating vents in your kitchen.
Inspect the flap assembly every few months. Look for loose hinge pins or visible cracks in the plastic. Catching small damage early prevents the flap from getting stuck open later.
Keep the area around your refrigerator clean and dry. Moisture and dust can enter the dispenser mechanism. Wipe down the exterior regularly and ensure proper air circulation around the unit.
Monitor ice production patterns. If ice output suddenly drops or the dispenser stops working smoothly, investigate immediately. Early detection helps you address wear and tear before the flap fails completely.
Store items properly in your freezer. Avoid placing bags or containers directly against the dispenser chute, which can block airflow and cause frost accumulation. Leave adequate space around the dispenser opening for proper function.
Final Thoughts
A sticking ice dispenser flap usually points to a mechanical problem, not a hidden electrical fault. Warped plastic, broken pins, or frost buildup cause most cases. Simple fixes solve the issue in many homes.
Start with the easiest checks first. Look at the flap assembly and clear out any frost or debris. These steps take only a few minutes but fix a large number of sticking flaps.
If the flap still won’t close, inspect the hinge pins closely. Damaged pins often need replacement before the flap moves correctly again. This part is inexpensive and easy to swap out yourself.
Warping is a different story. Once plastic bends from heat or age, it rarely goes back to its original shape. Replacing the entire dispenser door becomes the most reliable fix in this case.
Control board failures are less common but still possible. Rule out every mechanical cause first before you consider this option. A technician can confirm board issues with proper testing tools.
Patience matters during this process. Rushing through steps or skipping the unplugging stage can cause more damage or even injury. Take your time with each check.
Regular maintenance keeps this problem from coming back. Clean filters, clear chutes, and gentle handling all extend the life of your dispenser parts.
Most owners can handle this repair without calling a professional. The tools needed are basic, and the steps are straightforward once you know what to look for.
If your unit still gives trouble after trying these fixes, it may be time to reach out to a certified repair service. They can pinpoint issues that go beyond simple wear and tear.
A well maintained dispenser gives you reliable ice for years to come.
Frequently Asked Questions
Why does my ice dispenser flap stick open?
The flap sticks open for a few main reasons. Melted or warped plastic is the most common culprit. Heat from the freezer or nearby sources can bend the flap permanently. Broken hinge pins also cause sticking. These small metal pieces hold the flap in place, and when they crack or loosen, the flap won’t close properly.
Frost and debris buildup inside the chute can jam the mechanism too. If ice crystals or dirt block the opening, the flap gets stuck in an open position.
Can I fix a sticking ice dispenser flap myself?
Yes, you can handle basic troubleshooting. Start by unplugging your refrigerator completely. Inspect the flap assembly for visible damage like cracks or bent plastic.
Look at the hinge pins closely. If they’re loose or broken, you may need to replace them. Clear any frost or debris from the chute using warm water and a soft cloth.
If the plastic is warped, you’ll likely need to replace the entire dispenser door. This is still a DIY task for many people, though it requires ordering a replacement part.
Should I use heat to fix a warped flap?
No. Never use a hair dryer or heat gun on plastic components. Heat causes more warping, not less. Once plastic bends from temperature changes, it rarely returns to its original shape.
Stick to cool, dry methods only. Gentle hand inspection and cleaning work best.
What if mechanical fixes don’t work?
When the flap still sticks open after you’ve cleared debris and checked for damage, a faulty control board might be the issue. Smart refrigerators use circuit boards to manage ice dispensing functions.
Document your findings with photos. Contact the manufacturer with this information to explore board replacement options.

Hi, I’m Lola Griffin 👩💻, the voice and creator behind ResizerBox. I’m a passionate tech enthusiast who loves exploring the latest gadgets, smart devices, and trending Amazon electronics. Through my reviews, I share honest insights, real-world testing experiences, and practical buying advice to help readers make confident tech choices.