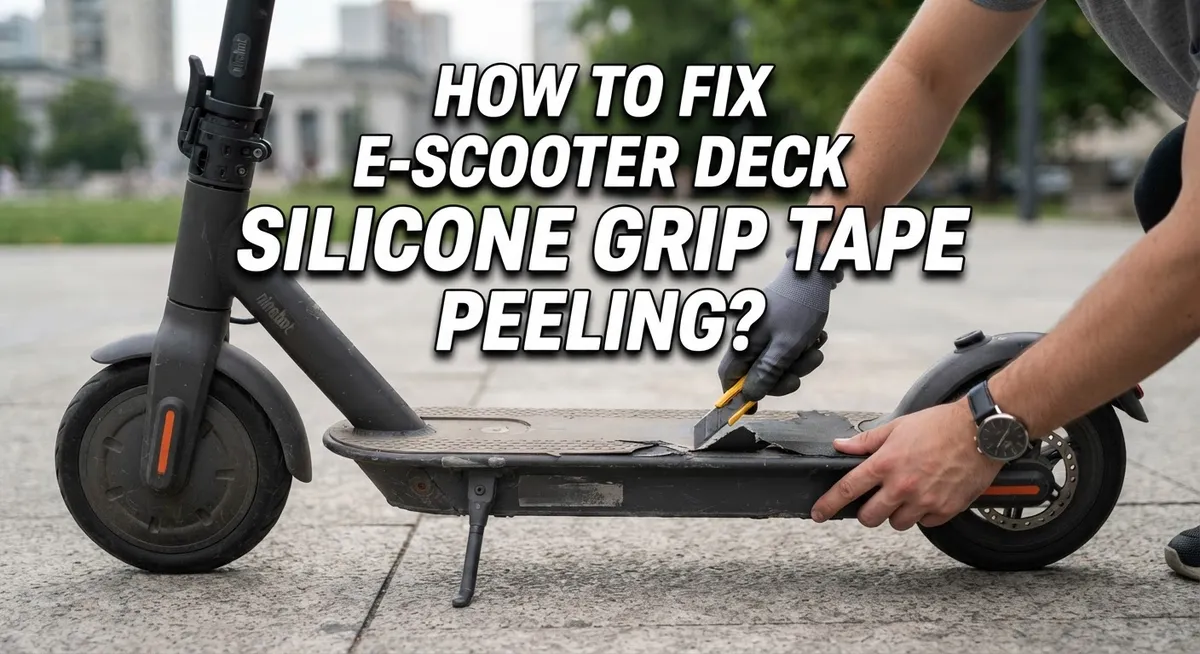
How To Fix E-Scooter Deck Silicone Grip Tape Peeling?
Your e-scooter deck grip tape starts peeling at the edges. You notice it while riding, and suddenly your footing feels unstable. This is a common problem, but it can turn dangerous fast.
Peeling grip tape is not just annoying. It can cause your feet to slip during rides. This creates a real safety risk, especially at higher speeds.
The good news is that fixing this problem is simple. You do not need special skills or expensive tools. With the right steps, you can restore your deck grip in less than an hour.
This guide walks you through the entire process. You will learn why grip tape peels in the first place. We cover deck cleaning, tape removal, and proper application techniques.
You will also discover common mistakes that cause repeat peeling. Many riders skip edge sanding or rush the cleaning step. These small errors lead to big problems later.
By the end of this article, you will know exactly how to fix peeling grip tape. Your scooter will feel safer and perform better. Let’s get your deck back in top shape.
In a Nutshell
Here is your quick summary of the entire fix:
-
Remove the rear wheel and brake first. Use an allen key to take them off safely. This gives you full access to the deck surface.
-
Peel off all old grip tape. Take your time to remove every bit of residue. Rushing this step often leaves sticky patches behind.
-
Clean the deck with isopropyl alcohol. This removes dust, grease, and leftover glue. A clean deck helps new tape stick better.
-
Apply new grip tape carefully. Align it properly before pressing down. Precision here prevents wobbling and balance issues later.
-
Smooth it out using a wheel or roller tool. This pushes out air bubbles and helps the tape bond fully to the deck.
-
Sand the edges once installed. This step seals the tape and stops it from lifting again over time.
Follow these steps in order. Skipping any step increases your chances of repeat peeling. A little patience now saves you from redoing the job later.
Why Grip Tape Peels: Understanding the Root Causes
Grip tape peels for several clear reasons. Understanding what causes the problem helps you prevent it from happening again after you fix it.
Poor adhesion is the main culprit. When grip tape doesn’t stick properly to your deck, it lifts at the edges first. This happens because the deck surface wasn’t clean enough before you applied the new tape. Dust, dirt, and grease create a barrier between the adhesive and the deck material. The tape can’t bond firmly to a dirty surface.
Moisture and temperature changes also matter. Your scooter experiences different weather conditions. Rain, humidity, and temperature swings cause the deck material to expand and contract slightly. This movement stresses the adhesive bond over time. Eventually, the tape starts peeling away from the edges where stress concentrates.
Wear and tear accelerates peeling. Every time you ride, your feet create friction on the grip tape. The constant pressure and movement weaken the adhesive bond gradually. Edges suffer the most damage because they don’t have full deck support underneath them.
Low quality materials fail faster. Cheap grip tape uses weaker adhesives that break down quickly. Budget options don’t hold up well against moisture, heat, and repeated use.
Incomplete edge finishing causes repeat problems. If you don’t sand and seal the edges properly after installation, they start lifting immediately. The tape edges need protection to stay secured long term.
Rushing the installation process guarantees failure. Taking shortcuts during application leads to misalignment, air bubbles, and poor adhesion. Each mistake compounds the peeling problem.
Knowing these causes helps you apply the fix correctly and keep your grip tape secure for months to come.
Tools and Materials You’ll Need Before Starting
Before you start fixing your e-scooter grip tape, gather the right tools and materials. Having everything ready makes the job faster and cleaner.
You will need an allen key set to remove your rear wheel and brake. Most e-scooters use standard sizes like 4mm or 5mm. Keep these keys organized so you don’t lose them during the repair.
Get isopropyl alcohol for cleaning your deck. This liquid removes dust, grease, and old adhesive residue that prevents new tape from sticking. A clean cloth or rag works best for wiping down the surface. Paper towels can leave fibers behind, so avoid them.
Purchase replacement grip tape designed for e-scooters. Look for options with strong adhesive backing. High quality tape lasts much longer than budget alternatives.
You will also need a roller tool or wheel to smooth the tape after installation. Some people use a skateboard wheel mounted on a truck hanger. Others use a hand roller. Either option works well for pressing out air bubbles and ensuring full contact between tape and deck.
A heat source like a blow dryer helps activate the adhesive during installation. Warm adhesive bonds faster and stronger than cold adhesive.
Finally, grab sandpaper with medium grit for finishing the edges. This prevents future peeling by sealing the tape perimeter. Don’t skip this step, as it makes a real difference in longevity.
Store all materials in one spot before starting. This prevents you from hunting for tools mid repair. A small table or workspace keeps everything organized and within arm’s reach. Good preparation means fewer interruptions and a better final result.
Step-by-Step: Removing the Old Grip Tape and Wheel
Now that you have your tools and materials ready, it’s time to start the removal process. Taking your time here prevents damage to your deck and makes the next steps easier.
Start by flipping your e-scooter upside down so the deck faces you. Locate the rear wheel and brake assembly. Use your allen key to unscrew the bolts holding them in place. Most e-scooters use standard sizes, so try common measurements first. Set these bolts aside in a safe spot so you don’t lose them.
With the wheel removed, you now have clear access to the grip tape. Begin peeling from one corner of the deck. Work slowly and steadily. If the tape resists, try lifting at a steeper angle. Stubborn sections may need gentle heat from a blow dryer to loosen the adhesive underneath.
Remove every piece of old grip tape. Don’t leave strips or patches behind. Leftover tape creates uneven surfaces that prevent new tape from bonding properly.
Once the deck is bare, you’ll notice sticky residue from the old adhesive. This is where cleaning becomes critical. Dampen a cloth with isopropyl alcohol and wipe the entire deck surface. Pay special attention to edges and corners where adhesive collects. Let the deck dry completely before moving forward.
Inspect your deck for any damage while it’s bare. Small cracks or dents won’t affect grip tape installation, but deep gouges may need attention. A clean, dry deck is your foundation for success. This preparation step directly impacts how well your new grip tape will stick and last through regular riding.
Prepping the Deck: Cleaning for Maximum Adhesion
Your deck’s cleanliness determines whether new grip tape sticks or fails. Dust, grease, and old adhesive residue block proper bonding. You must clean thoroughly before applying fresh tape.
Start by wiping your bare deck with a dry cloth. Remove all loose debris and dust particles. Pay special attention to corners and edges where dirt collects easily.
Next, use isopropyl alcohol on a clean cloth. Wipe the entire deck surface in circular motions. This removes grease, oils from your hands, and stubborn residue. Work slowly and don’t rush this step.
Let the alcohol dry completely. Wait at least 5 to 10 minutes before moving forward. Moisture prevents adhesive from bonding properly to your deck.
Check for any sticky spots remaining. These are old adhesive remnants. If you find them, apply more isopropyl alcohol and scrub gently until they disappear. Your deck should feel completely smooth and dry.
Inspect the entire surface under good lighting. Look for any dust particles or streaks you might have missed. A clean deck is a smooth deck, and smooth decks hold grip tape securely.
Pay extra attention to the edges and corners. These areas trap the most dirt and require focused cleaning. Wipe them multiple times if needed.
Once your deck passes inspection, you’re ready for the next stage. The cleaning process directly impacts how long your new grip tape lasts. Skipping this step leads to peeling within weeks. Taking time here saves you from repeating this repair later.
Applying New Grip Tape the Right Way
Applying new grip tape requires patience and precision. Start by positioning your clean, dry deck on a flat work surface. Make sure you have good lighting so you can see exactly what you’re doing.
Align your grip tape carefully before pressing it down. Most grip tape comes with a backing you peel away. Start at one end of the deck and work slowly toward the other end. Press down as you go, but don’t rush this step.
Use a blow dryer on low heat while you apply the tape. The warmth activates the adhesive and helps it bond better to your deck. Move the dryer back and forth across the tape surface. This simple step prevents future peeling problems.
Once the tape is down, roll it smooth using a firm tool. A wheel from your scooter truck works perfectly for this. Apply steady pressure and roll in one direction repeatedly. This removes air bubbles trapped underneath and ensures full contact with your deck.
Pay special attention to the edges and corners. Press down firmly on these areas since they experience the most stress during rides. Edges are where peeling typically starts, so don’t skip this.
Sand the entire edge perimeter after the adhesive sets. Use medium grit sandpaper and work carefully around all sides. Sanding prevents the edges from catching and peeling up later. This finishing step takes just a few minutes but makes a huge difference.
Let your newly taped deck sit for at least 24 hours before riding. The adhesive needs time to cure completely. This waiting period ensures your grip tape stays put for months to come.
Finishing Techniques: Rolling, Sanding, and Sealing Edges
Rolling your grip tape smooth is the first critical step. Use a roller tool or the wheel from your scooter’s truck hanger to apply firm, even pressure across the entire surface. Work from the center outward toward the edges. This pushes out air bubbles and ensures the adhesive makes full contact with the deck.
Press down hard as you roll. Light pressure leaves gaps that cause peeling later. Go over the tape multiple times, paying special attention to corners and the perimeter. These areas experience the most stress during riding and need the strongest bond.
After rolling, sanding becomes essential for long term durability. Wait until the adhesive fully sets, usually 24 hours. Then use medium grit sandpaper to smooth all edges and corners. Sand in circular motions along the perimeter where the tape meets the deck.
Sanding prevents peeling by removing sharp edges that catch on objects and peel upward. Work carefully around the entire deck edge. Sand until the tape feels smooth to your touch and sits flush against the deck surface. Don’t over sand, as this can damage the tape.
Sealing edges is your final finishing step. Some riders apply a thin line of clear protective coating around the tape perimeter. This creates a barrier against moisture and dirt that weaken adhesion. Let any sealant dry completely before riding.
The combination of proper rolling, careful sanding, and edge protection stops future peeling. These finishing techniques take time but save you from replacing grip tape repeatedly. Patience during this stage means your repair lasts much longer.
Common Mistakes That Cause Repeat Peeling
Grip tape peeling happens repeatedly when you skip or rush certain steps during installation. Understanding these mistakes helps you avoid the frustration of doing the job twice.
Poor deck cleaning is the biggest culprit. Dust, grease, and old adhesive residue create a barrier between your deck and new tape. Your grip tape cannot bond to a dirty surface. Even small particles trapped underneath will cause edges to lift within weeks. Take time to wipe your deck with isopropyl alcohol and let it dry completely before applying new tape.
Rushing the application process causes misalignment issues. When you press tape down too quickly, it shifts out of position. Misaligned tape affects your scooter’s balance and creates stress points at the edges. These stress points peel first. Work slowly and adjust the tape before pressing it fully down.
Inadequate edge finishing leads to repeat peeling. Many riders skip sanding or do it too lightly. Sharp edges catch on objects and peel upward. Sand your entire edge perimeter with medium grit sandpaper after the adhesive sets. This step is not optional if you want lasting results.
Using low quality grip tape materials guarantees failure. Cheap tape has weak adhesive that fails quickly, especially under foot pressure. Invest in high quality tape designed for your scooter type.
Not applying enough pressure while rolling creates hidden gaps. Light rolling leaves air pockets that expand over time. Press down firmly as you roll to ensure complete contact. These gaps become peeling spots within days of riding.
Finally, riding too soon after installation stresses the adhesive before it fully cures. Wait at least 24 hours before your first ride to let everything bond properly.
Troubleshooting Persistent Adhesion Problems
When grip tape keeps peeling despite your best efforts, the problem usually runs deeper than surface level. Persistent adhesion issues stem from one or more root causes that need proper diagnosis before you try another fix.
The most common culprit is incomplete deck cleaning. Even tiny particles of dust, old adhesive, or grease create a barrier between your new tape and the deck surface. Your grip tape cannot stick to what it cannot touch. Use isopropyl alcohol and wipe multiple times until the surface feels completely clean and dry.
Temperature matters more than most riders realize. Cold decks make adhesive sluggish and less effective. If you’re working in cool conditions, warm your deck gently with a blow dryer before application. This activates the adhesive chemistry and improves bonding strength significantly.
Application pressure is critical for long term success. Many people roll their tape too lightly, leaving microscopic gaps underneath. These gaps expand when you ride, and the tape starts lifting at edges. Press down firmly as you roll, using your full body weight if needed.
Edge sealing deserves special attention. Rough, unsealed edges catch on pant legs, shoes, and ground obstacles. This constant catching creates stress that pulls the tape away from the deck. Sand all edges smooth with medium grit sandpaper after installation.
Finally, rushing the curing process causes failure. Your adhesive needs time to fully bond. Wait at least 24 hours before riding, even if the tape feels stuck. This patience prevents adhesion problems from returning.
If peeling continues after addressing these factors, your deck may have structural damage or the original tape quality was genuinely poor. Consider a complete replacement with higher quality materials.
Final Thoughts
Fixing peeling grip tape does not need to be hard. Clean removal, proper cleaning, and careful application solve most problems.
Your deck deserves attention before you add new tape. Skipping steps now creates bigger problems later.
Remember the core process. Remove the old tape, clean thoroughly, apply new tape, roll it smooth, then sand the edges. Each step matters just as much as the next.
Many riders rush through installation. This leads to bubbles, gaps, and early peeling.
Take your time instead. A slow, careful approach gives you a deck that lasts for months or years.
Quality materials make a real difference too. Cheap or low grade tape peels faster, no matter how well you install it.
Spend a little more on good tape. Your feet will thank you during every ride.
Weather and temperature also affect how well tape sticks. Warm conditions help adhesive bond better than cold ones.
If you install tape indoors, use a blow dryer to warm the surface first. This small trick improves adhesion significantly.
Patience after installation counts just as much as the process itself. Let your deck rest for at least 24 hours before riding.
This waiting period allows the adhesive to cure fully. Riding too soon undoes all your hard work.
Grip tape problems usually come from small mistakes. Poor cleaning, rushed application, or weak materials cause most failures.
Fix these issues, and your new tape will hold strong. Your scooter will feel safer and more stable every time you ride.
Good grip starts with good preparation. Take the extra time now, and your deck will reward you later.
Frequently Asked Questions
Why does my grip tape peel so quickly after I replace it?
Grip tape peels fast when the deck surface isn’t clean enough. Dust and grease create a barrier that stops adhesive from bonding properly. You need to wipe your deck with isopropyl alcohol before applying new tape. Let it dry completely. Also, low quality tape materials won’t last long. Invest in high quality grip tape with strong adhesive backing.
Can I just re-glue my peeling grip tape instead of replacing it?
Re gluing rarely works well. Once tape starts peeling, the adhesive underneath has already failed. You can try pressing it back down temporarily, but it will peel again soon. The better solution is to remove the old tape completely and start fresh. This takes more time, but it gives you a permanent fix that actually lasts.
How long should I wait before riding after applying new grip tape?
Wait at least 24 hours before riding. This gives the adhesive time to cure fully. Some grip tapes need even longer. Check the manufacturer guidelines if available. Riding too soon puts stress on the adhesive before it’s ready. That’s a common reason tape peels prematurely.
Does temperature affect how well grip tape sticks?
Yes, temperature matters significantly. Cold surfaces make adhesive less effective. If you’re installing tape in cool weather, use a blow dryer to warm the deck first. This improves bonding strength. Warm surfaces help the adhesive activate better and cure faster. Avoid installing grip tape in extremely cold conditions when possible.
What’s the most important step I keep missing?
Sanding the edges is critical. Many riders forget this step entirely. After rolling your new tape smooth, sand the entire edge perimeter. This prevents corners from lifting and peeling later. Proper edge finishing is what separates temporary fixes from long term results.

Hi, I’m Lola Griffin 👩💻, the voice and creator behind ResizerBox. I’m a passionate tech enthusiast who loves exploring the latest gadgets, smart devices, and trending Amazon electronics. Through my reviews, I share honest insights, real-world testing experiences, and practical buying advice to help readers make confident tech choices.