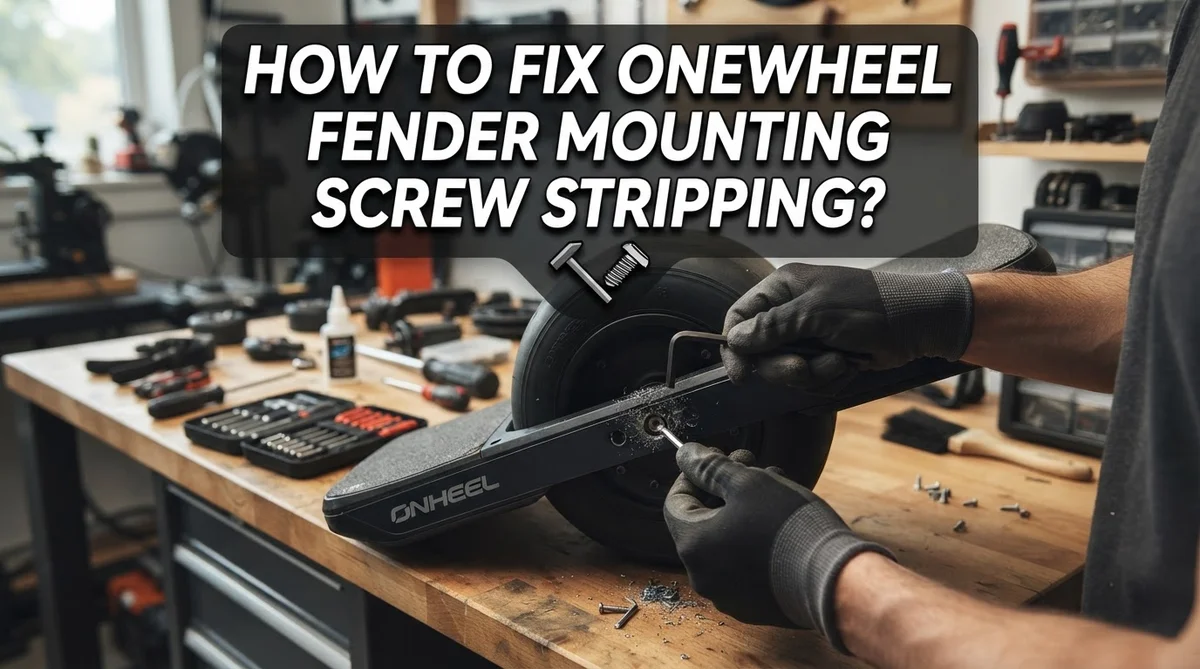
How To Fix Onewheel Fender Mounting Screw Stripping?
Your Onewheel fender rattles. You check the screws and your stomach drops. The mounting screw spins freely without gripping anything.
This is stripping, and it’s one of the most common Onewheel repairs riders face. It happens on the Pint, XR, and Plus models alike.
The good news? You don’t need to send your board to a repair shop. Most riders fix this problem at home with basic tools.
Stripping usually happens because of overtightening or normal wear over time. The screw threads wear down inside the mounting hole. Once that happens, the screw can’t hold the fender in place anymore.
This article walks you through why stripping happens in the first place. You’ll learn simple methods to fix it, from drilling a new hole to installing a helicoil insert.
We’ll also cover mistakes that make the problem worse, like using zip ties as a workaround.
By the end, you’ll know exactly how to secure your fender again. You’ll also learn how to prevent this issue from coming back.
Let’s get your Onewheel riding smoothly again.
In a Nutshell
Here’s the quick fix rundown for stripped fender screws:
-
Drill and tap a larger hole. This is the simplest fix. You drill out the stripped hole slightly and thread in a bigger screw for a tight grip.
-
Try a helicoil insert. This gives you a professional-grade repair. It restores the thread inside the hole so your original screw size works again.
-
Use an easy-out tool first. If the screw is stuck or broken, this tool helps you extract it before you start any repair.
-
A Dremel tool can help too. It’s useful for cleaning up damaged threads or removing a screw that won’t budge.
-
Skip the zip-tie trick. It feels like a quick fix, but it’s unreliable and won’t hold your fender securely.
-
Upgrade to stainless steel screws. They resist stripping better and last longer than standard ones.
-
Check screw tightness often. Loose fasteners create safety hazards, so regular inspection matters.
Fixing this yourself saves time and money, and it keeps your board ready to ride.
Why Onewheel Fender Screws Strip in the First Place
Onewheel fender screws strip for a few straightforward reasons. The most common cause is overtightening during installation or maintenance. Riders often crank down too hard, thinking a tighter screw means better security. In reality, excessive force damages the threads inside the plastic mounting hole.
The fender itself is made from plastic or composite material. Plastic threads are softer than metal, so they wear out faster. When you apply too much torque, the screw cuts into the material and destroys the grip. Once those threads are gone, the screw spins freely without holding anything.
Material fatigue plays a role too. Your Onewheel vibrates constantly while riding. This constant motion causes screws to work themselves loose over time. As they loosen, riders often tighten them again, which accelerates thread damage. This cycle repeats until the hole becomes completely stripped.
Temperature changes also matter. Plastic expands and contracts with heat and cold. This movement weakens the bond between the screw and the material. Combined with vibration, the threads gradually deteriorate.
Using the wrong screw size or type makes things worse. Incorrect fasteners don’t fit properly and create uneven pressure on the threads. Cheap screws with poor quality also strip more easily than quality alternatives.
Loose fasteners create safety hazards too. A rattling fender isn’t just annoying. It can eventually come loose completely and affect your board’s performance or stability. That’s why catching stripped screws early matters so much.
Understanding these causes helps you prevent future stripping. Proper installation technique and regular inspection keep your fender secure for the long term.
Tools and Materials You’ll Need Before Starting
Before you start fixing your stripped fender mounting screw, gather the right tools and materials. Having everything ready saves time and prevents frustration mid repair.
Drill bits are essential. You’ll need a bit slightly larger than your current stripped screw hole. Most Onewheel fenders use small diameter holes, so a bit in the 5mm to 6mm range works well. Make sure your drill bits are sharp and made for metal or plastic work.
A power drill or hand drill gives you control when enlarging the hole. A hand drill works if you move slowly and carefully. A power drill finishes faster but requires a steady hand.
Depending on your repair method, grab either larger replacement screws or a helicoil insert kit. If you’re drilling and tapping, you’ll need screws one size up from the original. Stainless steel versions resist future stripping better than standard screws.
An easy-out tool helps if your screw is stuck or broken inside the hole. These tools grip stripped screws and back them out without damaging surrounding material.
A tap and die set becomes necessary if you’re installing a helicoil insert. This tool cuts new threads into your enlarged hole. You don’t need an expensive professional set—basic kits work fine for this job.
Lubricant or penetrating oil helps loosen stuck screws. Apply it before attempting extraction.
A screwdriver set with various tip sizes ensures proper fit. Wrong sized tips slip and damage screw heads further.
Finally, keep safety glasses nearby. Metal shavings and plastic bits fly during drilling. Protect your eyes while working.
Step-by-Step: Drilling and Tapping for a Larger Screw
Drilling and tapping for a larger screw is the most straightforward solution. This method works because you’re creating fresh threads in undamaged material around the stripped hole.
Start by selecting a drill bit that’s one size larger than your current screw. For most Onewheel fenders, this means going from a standard size to the next increment. Mark the center of your stripped hole clearly so your drill stays on target.
Secure your fender firmly before drilling. Use a clamp or have someone hold it steady. A moving fender causes drill bits to slip and creates crooked holes. Drill slowly and apply steady pressure. Let the drill do the work instead of forcing it through.
Once you’ve drilled the new hole, you need to tap threads into it. A tap tool cuts spiral grooves that match your larger screw. Insert the tap by hand first to start the threads straight. Then use a tap handle to turn it clockwise, creating threads as you go. Apply cutting fluid or light oil to reduce friction.
The tapping process requires patience. Turn the tap a quarter turn forward, then a quarter turn backward. This breaks up metal chips and prevents the tap from binding. Stop if you feel resistance. Backing out slightly and trying again works better than forcing through.
After tapping is complete, insert your larger replacement screw. Tighten it firmly but don’t overtighten. The goal is snug contact without crushing the plastic fender. Test the fender by gently pulling on it to confirm it’s secure.
This repair typically lasts indefinitely if you avoid repeating the original overtightening mistake.
Step-by-Step: Installing a Helicoil Insert
A helicoil insert is a metal spiral that restores threads inside a stripped hole. This method works exceptionally well for fender mounting because it creates a permanent, strong repair.
Start by drilling out the stripped hole to the size specified in your helicoil kit instructions. The kit will tell you exactly which drill bit to use. Secure your fender firmly so it doesn’t move during drilling. Take your time and drill straight down to avoid damaging surrounding material.
Next, you’ll use the tap tool from your helicoil kit to cut new threads into the enlarged hole. Apply a small amount of cutting fluid or penetrating oil to help the tap move smoothly. Turn the tap clockwise slowly and steadily. Back it out every half turn to clear away metal shavings. This prevents the tap from seizing up inside the hole.
Once threading is complete, insert the helicoil into the hole using the installation tool provided in your kit. The helicoil wraps around itself as you turn it in, creating a new threaded surface. Stop when the top of the helicoil sits flush with the fender surface.
Finally, remove the installation tool and insert your original screw size into the helicoil. The screw will grip the metal helicoil threads instead of the stripped plastic hole. Tighten firmly but don’t overtighten, which defeats the purpose of the repair.
This method provides a professional grade fix that lasts for years. Your fender will stay secure through normal riding and weather changes. The helicoil approach costs less than replacing the entire fender assembly.
Alternative Extraction Methods: Easy-Out Tool and Dremel
When your screw won’t budge or breaks inside the hole, an easy-out tool becomes your best friend. This specialized tool grips the broken screw stub and turns it counterclockwise to remove it. Start by selecting an easy-out size that fits snugly into the screw head without wobbling.
Insert the easy-out tool into the stripped screw with firm downward pressure. Turn slowly and steadily. Rushing this step can break the tool itself, leaving you with an even bigger problem. Most stripped screws come free within a few rotations.
If the easy-out tool doesn’t work, a Dremel rotary tool offers another option. This approach requires more precision but works well for severely stuck fasteners. Attach a cutting bit to your Dremel and carefully carve a straight slot across the top of the screw head.
Once you’ve created a slot, use a flat head screwdriver to remove the screw. Apply penetrating oil around the screw first to help loosen it. Let the oil soak for 15 to 20 minutes before attempting removal.
The key difference between these methods is control and risk. Easy-out tools work best on broken screws still sitting flush in the hole. Dremel tools give you flexibility when the screw head is damaged or rounded off completely.
Both methods require a steady hand and patience. Work slowly to avoid damaging the surrounding fender material or the mounting bracket. Once you remove the stuck screw, you can proceed with drilling and tapping for a larger replacement or installing a helicoil insert for permanent repair.
Preventing Future Stripping and Maintaining Screw Integrity
Preventing future stripping starts with understanding what causes the problem in the first place. Overtightening is the main culprit. Most people assume tighter means better, but excessive force damages the threads inside your fender mounting holes. Stop tightening once you feel solid resistance. You should never force a screw past the point where it seats naturally.
Use the correct screw size for your specific Onewheel model. Pint models require different fasteners than XR or Plus boards. Installing an undersized screw creates loose connections that rattle and shift. Installing an oversized screw forces the threads beyond their capacity. Match your screw specifications exactly to your board’s design.
Stainless steel screws outperform standard options because they resist corrosion and maintain thread integrity longer. They cost slightly more but last significantly longer in outdoor conditions. Moisture and salt air degrade regular screws faster, leading to premature stripping.
Inspect your fender mounting screws every month. Vibration from riding gradually loosens fasteners over time. A quick check prevents major problems from developing. Tighten any loose screws you find, but use gentle pressure only.
Store your Onewheel in a dry location. Moisture accelerates corrosion and weakens the connection between screw and hole. Humidity creates rust that compromises thread quality.
Keep proper tools available for maintenance. Using the wrong screwdriver tip damages screw heads and makes overtightening more likely. A correctly fitting tool applies force efficiently without slipping.
Regular maintenance beats emergency repairs every time. Five minutes of monthly inspection prevents hours of troubleshooting later. Your fender stays secure, your board rides safely, and you avoid expensive fixes.
Common Mistakes to Avoid During Repair
Overtightening is the biggest mistake riders make during fender mounting screw repair. You feel like you need maximum pressure to secure the fender, but this actually damages the threads faster. Stop when you feel resistance. The screw should be snug, not cranked down with all your strength.
Using the wrong screw size creates immediate problems. Your Onewheel model requires specific dimensions. Installing a screw that’s too large or too small won’t grip properly in the stripped hole. Always verify your model’s specifications before purchasing replacement fasteners.
Skipping the extraction step properly leads to broken screws stuck inside the hole. Don’t force a stuck screw with brute strength. Use patience and the right extraction tool instead. Rushing this part doubles your repair time and frustration level.
Ignoring stripped threads in nearby screws is another common error. When one screw strips, check all the others immediately. Vibration and wear affect multiple fasteners at once. Catching problems early prevents sudden fender failures while riding.
Drilling without proper alignment causes new problems. Your replacement hole must be positioned carefully to avoid damaging internal components. Mark your spot clearly and drill slowly with steady pressure. A misaligned hole weakens the entire repair.
Skipping inspection after repair leaves you vulnerable to future failures. Test your fender mounting by gently pulling on the fender after installation. It should feel solid with no movement. Loose fenders create safety hazards and affect your ride quality.
Finally, don’t use temporary fixes like zip ties as permanent solutions. These workarounds fail quickly and compromise your safety. Invest the time in a proper repair using the drilling and tapping method or helicoil installation. Your Onewheel deserves a reliable fix that lasts.
Troubleshooting Persistent Fender Mounting Issues
When your Onewheel fender mounting screw keeps stripping, the problem often repeats itself because the underlying cause remains unaddressed. You need to identify why the screw is failing in the first place.
Overtightening is the primary culprit. Many riders assume tighter means safer, but excessive force strips the threads faster than you’d expect. The plastic or aluminum material in your fender mount cannot handle unlimited pressure. Once threads strip, they lose their grip permanently.
Material fatigue plays another role. Each time you ride, vibrations loosen fasteners slightly. Over months of use, this constant movement weakens the thread integrity. Your screw hole becomes increasingly vulnerable to stripping during normal tightening.
Check if you’re using the correct screw size for your model. Pint models require different specifications than XR or Plus versions. Using an undersized screw means less thread engagement. This creates a weak connection that strips easily under pressure.
Inspect the surrounding area carefully. If multiple screws in the same region keep stripping, your fender mount itself may be damaged. Cracks or deformation in the plastic housing prevent screws from seating properly. You might need to replace the entire fender assembly rather than just repair individual screws.
Examine your extraction technique too. If you’re forcing a stuck screw with excessive pressure, you’re damaging threads before removal even begins. Use the right tools and patience instead of brute force.
Document when stripping occurs. Does it happen after riding certain terrain? During specific weather conditions? This information helps you understand whether the problem stems from your maintenance habits, riding style, or actual equipment failure. Understanding the root cause prevents the same issue from happening again after your repair.
Final Thoughts
Fixing a stripped fender mounting screw does not need to feel overwhelming. With the right approach, you can solve this problem quickly and get back to riding.
Drilling and tapping a larger screw works well for most riders. This method fits Pint, XR, and Plus models. It gives you a fresh, solid connection.
A Helicoil insert offers a more permanent fix. This option suits riders who want a professional grade repair. It restores the hole to factory strength.
Easy-out tools and Dremel removal help when screws break off inside the hole. These methods take patience, but they clear the path for a proper fix.
Choosing the right method depends on your comfort level and tools on hand. Simple problems often need simple solutions. Complex stripping may require more advanced techniques.
Remember that replacement screws from Onewheel do not always grip stripped holes well. This is why drilling a new hole with a larger screw remains the simplest fix for many riders.
Safety matters more than speed. A loose fender can wobble during a ride and cause an accident. Take time to check your repair before riding again.
Once you fix the stripped screw, focus on keeping it secure. Good habits prevent this problem from returning.
Every Onewheel rider faces this issue at some point. Screws wear out. Threads strip. This is normal wear and tear on any board.
The good news is that fixing this problem does not require expert skills. With basic tools and patience, you can restore your fender mount and ride with confidence again.
Frequently Asked Questions
Why do Onewheel fender mounting screws strip so easily?
Fender mounting screws strip because riders apply too much force when tightening them. The plastic or aluminum material around the screw hole cannot handle extreme pressure. Over time, the threads wear down and lose their grip.
Material fatigue also plays a role. Vibrations from riding cause the screw to loosen slightly, then tighten again repeatedly. This cycle gradually damages the threads until they fail completely.
Can I just use a bigger screw to fix a stripped hole?
Yes, this is one of the simplest solutions. You drill a new hole slightly larger than the original one. Then you install a bigger screw that grips the fresh threads you create.
This method works well for most riders. It requires basic tools and takes only a few minutes. The new screw holds much better than replacement screws in the old stripped hole.
What is a Helicoil insert and when should I use it?
A Helicoil insert is a small metal coil that repairs stripped threads permanently. You drill out the stripped hole, tap new threads, and insert the coil. Then you screw in the original size fastener into the coil.
This option costs more in materials and time. Use it when you want a professional grade repair or when drilling a larger hole is not possible. It restores the hole to nearly original condition.
How do I remove a screw that broke off inside the hole?
Easy out tools grip the broken screw piece and extract it. You can also use a Dremel tool to carefully grind away the broken screw. This takes patience and steady hands.
Once removed, you can drill and tap a new hole or install a Helicoil insert.
Should I check my other fender screws regularly?
Absolutely. Inspect all fender mounting screws every few weeks. Tighten any loose ones gently. This prevents future stripping and keeps your fender secure during rides.

Hi, I’m Lola Griffin 👩💻, the voice and creator behind ResizerBox. I’m a passionate tech enthusiast who loves exploring the latest gadgets, smart devices, and trending Amazon electronics. Through my reviews, I share honest insights, real-world testing experiences, and practical buying advice to help readers make confident tech choices.