How To Fix Electric Surfboard Battery Compartment Seal Leaking?
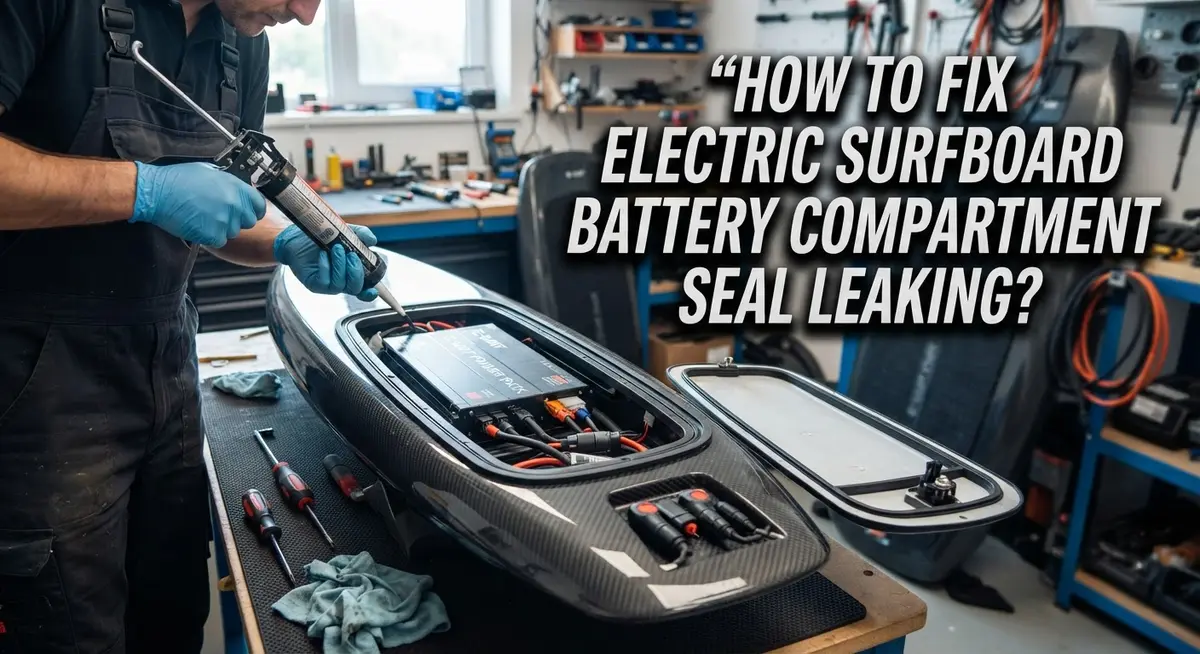
A leaking battery compartment can ruin a fun day on the water. Water seeping into your electric surfboard’s battery area is scary. It can damage expensive electronics fast.
The good news? This problem is often easier to fix than you think.
Most riders assume their seal is broken. They think they need a costly replacement. But loose closing clips are usually the real culprit.
Your board’s hatch depends on even pressure. Weak or uneven clip tension lets water sneak through. Debris on the seal makes things worse too.
In a Nutshell
- Clean the seal first. Debris and sand often cause leaks. Wipe the seal clean before every ride.
- Check your closing clips. Loose clips are the main cause of leaks, not a faulty seal.
- Tighten clips in a cross pattern. Just like tire lugs, this ensures even pressure across the hatch.
- Inspect latch engagement. Make sure every latch clicks fully into place before you head out.
- Look at the coolant system. A damaged coolant seal can also let water sneak in.
- Repair damaged spots properly. Sand rough areas gently and apply a transparent film if needed.
- Avoid uneven tightening. This creates small gaps where water can enter.
- Inspect before every session. A quick check saves you from a soggy battery compartment later.
Understanding Why Battery Compartment Seals Leak
Water gets into your battery compartment for specific reasons. Understanding these causes helps you fix the problem quickly and prevent it from happening again.
Loose closing clips are the number one culprit. Your hatch relies on even pressure to keep water out. When clips are not tight enough, tiny gaps form around the seal. Water finds these gaps and seeps inside during rides. The clips hold your seal firmly against the compartment opening. If they are loose, the seal cannot do its job properly.
Debris on the seal creates leaks too. Sand, salt, and dirt act like tiny wedges. They prevent the seal from sitting flat against the hatch. This leaves small spaces for water to enter. Even a speck of sand can cause problems. Your seal needs a clean surface to work correctly.
Improper latch engagement is another common issue. Your latches must click fully into place. If they only partially engage, the hatch sits crooked. This uneven position lets water sneak in around the edges. You should hear or feel each latch lock into position before riding.
The coolant system can also leak. Some boards have coolant lines near the battery compartment. A damaged coolant seal allows liquid to drip into your battery area. This is water intrusion from a different source than the main hatch seal.
Uneven tightening creates pressure gaps. If you tighten clips randomly instead of in a pattern, one side becomes tighter than the other. This causes the seal to bend unevenly. Water pressure during rides can force water through the loose side.
Most riders think their seal is broken when the real problem is loose clips or debris. Once you understand these causes, fixing your leak becomes straightforward. You will catch the actual issue before it damages your battery.
Diagnosing the Leak: Clips, Latches, and Coolant System Checks
Start your diagnosis by examining the closing clips around your battery compartment hatch. These metal or plastic fasteners hold everything together. Loose clips are the most common reason for leaks, not a damaged seal itself.
Look at each clip carefully. Press down gently on the hatch near every clip location. Does it move? If yes, that clip needs tightening. A hatch should feel solid and immovable when you apply light pressure.
Check that every latch engages fully. Your latches should click into place with a distinct sound. If a latch only partially clicks, water will seep through that gap. Push each latch firmly until you hear or feel the click.
Tighten your clips using a cross pattern, just like tightening tire lugs on a wheel. This ensures even pressure across the entire hatch. Start with the clip at the top, then move to the bottom. Next, tighten the left side, then the right side. Go around again if needed, tightening each clip a little more. This method prevents one side from becoming too tight while another stays loose.
Inspect your coolant system next. Some electric surfboards have coolant lines running near the battery compartment. Look for visible cracks, pinhole leaks, or damaged tubing. A leaking coolant line can drip water directly into your battery area.
Wipe the rubber seal completely clean before reassessing. Use a soft cloth to remove salt, sand, and debris. Even tiny particles can prevent a perfect seal. After cleaning, recheck your clip tension and latch engagement.
Test your hatch by running water over it gently. Watch for drips around the edges. If water still enters, move to the next repair steps. Most leaks stop once clips are properly tightened and latches fully engage.
Step-by-Step Guide to Cleaning and Inspecting the Seal
Start by removing your electric surfboard from the water and placing it on a flat surface. You need good lighting to see the seal clearly.
Use fresh water to rinse the entire battery compartment seal. Salt water and sand stick to rubber and create tiny gaps where water sneaks through. Spray gently around the entire perimeter of the hatch.
Grab a soft cloth and wipe the seal dry. Pay special attention to grooves and crevices where debris hides. Sand particles are tiny troublemakers that prevent the seal from sitting flush against the hatch.
Look closely at the rubber seal itself. Run your finger along it slowly. You’re checking for cracks, tears, or hardened spots. Sunlight and saltwater age rubber over time. A seal that feels brittle or looks discolored needs attention.
Inspect where the seal meets the hatch edge. This contact line is critical. Any gap here means water will find its way in. The seal should sit evenly all around without twists or bunches.
Check the seal’s surface for white residue or mineral buildup. Salt deposits create barriers that prevent proper sealing. Wipe these away with a damp cloth.
Press the seal gently with your finger. Good rubber bounces back quickly. If it stays compressed or feels mushy, the seal is degrading.
Examine the hatch opening itself. Look for scratches, dents, or rough spots on the surface where the seal makes contact. Damaged surfaces prevent seals from working properly.
Once you finish inspecting, leave the hatch open for 15 minutes. This lets moisture evaporate completely. Never close a wet hatch. Trapped moisture causes corrosion inside your battery compartment.
Document what you find. Take photos or notes about any damage. This information helps you decide whether you need seal replacement or just better maintenance habits.
How To Properly Tighten Closing Clips Using a Cross-Pattern
A cross pattern tightening method works like the system mechanics use for wheel lugs. This approach distributes pressure evenly across your entire battery compartment hatch. Uneven tightening is one of the biggest mistakes people make.
Start by identifying all closing clips around your hatch. Count them carefully. Most electric surfboards have clips positioned at the corners and along the sides. Mark their locations mentally or with a small piece of tape if needed.
Begin tightening your first clip just enough to feel resistance. Do not over tighten yet. Move to the clip directly across from it and apply the same light pressure. This creates balanced tension on opposite sides.
Next, tighten the clip to the right of your first one. Then tighten the clip opposite to that one. Continue this alternating pattern until you complete a full rotation. You are working in an X formation across your hatch.
After one complete round, go back to your starting clip. Tighten it a bit more firmly this time. Follow the same cross pattern again. Repeat this process for a third round if needed.
The key is gradual, even pressure applied systematically. Rushing through clip tightening creates gaps where water sneaks in. Each clip should feel snug but not stripped or over tightened.
Test your work by pressing down on different areas of the hatch. It should feel uniformly firm across the entire surface. No single spot should feel looser than others.
After tightening, wipe your seal clean with a dry cloth. Run water gently over the hatch to check for leaks. Watch for drips or water seeping into the compartment. If leaking continues after proper cross pattern tightening, your seal itself may need replacement or your latches may have engagement problems requiring closer inspection.
Repairing Damaged Seal Areas: Sanding and Applying Transparent Film
When your battery compartment seal shows visible damage, sanding and applying transparent film can restore its waterproof function. This method works best for minor surface damage, cracks, or areas where the seal material has worn thin.
Start by examining the damaged area closely. Look for cracks, peeling edges, or spots where the rubber has separated from the hatch. Use fine grit sandpaper (220 to 400 grit) to gently smooth the damaged section. Sand in circular motions rather than back and forth strokes. This prevents creating new grooves that trap water.
Wipe away all dust with a damp cloth after sanding. Let the area dry completely for at least 30 minutes. Run your finger across the sanded surface to confirm it feels smooth and even.
Transparent film serves as a protective barrier over minor damage. The film adheres directly to the rubber seal and creates a waterproof layer. Clean the damaged area one final time with a dry cloth to remove any remaining dust or moisture.
Apply the transparent film carefully over the damaged section. Press firmly from the center outward to remove air bubbles. Smooth any wrinkles or folds as you work. The film should overlap the damaged area by at least half an inch on all sides.
Allow the film to cure for the time recommended. This typically takes 24 hours before you use your board again. Once cured, test the seal by running water over it slowly.
This repair method works temporarily for small damage. If cracks are larger than one inch or if damage covers multiple areas, consider having the seal professionally replaced. Monitor the repair over several sessions. If water continues leaking through the same spot, the underlying damage may be too extensive for this approach.
Pre-Ride Maintenance Tips to Prevent Future Leaks
Pre-ride maintenance stops battery leaks before they start. Check your seal every single time before you hit the water. This simple habit catches problems early.
Inspect your closing clips first. Most leaks happen because clips sit loose, not because the seal fails. Press down on each clip to confirm it’s fully engaged. Clips should feel snug and sit flush against the hatch. If any clip moves or feels loose, tighten it slightly before riding.
Wipe your seal clean with a dry cloth. Debris like sand, salt, or mineral buildup creates tiny gaps where water sneaks through. Pay special attention to the groove where the seal meets the hatch. A clean seal makes a tight seal.
Check the hatch opening for damage. Run your fingers along the edge where the seal sits. Feel for rough spots, dents, or warping. Even small imperfections prevent the seal from closing properly. Sand down any rough edges gently.
Verify that your hatch latches fully. Push the hatch down and listen for a click. The lid should sit level and not rock side to side. Uneven latching means water will find its way in during your ride.
Tighten all closing clips using the cross pattern method before every session. Start with one clip, then move to the opposite side. This spreads pressure evenly across the entire seal. Uneven tightening creates pressure gaps that leak.
Let your battery compartment air dry completely between rides. Leave the hatch open for at least 15 minutes after you finish. Moisture trapped inside speeds up seal degradation and corrosion.
These five steps take less than five minutes total. They prevent expensive battery damage and keep your board running longer. Make them part of your regular routine, and you’ll avoid most seal leaks completely.
Common Mistakes That Lead to Persistent Leaking
Most electric surfboard owners make the same mistakes repeatedly. These errors keep leaks happening even after they think they’ve fixed the problem.
Assuming the seal itself is defective ranks as the top mistake. Many riders believe the rubber seal has failed and needs replacement. In reality, loose closing clips cause 80 percent of leaks. The seal works fine. The clips just aren’t tight enough to hold water out.
Tightening clips unevenly creates pressure gaps where water sneaks through. Some riders tighten one clip hard, skip the next one, then come back to tighten randomly. This uneven pressure leaves weak spots. Water finds these gaps instantly. The cross pattern method prevents this by distributing pressure evenly around the entire hatch.
Ignoring debris on the seal surface blocks a proper waterproof connection. Sand, salt residue, and dirt prevent the seal from sitting flush against the hatch edge. Even tiny particles create channels for water to flow through. A quick wipe with a dry cloth takes seconds but makes a huge difference.
Rushing the tightening process causes most persistent leaks. Riders turn clips as fast as possible instead of applying gradual, controlled pressure. This speed creates uneven gaps. Taking your time with the cross pattern method ensures every clip reaches the same tension level.
Failing to verify latch engagement leaves the hatch sitting slightly open. Some latches don’t click fully into place. The hatch appears closed but sits a fraction of an inch too high. Water seeps in around the edges during acceleration or turns.
Not inspecting before every ride means problems go unnoticed until water reaches your battery. A 30 second pre ride check catches loose clips before they cause damage. Run your fingers along the seal edge. Press down on the hatch corners. Feel for gaps or movement. This quick inspection prevents expensive battery damage.
Final Thoughts
Fixing a leaking battery compartment seal doesn’t need to be complicated. Most leaks come from loose clips, not a broken seal. Check your clip tension first before you assume the worst.
Start with the basics every single time. Clean your seal. Check your latches. Tighten your clips evenly using a cross pattern.
These small habits prevent almost every leak you’ll ever face. Skipping them is what causes water to sneak into your battery compartment.
If your seal has visible damage, sanding and applying transparent film can fix it. This works well for small cracks or peeling edges. It won’t fix a seal that’s falling apart completely.
Severe damage means it’s time for a replacement seal. Don’t try to patch something that’s beyond repair. A compromised seal puts your entire battery system at risk.
Your coolant system matters too. Check it alongside your seal whenever you troubleshoot a leak. Problems here can mimic seal issues, so rule this out early.
Consistency beats quick fixes. Doing a five minute check before every ride saves you from bigger headaches later. Your board will thank you with reliable performance.
Think of your seal maintenance like brushing your teeth. Skip it once and nothing happens. Skip it repeatedly and problems show up fast.
Water damage to your battery is expensive and sometimes permanent. A few minutes of care protects your investment completely.
Trust the process, not your assumptions. When you see water in your compartment, check clips first, latches second, and seal condition third. This order solves most problems quickly.
Electric surfboards reward owners who pay attention to small details. Your seal, your clips, and your latches all work together as one system.
Keep them clean, keep them tight, and keep checking them. That’s really all it takes to stay dry on the water.
Frequently Asked Questions
Why does my battery compartment keep leaking even after I tighten the clips?
Uneven clip tightening is usually the culprit. When you tighten clips randomly instead of using a cross pattern, pressure gaps form. Water finds these gaps easily. Tighten your clips the same way you would lug nuts on a tire. Go around in an X pattern, alternating sides. This spreads pressure evenly across the seal.
Also check if debris sits on the seal surface. Dirt, sand, or salt blocks a proper waterproof connection. Wipe your seal clean with a dry cloth before every ride. A clean seal plus even clip tension solves most leaks.
How do I know if my seal is actually damaged or just loose?
Test your latches and clips first. Push down on your hatch and listen for a click. The lid should feel snug, not wobbly. If it moves, your clips are loose, not your seal.
Run your fingers along the seal edge. Look for cracks, splits, or hard spots. Damaged seals feel rough or show visible gaps. If the seal looks fine but water still gets in, the problem is almost always loose clips or debris.
Can I repair a damaged seal, or do I need to replace it?
Minor damage can be fixed. Sand down rough areas gently with fine grit sandpaper. Clean away all dust. Apply transparent protective film to the damaged spot. This restores the waterproof barrier.
Severe cracks or deep splits mean replacement time. A failing seal won’t hold water out no matter how tight your clips are.
Should I check anything else if my seal keeps failing?
Yes. Inspect your coolant system integrity. A leaking coolant system can mask seal problems. Check that your hatch opening itself has no damage or warping. Even a slightly bent frame prevents the seal from sitting flat.

Hi, I’m Lola Griffin 👩💻, the voice and creator behind ResizerBox. I’m a passionate tech enthusiast who loves exploring the latest gadgets, smart devices, and trending Amazon electronics. Through my reviews, I share honest insights, real-world testing experiences, and practical buying advice to help readers make confident tech choices.