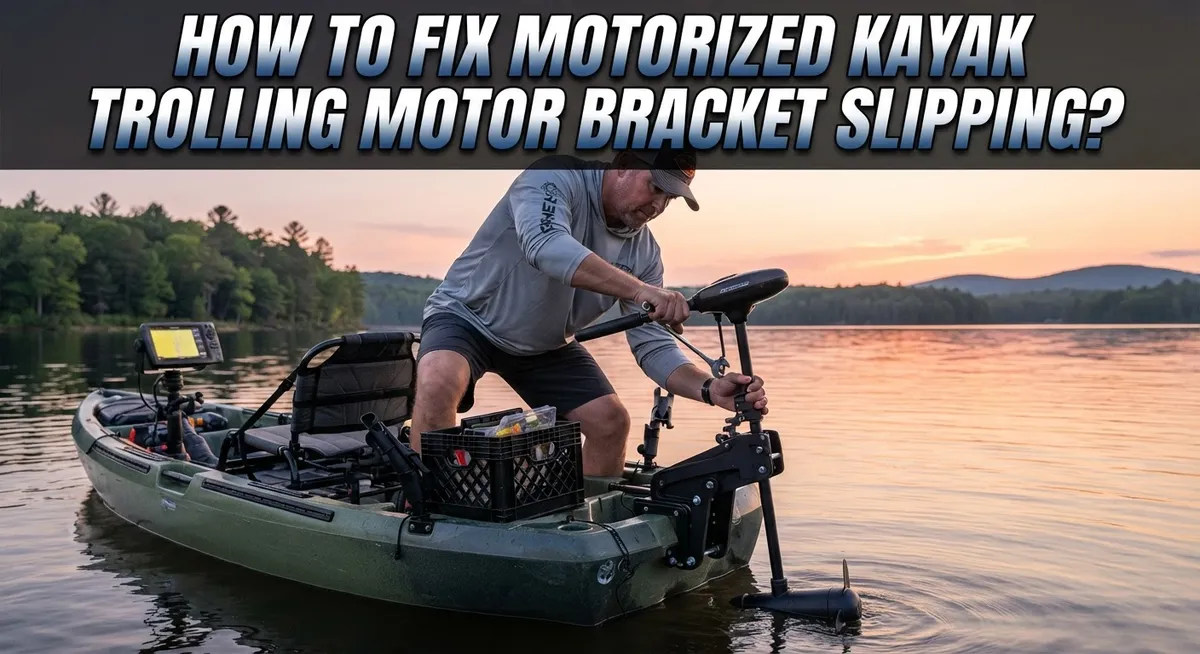
How to Fix a Kayak Trolling Motor Bracket That Keeps Slipping?
Does your kayak trolling motor bracket keep slipping when you hit the water? You are not alone.
This is one of the most common problems kayak anglers face. A loose bracket can turn a relaxing fishing trip into a frustrating battle with your motor.
The good news is that this problem has simple solutions. Most bracket slipping happens because of weak tightening, worn washers, or a plastic clamp that cannot hold its grip.
In a Nutshell
- Tighten the mounting knobs firmly. Loose knobs are the top reason brackets slip. Give them a firm twist every time you set up.
- Add metal washers for extra grip. Washers create more surface contact between the bracket and the mount. This small change makes a big difference.
- Try the heat and tighten method. Heat large round metal washers and press them into the plastic bracket. The plastic will deform slightly and mold around the clamp for a snug fit.
- Switch to a metal bracket if plastic keeps failing. Metal holds up better under pressure and resists wear over time. This is a smart long term fix.
- Avoid letting your motor slam down. This habit stresses the bracket and speeds up slipping. Always lower your motor slowly and carefully.
- Check compatibility across brands. Minn Kota, NuCanoe, and Newport Vessels setups all respond well to these fixes. A secure bracket means a stable, safe ride every time you paddle out.
Why Trolling Motor Brackets Slip on Kayaks
Trolling motor brackets slip on kayaks for a few clear reasons. Understanding what causes the problem helps you fix it faster and prevent it from happening again.
Loose mounting hardware is the number one culprit. Over time, the knobs and bolts that hold your bracket to the kayak vibrate loose. Water, movement, and regular use all contribute to this loosening. Even a small gap between the bracket and mount creates instability that gets worse with each fishing trip.
Plastic bracket wear is another major issue. Most kayak brackets use plastic material where the motor shaft connects. Plastic compresses under repeated pressure and loses its grip. The motor shaft slides around inside this worn plastic, especially when you turn or accelerate. Metal shafts grinding against soft plastic create a smooth surface that encourages slipping.
Inadequate contact surface between the bracket and mount also matters. If the mounting area is too small or uneven, the bracket cannot grip properly. Dirt, debris, or salt buildup on the contact surface reduces friction and stability.
Motor weight and movement make the problem worse. A heavy motor creates downward force that pushes the bracket against the mount. When you steer or hit waves, this force shifts side to side. This constant shifting stresses the bracket and speeds up wear.
Material mismatch between components plays a role too. Plastic brackets holding metal shafts create friction problems. The two materials move at different rates under stress, which causes slipping over time.
Understanding these causes helps you choose the right fix for your specific situation. Most slipping problems stem from loose hardware, so always start there first.
Tools and Materials You’ll Need Before You Start
Before you start fixing your slipping trolling motor bracket, gather the right tools and materials. Having everything ready makes the job faster and easier.
Metal washers are essential. You need large round washers that fit over your motor mount shaft. These washers increase the grip surface between your bracket and the mounting point. They work by spreading pressure over a wider area, which prevents slipping. Keep several washers on hand in case you need extras.
Wrenches and socket sets help you tighten mounting knobs securely. Most kayak trolling motor brackets use standard bolt sizes. A basic wrench set covers most situations. Socket sets give you better leverage for tight spaces.
A heat source is useful for the heat and tighten method. A heat gun or hair dryer works well. You want to warm the metal washers before pressing them into the plastic bracket. This allows the plastic to soften slightly and conform to the washer shape.
Cleaning supplies matter too. Use a wire brush or cloth to remove dirt, salt, and debris from the bracket and mount. Clean surfaces grip better than dirty ones.
Replacement brackets should be available if needed. Keep a metal bracket option nearby. Metal brackets resist wear better than plastic over time.
Mounting hardware like bolts, nuts, and clamps should be in good condition. Check that nothing is bent or damaged before you start.
A work surface keeps parts organized. A flat table or workbench prevents losing small components.
Having these materials ready means you can complete the repair without interruptions or trips to gather supplies.
Step-by-Step: The Heat-and-Tighten Washer Method
The heat and tighten washer method works by changing how the plastic bracket grips your motor mount. Here’s exactly how to do it.
Start by gathering large round metal washers. These washers become your secret to creating a secure hold. The goal is to use heat to soften the plastic bracket just enough so it conforms around the washer and clamp.
First, place a metal washer directly on top of your motor mount bracket. Position it where the mounting knob will press down. Make sure the washer sits flat and centered on the plastic surface.
Next, apply heat to the washer using a heat source. You want the washer to become warm to the touch, not scorching hot. The heat transfers through the metal and softens the plastic underneath. This takes about two to three minutes of steady heating.
While the plastic is still warm, tighten your mounting knob down firmly. Use steady, strong pressure. Push the knob down as you turn it. The warm plastic will deform slightly and conform to the shape of the washer and clamp.
Keep tightening until you feel solid resistance. The plastic has now molded around the washer, creating a much larger contact surface. This increased surface area dramatically improves grip and prevents slipping.
Allow the bracket to cool completely before testing. The plastic hardens in its new shape and locks everything in place. Once cooled, the bracket should hold your motor mount rock solid.
This method works because plastic is more pliable when warm. The washer creates a wider pressure point that resists movement better than a small clamp alone. Test your motor mount gently first to confirm the bracket stays put during operation.
Upgrading from Plastic to Metal Brackets for a Permanent Fix
Upgrading from a plastic bracket to a metal bracket offers a permanent solution to your slipping trolling motor problem. Metal brackets resist deformation and maintain their grip over time, unlike plastic that gradually wears down and loses tension.
Metal brackets provide superior durability because they don’t compress or flex under motor weight and movement. The rigid structure keeps your motor stable during operation, preventing the annoying shifts that happen with plastic components.
The upgrade process is straightforward. First, identify your current bracket type and motor mount compatibility. Check whether your motor uses Minn Kota, NuCanoe, Newport Vessels, or another brand system. Metal brackets typically fit the same mounting points as plastic ones.
Remove your existing plastic bracket by loosening all mounting hardware completely. Lift the bracket away from the motor mount carefully. Inspect the mounting surface for dirt, corrosion, or damage. Clean the area thoroughly before installing the new bracket.
Position your metal bracket onto the motor mount, aligning all holes precisely. Insert mounting bolts and hand tighten them first to ensure proper alignment. Then use your wrench or socket set to tighten each bolt firmly and evenly.
Test the bracket stability before taking your kayak on the water. Apply downward pressure to the motor shaft. The bracket should not move or shift at all. If you notice any movement, tighten the bolts further.
Metal brackets eliminate the need for repeated heat and tighten procedures. You won’t deal with plastic fatigue or compression issues anymore. Your motor will stay locked in position, giving you confidence during every paddling trip.
This upgrade is worth the investment for serious kayak anglers who use their trolling motors regularly.
Proper Tightening Technique to Prevent Future Slipping
Proper tightening technique prevents your bracket from slipping during future kayaking trips. The key is applying consistent, firm pressure when securing your mounting knobs.
Start by positioning your mounting knob at the base of your bracket. Turn it clockwise slowly at first to ensure proper alignment. Once you feel the initial resistance, increase your tightening force gradually. Don’t rush this step because uneven pressure causes uneven grip.
Apply steady, controlled force rather than sudden jerking motions. Your goal is to create uniform contact between the bracket and motor mount. Tighten in a circular pattern if your bracket has multiple mounting points. This distributes pressure evenly across all connection areas.
Check your tightness by attempting to move the motor mount by hand. The bracket should not budge at all. If you can shift it even slightly, tighten further. Stop when you meet solid resistance, but avoid over tightening, which can crack plastic brackets or strip threads.
Inspect your mounting hardware regularly during the season. Water exposure and vibration gradually loosen connections. Re tighten your knobs every few weeks, especially after intense use or rough water conditions.
Use a wrench that fits snugly on your mounting knob. Loose fitting tools slip and round off edges, making future tightening difficult. The correct tool size ensures maximum torque transfer to your bracket.
Temperature changes affect bracket tension. Cold water contracts plastic slightly, while sun exposure expands it. Check your tightness before each trip, particularly after weather changes.
This preventative approach keeps your motor stable and secure. Consistent maintenance eliminates most slipping problems before they develop into serious issues during your time on the water.
Common Mistakes That Cause Repeat Slipping
Most kayak owners repeat the same mistakes that cause their trolling motor bracket to slip again and again. Understanding these errors helps you avoid frustration on the water.
Insufficient tightening force is the number one culprit. Many people tighten their mounting knobs until they feel mild resistance, then stop. Your bracket needs aggressive, firm pressure to grip properly. The knob should feel tight enough that you cannot easily turn it by hand. Underestimating how much force is needed leads to slipping within days of use.
Allowing your motor to slam down forcefully causes immediate slippage problems. When you deploy or retract your motor quickly, the impact loosens the bracket connection. Gentle, controlled movements during deployment keep everything secure. Rough handling undoes all your tightening work.
Using inadequate washers creates another common issue. Small or thin washers don’t provide enough surface area for gripping. Large round metal washers distribute pressure evenly across the plastic bracket. Skipping this step or choosing undersized washers guarantees future slipping.
Neglecting regular inspection during the season allows problems to develop silently. Your bracket loosens gradually from vibration and motor movement. Check your mounting hardware every few outings, not just before trips.
Ignoring temperature changes affects bracket tension significantly. Cold weather contracts plastic slightly, reducing grip. Warm sun exposure expands it. Seasonal adjustments keep your bracket consistently secure.
Finally, mixing incompatible hardware causes recurring issues. Using mounting knobs designed for different bracket types creates gaps and poor contact. Verify your hardware matches your specific bracket model before installation.
Avoiding these mistakes means your trolling motor stays stable and secure throughout the entire season.
Troubleshooting: When the Bracket Still Slips After Repairs
Sometimes your bracket keeps slipping even after you’ve tried basic fixes. This frustration happens more often than you’d think. The good news is that deeper solutions exist.
Check your mounting surface first. Look closely at where the bracket connects to your motor mount. Plastic can develop micro cracks or permanent deformation over time. These damaged areas prevent a secure grip no matter how tight you crank down. Run your finger across the contact points. You should feel smooth, flat surfaces.
The heat and tighten method works when standard fixes fail. Large round metal washers get heated and pressed firmly into plastic bracket material. The plastic softens and molds around the washer shape. This creates a much larger gripping surface. Once cooled, the plastic hardens with the washer embedded into it. Your mounting knob now has far more material to grip.
Inspect your mounting hardware for wear. Knobs, bolts, and screws can strip or become damaged. Stripped threads mean they won’t tighten properly no matter your effort. Replace any hardware that looks bent, corroded, or damaged.
Consider shaft compatibility issues. Different motor brands have slightly different shaft diameters and bracket designs. A bracket designed for one brand might not grip another brand’s shaft as securely. Check your motor’s specifications against your bracket type.
Test everything before hitting the water. After repairs, grab your motor firmly and try moving it side to side. It shouldn’t budge at all. If movement exists, repeat your tightening process or explore the heat method. Persistent slipping after these steps usually means your bracket needs replacement with a more durable option.
Brand-Specific Notes: Minn Kota, NuCanoe, and Newport Vessels Mounts
Minn Kota, NuCanoe, and Newport Vessels each use slightly different bracket designs. Understanding these differences helps you fix slipping problems quickly.
Minn Kota motors like the Terrova and Riptide models feature round shaft designs. The bracket clamps around this shaft with metal knobs on both sides. These knobs tighten down to grip the shaft firmly. If your Minn Kota bracket slips, focus on tightening these knobs with steady, even pressure on both sides.
NuCanoe brackets often use a different clamping mechanism. They typically feature a side mount system with a wedge style clamp. This design requires you to tighten the clamp bolt while ensuring the wedge sits flush against the motor shaft. NuCanoe systems benefit greatly from adding metal washers under the clamp bolt.
Newport Vessels mounts use a universal bracket style. These brackets work with most standard motor shafts. The clamping knobs on Newport systems need firm, consistent tightening. Many Newport users report success with the heat and tighten method using metal washers.
Cross compatibility matters. Some brackets fit multiple brands, but mixing components from different manufacturers can cause fit issues. Always verify your bracket matches your specific motor model before assuming it’s a simple tightening problem.
Check your shaft diameter. Minn Kota shafts may differ slightly from Newport Vessels shafts. A bracket designed for one brand might not grip another brand’s shaft as securely. This incompatibility creates persistent slipping even after aggressive tightening.
Before purchasing replacement hardware, identify your exact motor brand and model. This ensures you get the right bracket design for your specific kayak trolling motor setup.
Final Thoughts
A slipping trolling motor bracket feels frustrating, but it’s fixable. Most problems come down to simple things like loose knobs or worn washers.
Tightening firmly solves many cases right away. Don’t be afraid to apply real pressure when securing your bracket.
The heat and tighten method remains your best tool for stubborn slippage. Heating washers and pressing them into plastic creates a lasting bond that resists movement.
Metal brackets outperform plastic ones over time. If you fish often, upgrading your bracket material saves you future headaches.
Remember that your mounting hardware matters just as much as your bracket. Quality knobs, bolts, and washers keep everything locked in place.
Regular checks throughout the season catch small issues before they become big problems. A quick inspection before each trip takes only a minute.
Brand compatibility plays a bigger role than most anglers realize. Matching your hardware to your specific motor model prevents unnecessary slipping.
Testing your repairs before hitting the water gives you confidence. Grab the motor and shake it gently. If it holds steady, you’re ready to go.
Patience pays off when fixing bracket issues. Rushing the repair often leads to repeat problems down the line.
Your kayak setup deserves a stable, secure motor mount. Taking time to fix slipping properly means smoother trips and less stress on the water.
Small adjustments now prevent bigger headaches later. Whether you tighten, replace washers, or switch to metal brackets, each fix brings you closer to a stable ride.
A secure bracket means a secure trip. Keep these fixes in mind, and your motor stays exactly where you want it every time you paddle out.
Frequently Asked Questions
Why does my trolling motor bracket keep slipping even after I tighten it?
Slipping happens when mounting knobs don’t get enough pressure. You need to apply firm, aggressive force when tightening. Many people stop too early and think it’s secure when it actually isn’t.
The bracket needs to grip the shaft tightly. If you’re still experiencing slippage after tightening hard, your washers may be too small. Larger metal washers distribute pressure across a bigger surface area.
Can I use the heat and tighten method on my plastic bracket?
Yes, this method works well for plastic brackets. Heat large round metal washers until they’re warm to the touch. Press them firmly into the plastic while it’s still warm.
The plastic will deform slightly and conform around the washer shape. This creates a much stronger grip than the original flat surface. Let everything cool before testing your motor.
What’s the difference between metal and plastic brackets?
Metal brackets last longer and resist wear better than plastic ones. Plastic brackets can crack or strip over time, especially with repeated tightening and loosening.
If your plastic bracket keeps slipping despite repairs, upgrading to a metal bracket might be your best solution. Metal won’t deform under pressure like plastic does.
Does motor brand affect bracket slipping issues?
Different brands use slightly different shaft diameters and clamping designs. Minn Kota, NuCanoe, and Newport Vessels each have their own bracket styles.
Mixing brackets from different brands can cause compatibility problems. Always check your motor brand and model before buying replacement hardware. Using the correct bracket for your specific motor prevents future slipping.
How do I know if my mounting hardware is worn out?
Inspect your knobs, bolts, and screws regularly. Look for cracks, stripped threads, or visible damage.
If hardware looks damaged, replace it before it causes bigger problems. Worn hardware won’t grip properly no matter how hard you tighten.

Hi, I’m Lola Griffin 👩💻, the voice and creator behind ResizerBox. I’m a passionate tech enthusiast who loves exploring the latest gadgets, smart devices, and trending Amazon electronics. Through my reviews, I share honest insights, real-world testing experiences, and practical buying advice to help readers make confident tech choices.