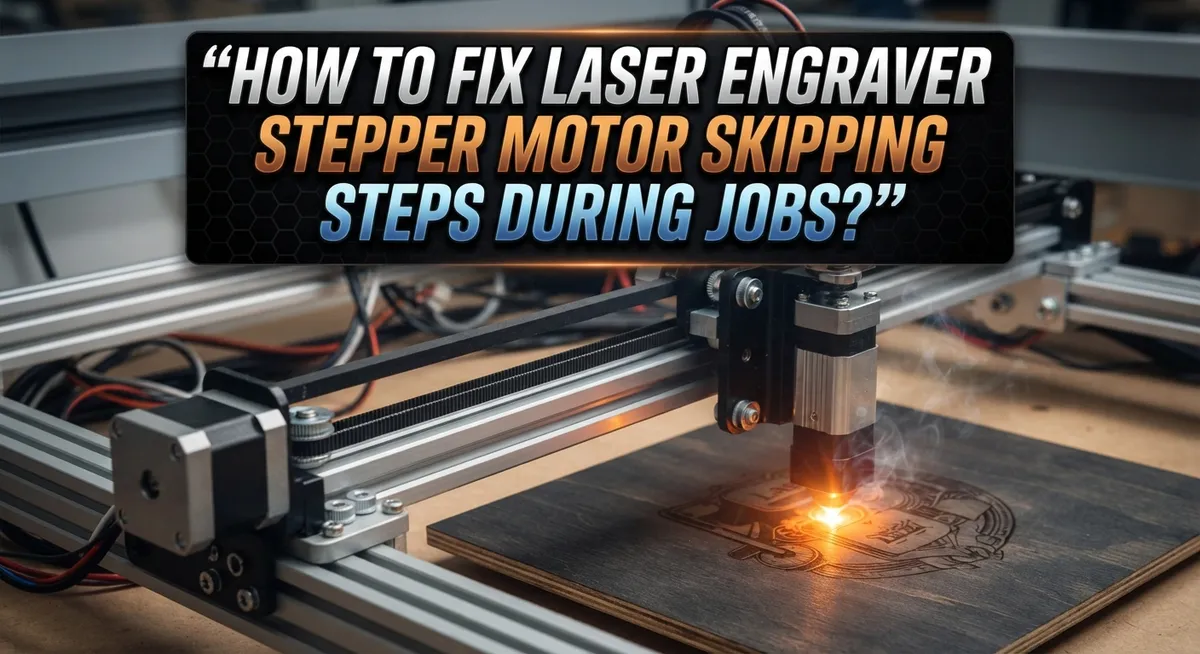
How To Fix Laser Engraver Stepper Motor Skipping Steps During Jobs?
Your laser engraver hums along, then suddenly you notice it. Lines that should be straight look jagged. Text appears warped. Shapes shift out of place mid job.
This frustrating problem usually points to one culprit: skipping steps in your stepper motor. When this happens, your machine loses track of its exact position. The result is a ruined project and wasted material.
The good news? You can fix this issue without buying a new machine.
Stepper motor skipping happens for several reasons. Sometimes it’s excessive speed. Other times, belts are too loose or too tight. Pulleys can slip out of alignment too.
In a Nutshell
- Check your speed and acceleration settings first. High speeds often overwhelm the motor. Try lowering values by 50 to 100 mm/s and test again.
- Inspect belts and pulleys carefully. Loose belts cause slipping. Misaligned pulleys create uneven pressure on the motor shaft.
- Look at motor current and driver heat. Low current makes motors weak. Overheated drivers lose power and skip steps randomly.
- Clean and lubricate your rails often. Dust and dry rails create friction. Friction forces your motor to work harder than it should.
- Keep signal cables away from metal parts. Metal enclosures can corrupt motor signals. This corruption leads to missed steps during jobs.
- Verify your gantry stays square. A crooked gantry stresses motors unevenly. This stress often shows up as sudden skipping.
What Causes Stepper Motor Skipping in Laser Engravers
Stepper motor skipping happens when your laser engraver moves the cutting head but the motor fails to complete all its commanded steps. The head ends up in the wrong position, ruining your design or cutting unevenly across the material.
Excessive speed settings rank as the top cause. When you push your engraver too fast, the motor cannot keep up with electrical commands. The stepper motor has physical limits, and speeds above those limits force it to skip.
Insufficient belt tension creates another major problem. Loose belts slip on pulleys instead of gripping them firmly. Your motor spins, but the belt slides, so the gantry doesn’t move as far as it should.
Misaligned pulleys force belts to track incorrectly. When pulleys sit at angles to each other, belts wear unevenly and slip more easily. This misalignment also increases friction on the system.
Driver chip overheating reduces motor power significantly. The driver circuit controls electrical current to your motor. When it gets too hot, it throttles back current automatically to protect itself. Weaker current means weaker motor force, leading to skipping.
Low motor current settings directly weaken your motor’s holding power. If your driver receives commands to reduce current, the motor cannot hold its position against friction and resistance.
Signal corruption from cables near metal enclosures causes erratic motor behavior. Metal parts can interfere with electrical signals traveling through motor wires. Corrupted signals make the motor skip or stall unpredictably.
Gantry misalignment creates uneven stress on motors. When your cutting head frame sits crooked, one axis bears more load than the other. The overloaded motor skips first.
Mechanical obstructions like dust buildup or dry rails increase friction dramatically. Your motor must work harder to move the gantry, and at high speeds, it cannot overcome this extra resistance.
Signs Your Machine Is Skipping Steps
Your laser engraver shows several clear warning signs when steppers skip steps. Learning to spot these signs helps you catch problems early before they ruin your projects.
Watch for position drift first. Your engraver starts a job perfectly aligned, but halfway through, the image shifts sideways or upside down. The cutting head moves, but the motor didn’t rotate enough. You end up with misaligned lines or incomplete cuts. This drift gets worse as jobs continue.
Listen for unusual sounds from the motor. A healthy stepper motor hums smoothly. A skipping motor makes clicking or grinding noises. You might hear rapid chattering sounds. These noises mean the motor is losing position repeatedly.
Check your finished engravings for physical clues. Blurry or distorted images appear when the head moves too fast for the motor to keep pace. Straight lines become wavy. Text looks stretched or compressed. Corners don’t meet properly. These defects concentrate in specific areas, usually where your machine runs fastest.
Monitor the gantry movement during operation. Watch the cutting head as it moves. Does it hesitate or stutter? Does it seem to “catch” and then jump forward? These micro pauses indicate step loss.
Feel for vibration changes. Excessive vibration in the machine frame often accompanies skipping. The whole unit might shake more than normal. Loose belts and misaligned pulleys create this vibration.
Notice if problems happen consistently. Skipping often occurs at specific speeds or during certain directions of movement. Your Y axis might skip while the X axis runs fine. Problems might only appear during fast diagonal cuts.
Pay attention to temperature. If your machine skips steps and feels hot to the touch near the motor driver, overheating is likely the culprit. The driver loses power as it heats up.
Step-by-Step Diagnostic Checklist
Start your diagnostic process by turning off your laser engraver completely. Safety comes first before any troubleshooting begins.
Check for physical obstructions around the gantry and carriage. Move the head by hand (power off) along both axes. You should feel smooth, consistent resistance. Any grinding, catching, or rough spots indicate mechanical problems that will cause skipping.
Next, inspect your belt tension carefully. Press the belt midway between pulleys with moderate finger pressure. It should deflect about a quarter inch. Belts that are too loose slip on pulleys. Belts that are too tight strain motors and overheat driver chips.
Examine pulley alignment by looking at belt tracking. The belt should run straight without wandering left or right on the pulley. Misaligned pulleys force belts to ride at angles, creating friction and resistance that exhausts your motor.
Clean your linear rails thoroughly with a soft brush. Remove dust, debris, and dried lubricant buildup. Apply fresh lubricant sparingly to the rails. Dry or dirty rails create excessive friction that forces motors to work harder.
Measure your gantry squareness by checking corner diagonals. Use a measuring tool to compare opposite corner distances. If diagonals differ by more than a few millimeters, your gantry is twisted, creating uneven stress on motors.
Test your signal cables for damage. Look for cuts, pinches, or exposed wires. Cables routed near the metal frame or power supply can pick up electrical noise. Separate signal cables from power cables and metal surfaces.
Check your motor current settings in your software. Verify they match your motor specifications. Low current settings produce weak holding force.
Document each finding. Take photos or notes. This record helps you identify patterns and track which fixes actually work for your specific machine.
Adjusting Speed, Acceleration, and Belt Tension
Your speed settings directly impact whether your stepper motors complete every commanded step. Excessive speed forces motors to work beyond their torque limits. Start by reducing your maximum speed by 50 to 100 mm per second from your current settings.
Test your engraver at this lower speed to see if skipping stops. If it does, you’ve found your culprit. Gradually increase speed in small increments until skipping returns, then back off slightly. This gives you a safe operating window.
Acceleration settings matter just as much as speed. Your motor needs time to ramp up power smoothly. Rapid acceleration demands sudden current surges that drivers cannot always deliver. Lower your acceleration values, especially on the Y axis, which typically handles heavier loads.
Check your belt tension next. A loose belt slips under load and creates the illusion of skipping steps. A belt that’s too tight overheats your motor and driver chip. Your belt should feel firm but allow slight deflection when pressed midway between pulleys.
Proper tension prevents both slipping and excessive strain. Tighten belts gradually and retest after each adjustment. Document your final tension settings so you can replicate them during maintenance.
Pulley alignment affects belt tracking significantly. Misaligned pulleys cause belts to ride off center, increasing friction and drag. Check that pulleys sit parallel to each other. Use a straightedge or alignment tool to verify they line up perfectly.
After adjusting speed, acceleration, and belt tension, run a test job on scrap material. Watch for position drift or distortion. Make small tweaks to one variable at a time. This approach isolates which setting actually solved your problem.
Remember to recalibrate your steps per millimeter after making mechanical changes like belt tension adjustments. Your machine may need new calibration values to maintain accuracy.
Checking Motor Current, Driver Heat, and Wiring
Your stepper motor driver chip generates heat during operation. When this heat builds up, the driver reduces power to protect itself. This reduction causes your motor to skip steps because it cannot produce enough force to move the carriage.
Start by checking your driver’s temperature during a job. Place your hand near the driver chip carefully. If it feels too hot to touch comfortably, overheating is your problem. Most driver chips should stay warm but not burning hot.
Poor airflow causes most driver overheating issues. Check if your machine’s enclosure blocks air around the driver. Remove any covers or panels blocking ventilation. Some users add small cooling fans near drivers to improve airflow significantly.
Next, verify your motor current settings in your software. Current controls how much power flows to each motor. Low current means weak force, which leads to skipping. High current generates excessive heat and damages components. Your machine manual specifies the correct current range for your motors.
Inspect all wiring connections carefully. Loose connections increase electrical resistance, which creates heat and reduces motor power. Check every connector between your control board and motors. Push connectors firmly into place. Look for bent pins or corrosion inside connectors.
Signal cables near metal enclosures pick up electrical noise. This noise corrupts the step signals sent to your motors. Route signal cables away from metal parts and power cables. Keep signal wires at least 6 inches from metal surfaces when possible.
Test your cables for physical damage. Look for cuts, pinches, or exposed wire. Damaged cables cannot carry clean signals. Replace any visibly damaged wiring before running your engraver again.
After making these checks, run a test job at reduced speed. Monitor the driver temperature and watch for skipping. If problems continue, document your findings for further troubleshooting steps.
Recalibrating and Testing After Repairs
After you fix the mechanical and electrical issues causing step skipping, you need to verify your repairs actually work. This is where recalibration and testing become essential.
Start by recalibrating your steps per millimeter settings. This value tells your engraver how many motor steps equal one millimeter of movement. If you replaced belts, pulleys, or adjusted anything mechanically, your original calibration may no longer be accurate. Use a test pattern with known dimensions. Engrave a square that should be exactly 100 millimeters on each side. Measure the actual result carefully. If your engraved square measures 98 millimeters, you need to adjust your calibration slightly.
Run several test jobs on scrap material before returning to important projects. Start with simple designs that move slowly. Gradually increase speed and complexity as you confirm the motor performs consistently. Watch and listen during these tests. You should hear smooth, continuous motor operation without grinding or stuttering sounds.
Create a test file that moves your gantry across the full work area in all directions. This reveals if skipping occurs in specific locations or only at certain speeds. Some machines skip more on the Y axis than the X axis, so test both thoroughly.
Check your engraved results for accuracy and quality. Skipping creates uneven lines, missing details, or shifted patterns. Even slight skipping becomes obvious in fine engravings or text.
Document your calibration settings and test results. Keep notes about which speed settings work reliably and which ones cause problems. This information helps you avoid issues during future jobs.
Run at least three successful test jobs without any skipping before you consider the repair complete. This confirms your fixes are stable and reliable under real working conditions.
Common Mistakes That Make Skipping Worse
Many users make mistakes that actually worsen step skipping instead of fixing it. Understanding these errors helps you avoid them during troubleshooting.
The most common mistake is over tightening your belts. People think tighter belts prevent slipping, but excessive tension creates enormous strain on your motor and driver. Your stepper motor works harder to move the gantry, which causes the driver chip to overheat rapidly. Overheated drivers lose power and skip steps more frequently. Proper belt tension should feel firm but allow slight flex when you press the belt between pulleys.
Another frequent error involves ignoring your driver chip temperature completely. Many users assume if the machine runs, the driver must be fine. This is incorrect. Your driver generates significant heat during jobs, and poor ventilation makes this worse. If you never check the driver’s temperature, you won’t notice when it’s throttling power to protect itself. This throttling directly causes step skipping.
Incorrect motor current settings cause serious problems too. Setting current too low means your motor lacks power to complete steps under load. Setting current too high creates excessive heat in the driver without improving performance. Most users never adjust these settings and run at factory defaults, which may not match their specific machine setup.
Poor cable management introduces electrical noise that corrupts step signals. Routing signal cables next to metal enclosure walls or power cables picks up interference. This noise confuses your stepper driver about whether a step command actually occurred. The result is inconsistent, unpredictable skipping that seems random.
Finally, many people skip the recalibration step after making repairs. Your steps per millimeter setting becomes inaccurate after you adjust belts, replace pulleys, or modify anything mechanical. Running jobs without recalibrating means your machine receives incorrect positioning commands, which stresses the motors unnecessarily.
Avoiding these mistakes puts you on the path to a properly functioning engraver.
Final Thoughts
Stepper motor skipping feels frustrating, but it rarely means your machine is broken. Most causes trace back to simple mechanical or electrical issues you can fix yourself.
Patience matters more than speed when diagnosing these problems. Rushing through checks often leads you to miss the real cause.
Work through each potential issue in order. Start with the simplest fixes like belt tension and obstructions before moving to more complex electrical checks.
Your engraver depends on precise coordination between motors, belts, and pulleys. When one part fails, the whole system suffers.
Small adjustments often solve big problems. A slight speed reduction or belt tightening can eliminate skipping entirely without major repairs.
Keep track of what settings work for your specific machine. Every laser engraver behaves slightly differently based on its build quality and components.
Write down your speed limits, current settings, and any adjustments you make. This record helps you troubleshoot faster if problems return later.
Regular maintenance prevents most skipping issues from happening in the first place. Check your belts and clean your rails on a consistent schedule.
Don’t ignore small changes in your engraving quality. Early signs of skipping are easier to fix than problems that have gotten worse over time.
Your machine will tell you when something needs attention. Listen for unusual sounds and watch for uneven engraving results.
Fixing stepper motor issues builds your confidence with the entire machine. You learn how each component works together to create accurate results.
Take your time with each troubleshooting step. Rushing repairs often creates new problems instead of solving the original issue.
With careful attention and the right approach, you can keep your laser engraver running smoothly. Most skipping problems have straightforward solutions once you identify the actual cause.
Your engraver deserves proper care to deliver consistent, quality results every time you use it.
Frequently Asked Questions
Why does my stepper motor skip steps during engraving jobs?
Step skipping happens when your motor loses position. The most common culprits are excessive speed settings, loose belts, and misaligned pulleys. Driver chip overheating also causes this problem. Your machine tries to move faster than the motor can handle, so it skips steps to catch up.
Low motor current settings make skipping worse. Signal cables running near metal enclosures pick up electrical noise that corrupts movement commands. Gantry misalignment forces motors to work harder than necessary.
How do I know if my belt tension is correct?
Press on your belt midway between pulleys. It should move about half an inch with moderate finger pressure. Too tight causes overheating and motor strain. Too loose allows slipping and skipping.
Check both X and Y axis belts. They may need different tension levels depending on your machine design. Inspect the belt surface for wear, cracks, or glazing. Replace worn belts completely to restore proper grip on pulleys.
What speed settings prevent step skipping?
Start by reducing your maximum speed by 50 to 100 millimeters per second. Lower your acceleration settings, especially on the Y axis. Many users find their machine runs reliably at 70 to 80 percent of maximum speed.
Test different speeds on scrap material first. Your specific machine may have different limits based on belt condition, pulley alignment, and motor quality. Document which speeds work without skipping.
Can cable management really affect step skipping?
Yes. Route signal cables away from your metal machine frame and power supply lines. Twisted or bundled cables reduce electrical noise. Separation prevents interference with stepper motor signals.
Check all cable connections for looseness. Corroded or loose connectors introduce signal corruption. Clean connector pins gently if they show discoloration.

Hi, I’m Lola Griffin 👩💻, the voice and creator behind ResizerBox. I’m a passionate tech enthusiast who loves exploring the latest gadgets, smart devices, and trending Amazon electronics. Through my reviews, I share honest insights, real-world testing experiences, and practical buying advice to help readers make confident tech choices.