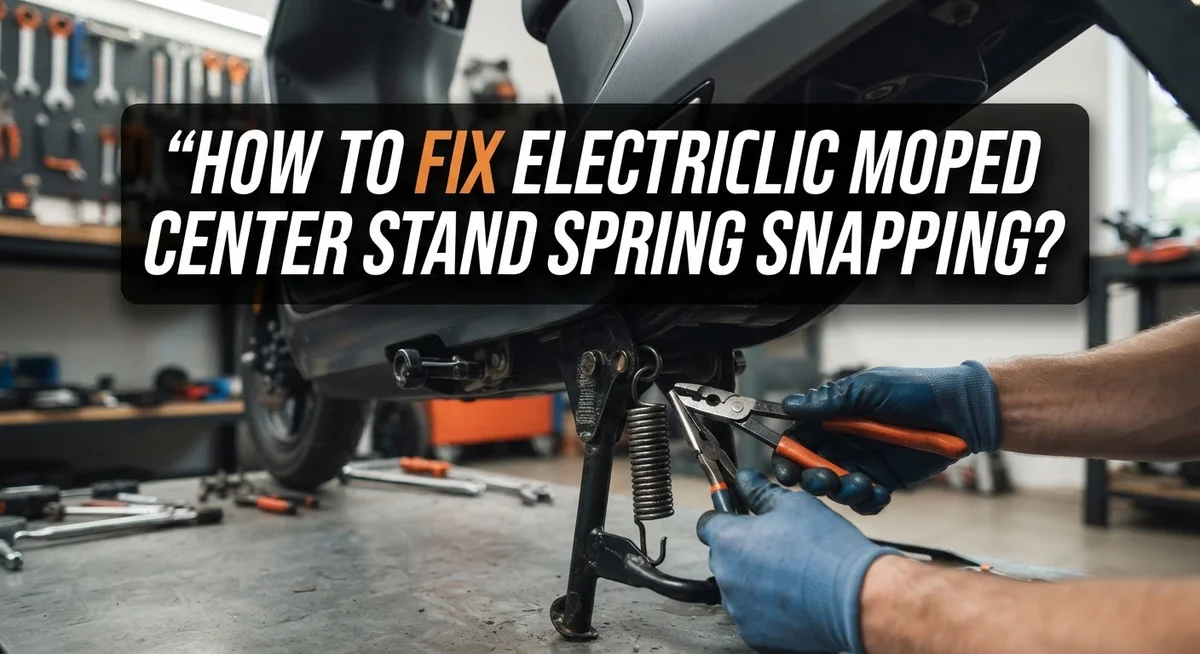
How To Fix Electric Moped Center Stand Spring Snapping?
Your electric moped’s center stand spring snapping can turn a simple parking task into a real headache. One moment the kickstand holds firm. The next, it falls flat or refuses to retract at all.
This problem happens more often than you think. A broken or misaligned spring puts extra strain on the stand. Over time, this leads to snapping and a wobbly, unreliable center stand.
The good news? You can fix this yourself with some basic tools and patience.
In a Nutshell
- Check the spring post first. A lot of snapping happens because the post was welded too far back. This puts extra strain on the spring every time you use the stand.
- Position your moped safely. Place a sturdy board like 1/2 inch plywood or a 2×4 under the rear wheel. This keeps everything stable while you work.
- Use a cord and spoke trick. Tie a strong cord to the spring loop. Attach the other end to a rear wheel spoke for leverage.
- Pull the wheel to create tension. Rotating the wheel helps guide the new spring into its correct position without straining your hands.
- Use the stand as a lever. This helps line up the pivot holes so everything fits together smoothly.
- Release tension carefully. Slide pennies between the coils before removing the old spring. This step keeps you safe from sudden snapping.
Understanding the Center Stand Spring and Why It Snaps
A center stand spring is a metal coil that holds your moped’s kickstand in place. When you park, this spring pushes the stand down and keeps it stable. When you ride, the spring retracts the stand back up against the frame.
The spring works by storing and releasing energy. Think of it like a compressed muscle. Over time, this constant stretching and contracting weakens the metal. Eventually, the spring loses its strength and snaps.
Why does this happen so often? Several reasons cause premature failure. The spring post position matters greatly. If the post was welded too far back during manufacturing, it creates uneven tension. This imbalance puts extra stress on one side of the spring coil. The metal fatigues faster and breaks sooner.
Rust and corrosion also damage springs. Moisture gets into the coils and eats away at the metal from inside. Road salt makes this problem worse, especially in winter months. A corroded spring becomes brittle and snaps easily.
Poor maintenance speeds up failure too. A spring that never gets cleaned or lubricated works harder than it should. Dirt buildup prevents smooth movement. The spring strains with each use.
What happens when it snaps? Your kickstand falls or won’t retract properly. The moped becomes unstable when parked. You cannot leave it standing safely.
The good news is that understanding these causes helps you prevent future problems. Keeping your spring clean and checking the post position regularly extends its life. When replacement time comes, you will recognize the warning signs early and avoid being stuck with a fallen moped.
Tools and Materials You’ll Need
Before you start working on your electric moped’s center stand spring, gather the right tools and materials. Having everything ready makes the job faster and safer.
Basic hand tools are essential. You will need an adjustable wrench to remove bolts holding the spring assembly. A socket set helps with different bolt sizes. Keep a flathead screwdriver nearby for prying and adjusting components.
For spring removal and installation, get a strong cord or rope. This cord ties to the spring loop and attaches to a rear wheel spoke. The cord creates mechanical advantage when you need to pull the spring into position. Make sure the cord is thick enough to handle tension without fraying.
You’ll also need safety materials. Wear work gloves to protect your hands from sharp edges and rust. Safety glasses keep debris out of your eyes during removal.
For stabilization, have a sturdy board ready. A half inch piece of plywood or a 2×4 wooden block goes under the rear wheel. This prevents your moped from shifting while you work.
Pennies serve a specific purpose here. You’ll insert them between the spring coils to release tension safely before removing the old spring. Keep several pennies on hand for this step.
Consider having a new replacement spring available. Measure your old spring’s length and diameter before shopping. Having the replacement ready means you won’t stop halfway through the job.
A flashlight or work light helps you see inside the spring assembly clearly. Rust and corrosion hide in dark areas, and good lighting prevents mistakes.
Finally, keep rags and a wire brush nearby. You’ll clean rust and debris from the mounting points. Clean surfaces ensure your new spring sits properly and functions correctly.
Preparing Your Moped for Safe Repair
Getting your electric moped ready for center stand spring repair starts with proper positioning and safety checks. This step prevents accidents and makes the actual work much easier.
Start by placing your moped on a flat, level surface. Find solid ground where the moped won’t tip or roll during your work. Concrete or asphalt works best. Avoid gravel, dirt, or sloped areas.
Next, position the moped so the center stand is fully extended and supporting the rear wheel. The moped should sit stable and balanced. You want the rear wheel slightly off the ground so you can rotate it freely later.
Place a sturdy board under the rear wheel as a backup support. Use 1/2 inch plywood or a 2×4 piece of wood. This board catches the wheel if the stand fails during your repair. It adds an extra layer of safety and gives you peace of mind while working.
Check that you have clear space around the moped. You need room to move around the stand area, access the spring, and rotate the rear wheel. Clear away any tools, cords, or obstacles from your work zone.
Inspect the center stand for obvious damage before starting. Look for cracks, bends, or rust on the stand itself. If the stand is severely bent, you may need to address that first.
Finally, gather all your tools and materials within arm’s reach. Having everything nearby means you won’t need to leave your work area during the repair. This keeps your moped stable and your focus on the job. You’re now ready to begin the actual spring replacement process safely.
Step-by-Step: Removing the Broken Spring Safely
Start by securing your moped so it won’t move during spring removal. The rear wheel should rest on the plywood or 2×4 board you positioned earlier. This extra support prevents the moped from shifting while you work on the center stand.
Locate the broken spring on your center stand assembly. You’ll see it attached at two points: one end connects to the stand itself, and the other end anchors to the frame. Take a moment to examine how the spring currently sits before you disturb it.
Tie a strong cord to the spring loop. Attach the other end of the cord to a spoke on the rear wheel. This setup creates mechanical advantage when you need to manage spring tension. The cord acts like a helper, keeping tension controlled throughout removal.
Insert pennies between the spring coils carefully. Work your way around the coil, spacing pennies evenly. This step is crucial because it releases built up tension gradually. The pennies prevent the spring from suddenly snapping back at you, which could cause injury.
Use the center stand itself as a lever to help align the pivot holes. Gently rock the stand back and forth while maintaining cord tension. This movement helps separate the spring from its attachment points without forcing anything.
Once the spring feels loose, you can remove it completely. Keep the cord attached until the spring is fully free from the assembly. Work slowly and deliberately throughout this entire process. Rushing leads to mistakes or personal injury. The pennies between coils remain in place until you’re completely finished removing the old spring.
Step-by-Step: Installing and Tensioning the New Spring
Now that you’ve removed the broken spring safely, installing the new one requires careful attention to tension and alignment. Start by positioning your moped exactly as you did during removal. The rear wheel should rest on your sturdy board for stability.
Take your new spring and examine where it attaches to both the center stand and the frame. Alignment is critical here because incorrect positioning causes the kickstand to malfunction again. Place the spring’s lower end onto the frame attachment point first.
Tie a strong cord to the spring loop, just like you did with the broken spring. Attach the cord’s other end to a rear wheel spoke. This cord becomes your mechanical advantage for pulling the spring into proper tension.
Slowly rotate the rear wheel forward using the cord. This action pulls the spring into position gradually. Move the wheel in small increments rather than yanking it quickly. Watch the spring carefully as it stretches into place.
Use the center stand as a lever to help align the pivot holes between the spring and the stand itself. Press down gently on the stand while the spring is under tension. This helps the holes line up perfectly for insertion.
Once everything aligns, you can insert the spring’s upper end into the stand attachment point. Keep tension on the cord throughout this process. When both ends are secured, release the cord slowly and check that the spring holds the stand properly.
Test the kickstand several times by extending and retracting it. The stand should move smoothly without resistance. If it feels tight, the spring tension is correct. Your repair is complete when the kickstand functions reliably.
Checking Spring Post Alignment and Welding Position
Spring post alignment directly affects whether your kickstand works smoothly or fails repeatedly. The welding position determines how the spring pulls and releases the stand.
Start by examining where the spring post attaches to your moped’s frame. This metal piece must sit in the correct location relative to the center stand pivot point. If the post is welded too far back, the spring cannot pull the stand up with enough force. If it’s positioned too far forward, the stand may not stay down properly when extended.
Check the distance between your spring post and the center stand’s main pivot hole. This gap should allow the spring to work through its full range of motion without binding or stretching beyond its limits. Measure from the pivot hole to where the spring connects on the frame.
Look at the welding seams around the spring post. Clean welds appear smooth and complete without cracks or gaps. Broken welds cause the post to shift position, which throws off your entire spring system. Inspect both the top and bottom of the weld bead.
If your spring post seems loose or misaligned, the welding may have failed. You’ll need to have it rewelded by someone with proper equipment and experience. Do not attempt to operate your moped with a loose spring post.
The post should sit perpendicular to your frame surface. Any angle or tilt changes how the spring functions. Use a straight edge or level to verify the post stands upright. Correct alignment prevents future spring snapping and keeps your kickstand reliable for years.
Common Mistakes to Avoid During Reinstallation
Reinstalling your center stand spring requires avoiding several critical mistakes that lead to repeated failures. Understanding these errors helps you complete the job correctly the first time.
Never skip tension relief before reinstallation. Many people attempt to force the spring back into position without inserting pennies between the coils first. This causes the spring to snap again or fly out unexpectedly. Always insert pennies gradually to release tension safely before you touch any attachment points.
Incorrect moped positioning creates alignment problems during reinstallation. Your moped must sit flat and stable on the center stand throughout the entire process. Place a 2×4 or half inch plywood under the rear wheel for proper support. An unstable moped shifts during work, causing the pivot holes to misalign with the spring attachment points.
Rushing the cord tension process causes installation failures. Pull the wheel slowly and steadily when using the cord attached to your spring loop. Quick jerking motions can bend the spring or damage attachment points. Let the mechanical advantage work gradually.
Forgetting to check spring post welding before reinstallation wastes your effort. If the post sits too far back or at an angle, your new spring will fail just like the old one. Inspect the welding seams carefully and verify the post sits perpendicular to your frame surface.
Don’t leverage the center stand without securing the spring first. Many people try to use the stand as a lever before the spring’s upper end is properly inserted into the attachment point. This damages both the spring and the stand itself.
Finally, avoid testing the kickstand immediately after installation. Let everything settle for several hours before extending and retracting it repeatedly.
Troubleshooting a Kickstand That Still Falls or Sticks
When your kickstand falls unexpectedly or gets stuck in place, the spring needs troubleshooting. A failing spring creates these exact problems. You’ll notice the stand won’t stay extended or won’t retract smoothly.
Start by positioning your moped on level ground. Place a 1/2″ plywood block or 2×4 under the rear wheel for stability. This prevents your moped from shifting while you work. Position yourself where you can safely observe the spring mechanism.
Inspect the spring visually first. Look for obvious breaks, cracks, or permanent bends in the coils. A snapped spring won’t function no matter how well you adjust it. Check if the spring still has tension by gently pushing the kickstand. A loose or floppy stand indicates spring failure.
Next, examine where the spring attaches to both the stand and frame. These connection points often loosen or bend. Wiggle the spring gently to identify any play in the attachment points. Movement here means your connections need tightening or realignment.
If the spring appears intact but the stand still malfunctions, the problem may be spring post misalignment. The spring post should sit perpendicular to your frame. Any tilting or angling changes how the spring pulls the kickstand up.
Test the kickstand through several cycles. Extend it fully, then retract it completely. Repeat this five times. If the stand falls during any cycle or feels sticky, spring tension is insufficient or the post is misaligned.
Document what you observe. Does it fall immediately? Does it stick halfway? This information helps you determine whether you need spring replacement or post realignment. Your troubleshooting notes guide your next repair steps.
Final Thoughts
Fixing a snapped center stand spring does not need to be scary. You just need patience and the right steps.
Most failures happen for simple reasons. A misaligned spring post or rushed reinstallation causes most problems. Slow down and check each part carefully.
Remember the core method. Tie a cord to the spring loop and attach it to a wheel spoke. Rotate the wheel to pull the spring into place safely.
Always relieve tension before removing the old spring. Insert pennies between the coils first. This simple trick prevents injury and keeps the process controlled.
Positioning matters just as much as technique. Place your moped on stable ground before you start. Use plywood or a block under the rear wheel for extra support.
Take your time with each step. Rushing leads to mistakes that cause the same problem again. A few extra minutes now saves hours of frustration later.
Once your spring is back in place, test it properly. Extend and retract the stand several times. Watch how the spring reacts under pressure.
If the stand still falls or sticks, check the spring post again. Misalignment is often the hidden cause behind repeated failures. Small adjustments can make a big difference.
Keep a simple checklist for future reference. Note the tools you used and the steps that worked. This makes your next repair much faster.
Electric moped maintenance gets easier with practice. Each repair teaches you something new about your bike. Trust the process and work through each step carefully.
With the right approach, your center stand spring can last a long time. Regular checks help you catch problems early. A little care today keeps your moped running smoothly tomorrow.
Frequently Asked Questions
Why does my kickstand keep falling after I fix it?
Your spring post might be welded in the wrong position. If it sits too far back on the frame, the spring cannot hold the stand up properly. Check where the spring attaches to your frame before reinstalling it. The post should align with the stand’s pivot point. Misalignment is the most common reason for repeated failures.
How do I safely remove a broken spring without getting hurt?
Insert pennies between the coils first. This simple step releases the tension safely. Slide the coins in gradually around the spring. The pennies create space and reduce the pressure pushing outward. Once you’ve added enough pennies, the spring becomes safe to handle. Never skip this step, as springs store dangerous energy.
What’s the best way to position my moped during repair?
Place your moped on level ground. Use a 2×4 board or half inch plywood under the rear wheel for extra stability. This prevents the moped from rolling or shifting while you work. A stable moped makes reinstallation much easier. You’ll have better control and can align the spring accurately.
Can I use a cord to help reinstall the spring?
Yes, a strong cord is very helpful. Tie it to the spring loop and attach the other end to a rear wheel spoke. Slowly rotate the wheel to pull the spring into position. This mechanical advantage lets you tension the spring gradually without forcing it. The cord method works best when your moped is stable and level.
How do I know if my spring post is damaged?
Inspect the welding around the post carefully. Look for cracks in the weld or rust spots. A damaged post won’t hold the spring securely. If you see problems, the post may need rewelding before you reinstall the spring. A solid post is essential for long term reliability.

Hi, I’m Lola Griffin 👩💻, the voice and creator behind ResizerBox. I’m a passionate tech enthusiast who loves exploring the latest gadgets, smart devices, and trending Amazon electronics. Through my reviews, I share honest insights, real-world testing experiences, and practical buying advice to help readers make confident tech choices.