How To Fix Drone Remote Controller Gimbal Stick Snapping?
Your drone remote controller feels different in your hands. The gimbal stick snaps back too fast. Or maybe it feels loose and wiggly when you push it.
This is a common problem for drone pilots. Many DJI controllers, including the RC and FPV Remote Controller 3, face this issue. The cause often lies in internal wiring that flexes and breaks over time.
A snapping gimbal stick is more than annoying. It can lead to real flight problems. Your drone might drift, jerk, or even become hard to control mid air.
In a Nutshell
- Snapping gimbal sticks usually come from wiring damage inside the controller. This happens after repeated stick movement over time.
- Calibration often fixes minor drift. You can adjust stick settings through your controller software before trying anything else.
- Thumbstick modules can be replaced if calibration does not solve the problem. Many controllers allow you to swap out just the damaged part.
- Super glue works as a temporary patch but it will not fix the root wiring issue. Treat it as a short term solution only.
- Full controller replacement may be needed if the internal wiring keeps failing. This is common in certain DJI models with known flexing problems.
- Never fly with a damaged gimbal stick. You risk losing control mid flight, which can damage your drone or hurt someone.
- Check your gimbal assembly often. Catching early signs of drift saves you time and money later.
Understanding Gimbal Stick Snapping and Its Causes
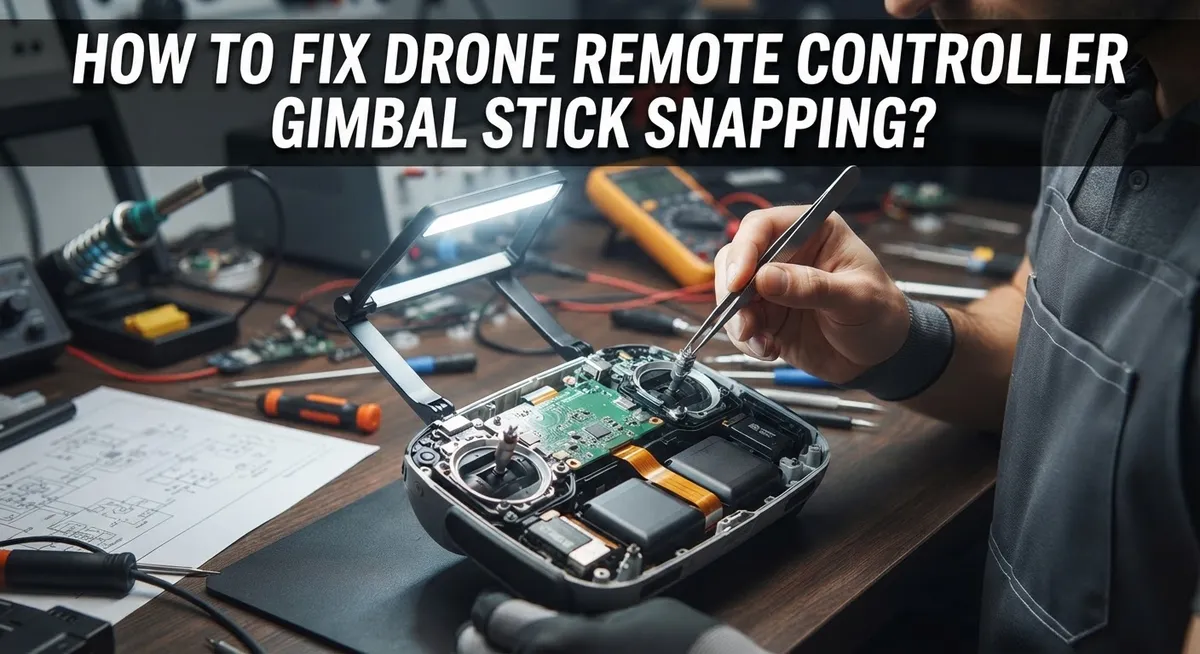
A gimbal stick snaps when the internal components break or separate from their housing. This happens inside your controller, where small wires connect the stick mechanism to the circuit board. When these wires flex repeatedly during flight, they eventually crack or disconnect.
Wiring damage is the main culprit. Your controller’s gimbal assembly has delicate wires that carry signals from the stick to your drone. Each time you move the stick, these wires bend slightly. Over months of flying, this constant bending weakens the connections. Eventually, the wires break, and your stick becomes loose or stops responding.
Repeated stick movement causes the most damage. Aggressive flying with sudden, extreme stick movements puts extra stress on the internal wiring. If you frequently push the sticks to their limits, you speed up the wear process. Gentle, smooth stick movements reduce this strain.
Manufacturing defects can also play a role. Some controllers leave the factory with wiring that isn’t secured properly inside the gimbal assembly. The wires may not be soldered well or protected from movement. These controllers fail faster than others, even with normal use.
Loose sticks often appear before snapping happens. If your stick wiggles side to side before moving, the wiring is likely already damaged. This wobbling means the internal connection is failing. Catching this early gives you time to fix it before the stick completely snaps.
Environmental factors matter too. Extreme heat can damage the solder joints that hold wires in place. Moisture and salt air corrode the metal connections. Dropping your controller can shift the internal wiring out of alignment, causing immediate or delayed failure.
Understanding these causes helps you prevent gimbal stick snapping. You’ll know why it happens and what actions make it worse. This knowledge guides your next steps for repair or replacement.
Signs Your Controller Sticks Are Failing
Your controller sticks might fail before they actually snap. Learning to spot these warning signs saves you from losing control during flight.
Stick drift is the first red flag. Your drone moves in one direction without you touching the controller. This happens when internal wiring loosens and creates false signals. You’ll notice your aircraft drifting left, right, up, or down on its own.
Loose or wiggly sticks come next. Press your thumbstick gently and feel for extra movement. A healthy stick moves smoothly in all directions. A failing stick feels spongy or has play in the housing. You might hear a slight rattling sound when you shake the controller.
Unresponsive inputs are another warning sign. You push the stick forward, but your drone doesn’t react immediately. Or the response feels delayed. This means the wiring inside isn’t sending your commands properly to the aircraft.
Grinding or clicking sounds indicate internal damage. When you move the stick around, listen carefully. Healthy controllers are silent. Strange noises mean components are rubbing or breaking inside.
Inconsistent stick behavior is critical to notice. Sometimes the stick works fine. Other times it acts up. This on and off problem usually points to a loose wire connection that moves when you handle the controller.
Visual cracks or damage on the stick itself also matter. Look at the rubber covering and the plastic housing. Cracks let moisture and dust inside, which accelerates failure.
Don’t ignore these signs. Early detection prevents emergency situations mid flight. If you spot any of these warnings, stop flying immediately and inspect your controller carefully. Address the problem before your next flight session to keep your drone safe and under control.
Step-by-Step: Calibrating Your Gimbal Sticks
Calibrating your gimbal sticks is often the first solution you should try before considering replacement. This process resets your controller’s internal sensors and can fix minor drift issues caused by electrical misalignment rather than physical damage.
Start by accessing your controller’s calibration menu. Most drone controllers have this feature in their settings app or companion software. You will need to connect your controller to your computer or mobile device using the official software provided by your manufacturer.
Once you open the calibration tool, you will see options for gimbal calibration or stick calibration. Select the gimbal stick option. The software will guide you through a series of movements. Follow each instruction carefully because accuracy matters here.
You typically need to move each stick to its extreme positions. Push the stick all the way forward, backward, left, and right. Some calibration processes also require you to move the stick in circular motions. Do this slowly and deliberately to ensure the sensors read your inputs correctly.
Wait for the software to confirm each movement. Do not rush through the process. The system needs time to register the full range of motion for each stick.
After completing all movements, the software will show you calibration results. If the sticks read within normal ranges, your calibration is successful. Test your controller by moving the sticks and watching the on screen indicators respond smoothly.
If calibration completes but your sticks still drift or feel loose, the problem is likely physical damage inside the controller. Calibration cannot fix broken wires or separated components. In that case, you will need to consider thumbstick module replacement or controller replacement depending on the damage severity.
Perform calibration every few months as part of regular maintenance. This keeps your sticks responsive and helps you catch problems early before they become serious.
Step-by-Step: Replacing a Thumbstick Module
Replacing a thumbstick module is a straightforward process that many drone owners can handle themselves. This fix works best when calibration hasn’t solved your stick drift or snapping problems.
First, power off your controller completely. This step is critical for your safety and prevents accidental signal transmission to your drone. Wait a few seconds after shutting down to ensure all power drains from the device.
Next, locate the thumbstick module you need to replace. Most drone controllers have two modules, one for each stick. Check your controller’s manual to find the exact position. The module typically sits underneath a removable cover or panel on your controller’s surface.
Remove the cover or panel carefully. Some controllers use small screws, while others have clips. Keep these fasteners in a safe place so you don’t lose them. Take a photo with your phone before disassembly. This photo helps you remember how everything fits back together.
Gently disconnect the old thumbstick module from its socket. Most modules simply pull out once you’ve removed the cover. Note the orientation and wiring connection before removal. Some controllers have a small connector that unplugs, while others have the module soldered directly to the circuit board.
Insert your new thumbstick module into the same socket. Make sure it aligns properly with the connector. Push it in slowly until you feel it seat completely. Don’t force it, as this can damage the socket or the new module.
Reconnect any wiring if your model requires it. Reattach the cover or panel using the screws or clips you removed earlier. Power your controller back on and test the new stick.
Perform a full calibration after replacement. This ensures your drone recognizes the new module’s range and sensitivity. Your stick should now respond smoothly without drift or snapping issues.
Adjusting Gimbal Spring Tension for Manual Flight
Adjusting your gimbal spring tension helps you control your drone better during manual flight. Spring tension affects how your sticks respond to your inputs and how quickly they return to center position.
Most drone controllers allow you to adjust spring tension through their software settings. Access your controller’s menu and look for gimbal settings or stick sensitivity options. You will typically find sliders that control spring force for each stick independently.
Tighter spring tension means your sticks snap back to center faster. This setup works well if you fly in windy conditions or need quick corrections. Tighter springs also reduce accidental stick drift because the sticks return to neutral quickly.
Looser spring tension gives you smoother, more gradual stick movement. This setting suits calm weather flying and precise camera movements. Many pilots prefer looser tension for cinematic shots because it allows finer control.
Start with your controller’s default spring settings. Fly a short test flight and notice how the sticks feel. If your sticks feel sluggish or too responsive, adjust the tension slightly and test again.
Make small adjustments rather than big changes. Move your spring tension slider by just one or two points at a time. This approach helps you find your ideal setting without overshooting.
Remember that spring tension differs from stick calibration. Calibration fixes accuracy problems, while spring tension adjusts how sticks physically move. You can adjust both settings together for better overall performance.
If your sticks feel loose or wobbly, spring tension adjustment won’t fix the problem. Loose sticks indicate internal wear or wiring damage that requires thumbstick module replacement. Spring adjustment only works on controllers with functioning mechanical components.
Test your adjusted settings on multiple flights before finalizing. Different flying styles may need different spring tensions. What works for racing might not work for photography, so adjust accordingly for your flying needs.
Common Mistakes to Avoid When Diagnosing or Repairing Sticks
Flying with damaged gimbal sticks puts your drone at serious risk. You lose control over throttle, pitch, and roll movements. The aircraft may drop from the sky or fly in unpredictable directions. Never fly with a snapping or broken stick. Always ground your drone until repairs are complete.
Many people skip calibration and jump straight to replacement. This is a mistake. Software calibration solves most stick drift issues without any hardware changes. You waste money and time by replacing parts that don’t need replacement. Try calibration first, always.
Relying only on super glue or temporary DIY fixes creates false confidence. These solutions last days or weeks at best. The internal wiring damage remains unfixed. Your stick will snap again during a flight, potentially causing a crash. Temporary fixes mask the real problem instead of solving it.
Ignoring early warning signs leads to bigger problems. If your stick feels loose or drifts slightly, address it immediately. Early detection prevents complete failure mid flight. Small issues become dangerous emergencies when left alone.
Some people apply excessive force when testing stick movement. Pushing sticks too hard during diagnosis causes additional damage. Handle sticks gently during inspection. Move them slowly through their range to assess the problem without making it worse.
Misaligning the new gimbal module during replacement causes immediate failure. The stick may feel tight, loose, or unresponsive. Take time to seat the module properly. Ensure all connectors click into place firmly.
The biggest mistake is rushing the repair process. Each step matters. Proper diagnosis takes patience. Careful replacement takes attention to detail. These investments prevent repeat failures and keep your drone safe in the air.
Troubleshooting Persistent Drift or Snapping Issues
When your gimbal stick snaps or drifts persistently, the problem usually stems from internal wiring damage rather than simple wear. This happens because the wiring inside your controller flexes repeatedly with each stick movement. Over time, this flexing causes breaks in the electrical connections that control stick responsiveness.
Start by identifying the exact type of drift you’re experiencing. Does your stick return to center slowly? Does it jump around without touching? Does it feel loose and wobbly? Each symptom points to different underlying issues. Loose, wiggly sticks often indicate mechanical wear, while erratic jumping suggests electrical connection problems.
Your first troubleshooting step should always be recalibrating through your controller’s software. Most modern controllers have built in calibration tools that can resolve minor drift issues. Connect your controller to the app, access calibration settings, and follow the on screen prompts. Move each stick through its full range of motion as instructed. Sometimes this simple process fixes persistent drift completely.
If calibration doesn’t solve the problem, inspect the gimbal assembly physically. Look for visible cracks, loose components, or damaged wiring. Check that all internal connections sit firmly in their sockets. A loose connection might appear as a snapping issue but actually needs only reseating.
Never ignore early warning signs of drift. Flying with a damaged gimbal risks losing control of your drone mid flight. What starts as minor drift can worsen quickly during actual flight conditions.
If physical inspection reveals broken wiring or if calibration fails, you’ll likely need to replace the thumbstick module or entire controller. This prevents safety hazards and restores reliable flight control. Attempting temporary fixes like super glue might work briefly, but they don’t address the root electrical problem and can create false confidence before a complete failure occurs during flight.
Final Thoughts
Fixing a snapping gimbal stick does not have to feel overwhelming. Most issues start small, like slight drift or a wobble. Catching these signs early saves you time and money.
Calibration should always be your first step. It solves many problems without opening your controller. Try this before assuming the worst.
If calibration fails, physical inspection comes next. Check the wiring and stick module carefully. Look for loose connections or visible damage.
Replacing the thumbstick module often fixes persistent snapping. This works well when wiring has failed internally. Take your time during replacement to avoid new problems.
Sometimes the whole controller needs replacing. This happens when damage runs deeper than one stick. Weigh the repair cost against buying a replacement unit.
Remember that DIY fixes like glue only offer short term relief. They mask symptoms without fixing the real issue. Use them only as a temporary bridge to proper repair.
Never fly with a damaged gimbal stick. The risk of losing control is too high. Your drone’s safety depends on responsive, accurate controls.
Take note of how your sticks behave over time. Early drift or resistance tells you something is wrong. Address these signs before they turn into bigger failures.
Patience matters throughout this whole process. Rushing calibration or replacement creates more problems than it solves. Careful, steady work gets better results every time.
Your drone deserves reliable controls. A snapping gimbal stick threatens both your flight experience and your equipment’s safety. Fix it properly, and you will fly with confidence again.
Whether you calibrate, repair, or replace, informed action makes all the difference. Understanding the root cause helps you choose the right fix. This keeps your drone flying smoothly for seasons to come.
Frequently Asked Questions
Why does my gimbal stick feel loose and wiggly?
Loose gimbal sticks happen when internal components wear down or wiring flexes repeatedly. This is especially common in certain controller models. The stick may move around even when you’re not touching it, or it might feel sloppy during normal use.
Loose sticks don’t always mean complete failure. Many controllers experience this issue and can be fixed through software calibration first. If calibration doesn’t help, the thumbstick module itself may need replacement.
Can I fix gimbal snapping with super glue or other DIY methods?
Super glue and similar DIY fixes offer only temporary relief. These methods might hold your stick together for a short time, but they don’t address the real problem, which is usually internal wiring damage.
Relying solely on DIY fixes creates false confidence. You might think the stick is fixed when it’s actually still damaged. This puts your drone at risk during flight. Use DIY methods only as emergency temporary solutions while you arrange proper repairs.
What should I do if calibration doesn’t stop the drift?
Start by physically inspecting your gimbal assembly. Look for visible damage, loose connections, or broken components. Check if the stick moves smoothly or if something feels stuck inside.
If inspection reveals internal damage, the thumbstick module likely needs replacement. This involves carefully removing the old module and installing a new one with proper alignment. If the wiring itself is damaged beyond the module, you may need to replace the entire controller.
Is it safe to fly with a snapping gimbal stick?
No. Flying with a damaged gimbal is extremely risky. A snapping stick can cause sudden, uncontrolled movements. Your drone could lose stability mid flight or respond unpredictably to your commands, potentially resulting in a crash or loss of the aircraft.
Always ground your drone immediately if you notice gimbal problems.

Hi, I’m Lola Griffin 👩💻, the voice and creator behind ResizerBox. I’m a passionate tech enthusiast who loves exploring the latest gadgets, smart devices, and trending Amazon electronics. Through my reviews, I share honest insights, real-world testing experiences, and practical buying advice to help readers make confident tech choices.