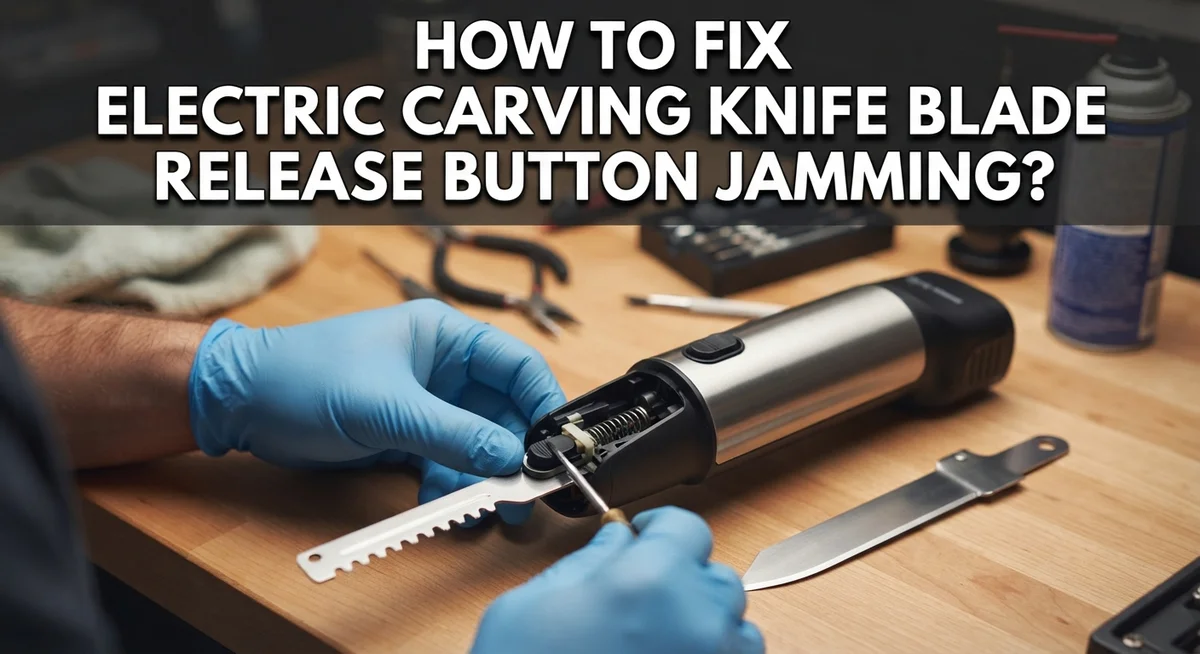
How To Fix Electric Carving Knife Blade Release Button Jamming?
Picture this. You just finished carving a big holiday turkey. Now you want to clean your electric carving knife. You press the blade release button, but nothing happens. The blade stays stuck in place.
This is a common problem many people face with electric carving knives. The release button jams and refuses to budge. It can feel frustrating, especially when you need to clean the blade quickly.
The good news? This issue is usually fixable at home. You do not need to throw away your knife or buy a new one right away.
In this guide, we will walk you through simple steps to diagnose the jam. We will show you how to safely disassemble the knife and spot the real cause. You will learn proven methods to loosen a stuck blade without damaging the unit.
We will also cover common mistakes that make jamming worse. Plus, we share a key tip on when to call a professional for help. By the end, you will know exactly how to get your blade release button working again.
In a Nutshell
Here’s a quick summary to help you fix the jam fast:
-
Check for obstructions first. Look inside the chuck area for food bits or debris before doing anything else.
-
Never force the blade out. Pulling hard can damage the safety mechanism or break the button completely.
-
Loosen the chuck gently. Use a soft cloth or pliers for better grip. Then pull the blade straight out.
-
Add a drop of oil if the button still feels stuck. This helps loosen tight parts without extra force.
-
Watch for wrong screw sizes. An incorrect screw can jam the safety mechanism and cause repeat problems.
-
Know when to stop. Complex issues with the safety mechanism need a qualified electrician. Don’t risk further damage.
This summary covers the essential fixes for a jammed release button. Most jams happen after cleaning, so a little care during that step goes a long way. Follow these points in order for the best results. Simple actions often solve the problem without needing any tools beyond a cloth.
Why Blade Release Buttons Jam: Common Causes
Blade release buttons jam for several straightforward reasons. Understanding these causes helps you fix the problem faster and prevents future issues.
Food debris and crumbs build up inside the button mechanism during normal use. Carving meat sends small particles into tight spaces. These fragments block the button from moving smoothly. The button feels stuck even though nothing is broken.
Dried meat juices harden inside the release mechanism. When you carve, liquids splash onto internal parts. Over time, these liquids dry and create a sticky residue. This residue acts like glue, preventing the button from pressing down fully.
Incorrect screw sizes can jam the safety mechanism. If someone replaces screws with the wrong size, they interfere with internal springs and levers. The button then locks up because parts cannot move correctly.
Mineral buildup happens in areas with hard water. Minerals accumulate inside the chuck and button housing. This buildup creates friction that makes the button feel stiff and stuck.
Spring tension loss occurs when internal springs weaken or shift out of position. Springs hold the blade firmly and help the release button work. When springs fail, the button gets trapped and won’t budge.
Blade misalignment causes jamming during storage. If the blade sits at an odd angle, it presses against the release button. The button stays partially depressed and cannot function properly.
Rust and corrosion develop on metal parts that contact moisture. Rust creates rough surfaces that catch and bind. This makes the button harder to press and release.
Most jams result from food debris or dried juices. These causes are easy to fix with basic cleaning. More serious issues like spring failure need professional help.
Safety First: Before You Start Disassembly
Before you open up your electric carving knife, stop and take a few important safety steps. These actions protect you from injury and prevent damage to the tool.
Unplug the knife from the electrical outlet first. This is the most critical step. Even if the blade isn’t moving, electricity can still flow through the motor. Never work on an electric appliance while it’s plugged in.
Wait a few minutes after unplugging. The motor may still have residual energy. Let it settle completely before you touch any internal parts.
Clear your work area completely. Remove any loose items from your table or counter. Small screws, springs, and blade parts are easy to lose. A clean workspace helps you find pieces if they fall.
Gather your tools before starting. You will need a screwdriver set, a soft cloth, and possibly a small bowl of water. Having everything ready means you won’t search for tools mid repair.
Wear safety glasses or goggles. Springs can pop out suddenly when you release tension. Small metal pieces can fly toward your face. Protect your eyes from unexpected surprises.
Put on work gloves if you have them. This protects your hands from sharp blade edges and rough metal surfaces inside the handle.
Document the disassembly process. Take photos or videos as you remove each part. This helps you remember how to reassemble everything correctly. Many people struggle to put things back together without visual reference.
Make sure you have good lighting. Use a lamp or flashlight to see inside the knife handle clearly. Poor lighting leads to mistakes and missed details.
Step-by-Step: Diagnosing the Jammed Release Mechanism
Start by examining the release button area closely. Look for visible food particles, dried meat residue, or debris stuck around the button edges. Use a flashlight to see inside the mechanism clearly.
Press the release button slowly and listen for any grinding or clicking sounds. These noises tell you if something is mechanically blocking the button’s path. Note whether the button moves partially or not at all.
Check if the blade moves when you press the button. A stuck blade means the problem is in the chuck or blade holder. A button that won’t press means the jam is in the release mechanism itself.
Inspect the blade alignment carefully. Remove the knife from the base and look at how the blade sits. Misaligned blades can wedge into the release mechanism and prevent button movement.
Examine all visible screws around the release button area. Make sure each screw is the correct size and properly seated. Incorrect screw sizes can interfere with internal springs and levers.
Test the button with the knife unplugged and unpowered. Push gently and feel for resistance points. This helps you locate exactly where the jam occurs without electrical current.
Look for rust or corrosion on metal parts near the button. Moisture exposure creates buildup that restricts movement. Discolored or pitted metal indicates corrosion damage.
Check if the jam appeared suddenly or gradually worsened over time. Sudden jamming suggests debris or misalignment. Gradual jamming points to rust, mineral buildup, or spring wear.
Take photos of the release button area before you proceed. These images help you remember the original configuration when reassembling. They also serve as reference if you need professional help later.
Step-by-Step: Loosening and Removing a Stuck Blade
Start by ensuring the knife is unplugged and completely cool. You’ll want to work in a well lit area with your safety glasses on. Have a cloth or soft towel ready before you begin.
Locate the blade chuck, which is the part that holds the blade in place. Gently grip the chuck with your cloth to get better traction. Never use excessive force, as this can damage the mechanism further.
If the blade feels stuck, apply a small drop of penetrating oil around the chuck area. Let it sit for two to three minutes so the oil can work into the tight spaces. The oil helps loosen corrosion and debris without harming the knife’s internal parts.
Now try rotating the chuck slowly in the counterclockwise direction. Use steady, gentle pressure rather than sudden jerking motions. You should feel it begin to loosen as the oil penetrates the stuck areas.
Once the chuck loosens, support the blade with your other hand. Pull the blade straight out in one smooth motion. Avoid twisting or angling the blade, as this can cause misalignment.
If the blade still won’t budge, wait another few minutes for the oil to penetrate deeper. Repeat the gentle rotation process. Sometimes stubborn jams need extra time to respond to lubrication.
After successful removal, inspect both the blade and the chuck for debris or damage. Wipe everything clean with your cloth. Check that the release button moves freely now without the blade installed.
If the button remains stuck even after blade removal, the jam exists within the button mechanism itself. This signals a more complex internal issue that may require professional attention from a qualified electrician or repair specialist.
Using Oil and Lubrication Techniques Safely
Oil and lubrication work best when you apply them correctly and safely. Start by ensuring your knife is unplugged and has cooled completely. Never apply oil to a powered or warm device.
Use only light machine oil or penetrating oil for this task. Apply just one small drop directly to the stuck release button area. Too much oil can attract dust and create bigger problems later. Let the oil sit for five to ten minutes so it can work into tight spaces.
Gently work the release button back and forth with slow, small movements. Don’t force it or press hard. Forcing causes more jamming and can damage internal springs. Move the button only a quarter inch in each direction while the oil penetrates.
After several gentle movements, wait another five minutes. Apply one more tiny drop if needed. Repeat the slow back and forth motion again. This patience allows the oil to reach stuck parts deep inside the mechanism.
Wipe away any excess oil with a clean, dry cloth. Excess oil left on the surface attracts dirt and debris. This debris can jam the button again quickly.
Test the button by pressing it slowly. It should move more freely now. If it still sticks, repeat the process once more. Most jamming issues resolve within two applications.
Never use thick greases or heavy oils. These trap particles and make jamming worse. Stick with thin, light oils designed for mechanical devices.
If the button remains stuck after three attempts, the internal mechanism likely needs professional attention. A qualified electrician can safely disassemble the knife without damaging safety features. Continuing to force the button risks breaking springs and other critical components.
The Super Glue, Accelerator, and Baking Soda Repair Method
The super glue, accelerator, and baking soda method offers an interesting approach to fixing stubborn release button jams. This technique works by creating a chemical reaction that can help dislodge debris or break down buildup inside the mechanism.
Here’s how the method works. First, unplug your knife and ensure it’s completely cool. Mix a small amount of baking soda with a few drops of cyanoacrylate accelerator to create a paste. This paste becomes slightly abrasive and helps scrub away internal blockages.
Apply this mixture very carefully around the release button edges using a small applicator stick or old toothbrush. Work slowly and deliberately. Don’t force the button or press it hard while the mixture sits there.
Let the paste sit for about two to three minutes. The chemical reaction between the accelerator and baking soda creates gentle action that can help break apart stuck particles.
Gently work the release button back and forth with tiny, slow movements. You should feel resistance gradually decrease as the paste does its job. Stop immediately if you hear cracking sounds or feel sharp resistance.
After several gentle attempts, wipe away all the paste thoroughly with a damp cloth. Dry the area completely before testing the button.
This method works best for light jamming caused by dust or dried residue. For severe jamming or if the button remains stuck, professional repair becomes necessary. The internal safety mechanisms in electric carving knives are complex, and excessive force can damage important components beyond repair.
Always prioritize safety over forcing any part of the knife mechanism.
Common Mistakes to Avoid When Fixing the Release Button
Many people rush into repairs without thinking through the consequences. Forcing the blade out without understanding why it’s stuck can damage internal parts. The release button has safety mechanisms that protect your hands. When you yank too hard, you might break these protective features.
Another common mistake involves using the wrong tools. Some people grab pliers or wrenches that are too large for the chuck. Oversized tools can slip and damage the delicate mechanism inside. This makes the jam worse, not better.
Applying too much oil at once creates more problems. People think “more oil means better results,” but excess lubricant attracts dust and debris. This buildup actually causes tighter jamming over time. A single small drop works better than pouring oil everywhere.
Disassembling the knife without proper knowledge leads to trouble. Electric carving knives contain springs, screws, and safety switches in tight spaces. If you remove parts randomly, you won’t remember how they fit back together. The knife becomes unusable instead of fixed.
Ignoring the cooling period is another frequent error. Blades heat up during use, and the metal expands. Attempting repairs on a hot knife makes everything harder. Always wait until the unit cools completely.
Using super glue incorrectly causes permanent damage. The mixture can seep into electrical components and ruin the knife forever. If you try this method, apply it only around the button edges, never inside the housing.
Finally, continuing to use a jamming knife makes repairs harder. Each time you press the stuck button, you push debris deeper into the mechanism. Stop using the knife as soon as jamming starts. Early action prevents expensive damage and keeps your repair simple.
When to Call a Qualified Electrician or Repair Technician
Your electric carving knife contains complex internal mechanisms. Some jams require professional expertise to fix safely. Knowing when to stop and call for help prevents further damage.
Stop DIY efforts if the button doesn’t respond after three gentle attempts. Continued forcing can damage the internal safety mechanism. This mechanism prevents accidental blade release during operation. Once broken, it creates a serious safety hazard.
Call a qualified electrician or repair technician if you see visible cracks in the knife’s housing. Cracks indicate internal damage you cannot assess from outside. Professional tools and knowledge are needed to inspect these areas safely.
Seek professional help if oil and lubrication methods fail completely. This signals that the jam exists deep within the button mechanism. Internal springs or gears may be misaligned or broken. Only trained technicians can disassemble and repair these parts correctly.
Contact a repair specialist if the blade release button feels loose or makes grinding sounds. These signs mean internal components are damaged. Loose parts can fail suddenly during use and cause injury.
Professional repair becomes necessary when you discover rust inside the knife. Rust indicates water damage or age related deterioration. Rust spreads quickly and affects multiple internal parts. A technician can clean corroded components and replace damaged ones.
Never attempt to fix safety mechanisms yourself. These systems protect your hands and face during operation. Improper repairs compromise this protection. A qualified technician understands how these mechanisms work together.
Most repair shops can diagnose the problem within minutes. They have specialized tools and replacement parts in stock. Professional repairs cost less than buying a new knife. They also guarantee the knife works safely after repair.
Final Thoughts
A jammed blade release button feels frustrating, but most fixes are simple. Patience matters more than force when you tackle this problem.
Start with the gentlest methods first. A drop of oil or a careful cleaning often solves the issue quickly.
Remember that your electric carving knife holds small parts inside. Springs, screws, and safety mechanisms work together to keep you safe.
Rushing the repair almost always makes things worse. Take your time and follow each step slowly.
If gentle methods don’t work, don’t force the button. Stop and think about what might be causing the deeper problem.
Safety should guide every decision you make. A cracked housing or grinding sound means it’s time to stop the DIY approach.
Qualified electricians and repair technicians exist for good reason. They understand these internal mechanisms better than most home users.
Calling for help isn’t a failure. It’s a smart choice that protects both you and your knife.
Regular maintenance prevents many jamming issues before they start. Clean your knife properly after each use.
Check the release button for debris or residue regularly. This small habit saves you from bigger headaches later.
Keep your knife dry and store it properly between uses. Moisture and dust cause many jamming problems over time.
Every knife owner faces this issue eventually. Knowing how to respond makes the difference between a quick fix and a costly repair.
Trust your instincts about when a problem feels bigger than a simple fix. Your safety always comes first.
With the right approach, your electric carving knife can serve you well for years. Treat it with care, and it will work smoothly every time you need it.
Frequently Asked Questions
Why does my electric carving knife blade release button get stuck?
The blade release button jams when debris, food particles, or moisture collect around the mechanism. Over time, these materials harden and block the button from moving freely. The safety mechanism inside can also interfere if screws loosen or shift position.
Sometimes the blade itself doesn’t align properly in the chuck. This misalignment puts pressure on the release button and makes it harder to push. Moisture and rust develop quickly if you don’t dry the knife after use.
Can I fix a jammed blade release button myself?
Yes, many jamming issues respond well to simple home fixes. Start by applying a small drop of oil around the button’s edges. Let it sit for a few minutes so the oil can penetrate the mechanism.
Gently wiggle the button back and forth without forcing it. This helps the oil work into tight spaces. If the blade still won’t release, try loosening the chuck with a cloth for better grip, then pull the blade straight out.
Stop if you feel resistance after gentle attempts. Forcing the button can damage internal springs and make repairs impossible.
What should I do if gentle methods don’t work?
Contact a qualified electrician or repair technician. They have proper tools and knowledge to disassemble the knife safely. Professional help prevents accidental damage to safety mechanisms inside the unit.
Don’t continue trying to force the blade out. This risks breaking the housing or internal components.
How can I prevent blade release button jamming?
Clean and dry your knife immediately after each use. Wipe away all food residue and moisture from the button area. Store the knife in a dry location away from humidity.
Check the release button regularly for debris before it becomes stuck.

Hi, I’m Lola Griffin 👩💻, the voice and creator behind ResizerBox. I’m a passionate tech enthusiast who loves exploring the latest gadgets, smart devices, and trending Amazon electronics. Through my reviews, I share honest insights, real-world testing experiences, and practical buying advice to help readers make confident tech choices.