How To Fix E-Bike Derailleur Hanger Bending?
Does your e-bike suddenly skip gears or make weird clicking sounds? The problem might not be your motor or battery at all.
A bent derailleur hanger is often the sneaky cause behind poor shifting. It happens to almost every rider at some point.
Good news first: this is a common issue, and it is completely fixable. You do not need to rush to a bike shop or spend a fortune on repairs.
In a Nutshell
- A bent hanger causes bad shifting. It is often the real reason behind skipping gears or strange noises, not your motor or battery.
- This problem is very common. It happens easily if your bike falls over or gets bumped during transport.
- You can fix it yourself. With the right tools, this repair often takes just a few minutes.
- A derailleur alignment gauge is your best friend. It helps you diagnose and fix the hanger with real accuracy.
- A 5mm hex wrench works in a pinch. You can use it for a quick “limp home” fix if you are stuck without a gauge.
- Skipping the gauge is a common mistake. Guessing the alignment often leads to more shifting problems later.
What Is a Derailleur Hanger and Why It Bends
A derailleur hanger is a small metal bracket that connects your rear derailleur to the bike frame. Think of it as the mounting point that holds the derailleur in place. This tiny component plays a huge role in keeping your gears shifting smoothly.
The hanger sits between the derailleur and your frame. It allows the derailleur to move up and down across your cassette. When you shift gears, the hanger helps position the derailleur exactly where it needs to be.
Why does it bend so easily? The hanger sticks out from your frame. This makes it vulnerable to impacts. A simple fall, bumping into a door frame, or rough handling during transport can bend it. Even a gentle tip over while parked can cause misalignment.
The hanger bends because it is designed to be a “sacrifice point.” Manufacturers intentionally make it slightly weaker than the frame itself. This protects your expensive frame from damage. When something hits your bike, the hanger takes the hit instead.
What happens when it bends? A bent hanger throws off the derailleur’s alignment. Your chain starts skipping gears. You hear clicking or grinding sounds. Shifting becomes slow and unreliable. Your e-bike struggles to find the right gear, especially under pedal pressure.
The good news is simple: this problem is fixable. The hanger does not need replacement in most cases. A slight bend can be straightened out. You just need the right tools and a few minutes of your time.
Understanding how and why your hanger bends helps you prevent future damage. It also shows you why fixing it quickly matters for your riding experience.
Signs Your E-Bike Derailleur Hanger Is Bent
Your e-bike will show clear warning signs when the derailleur hanger bends. Learning to spot these signals helps you catch the problem early.
Shifting problems are the first clue. Your chain may skip gears randomly or struggle to move between sprockets smoothly. You might notice the chain hesitates when you shift, or it refuses to go into certain gears at all. Sometimes the chain moves slowly between cogs instead of snapping into place instantly.
Strange noises come next. Listen for clicking, grinding, or rubbing sounds from the rear derailleur area. These sounds happen because the bent hanger throws the derailleur out of alignment. The derailleur cage rubs against the chain or cassette when the hanger leans sideways.
Visual misalignment is easy to spot. Stand behind your bike and look at the derailleur cage. The cage should sit parallel to your cassette. If the derailleur cage tilts left or right, your hanger is bent. You can also spin the pedals and watch how the chain tracks. A bent hanger causes the chain to sit crooked on the sprockets.
Dragging sounds from the derailleur cage indicate contact with the chain or cassette. This happens when the bent hanger positions the cage too close to moving parts.
The derailleur hangs at an odd angle. Compare it to photos of your bike model online. A healthy derailleur sits upright and centered. A bent one leans noticeably to one side.
These signs all point to the same issue. Don’t ignore them. A bent hanger gets worse with more riding and creates additional shifting problems over time. Address it promptly to keep your e-bike running smoothly.
Tools You Need Before Starting the Repair
Before you start straightening your bent derailleur hanger, gather the right tools. Having everything ready makes the job faster and safer.
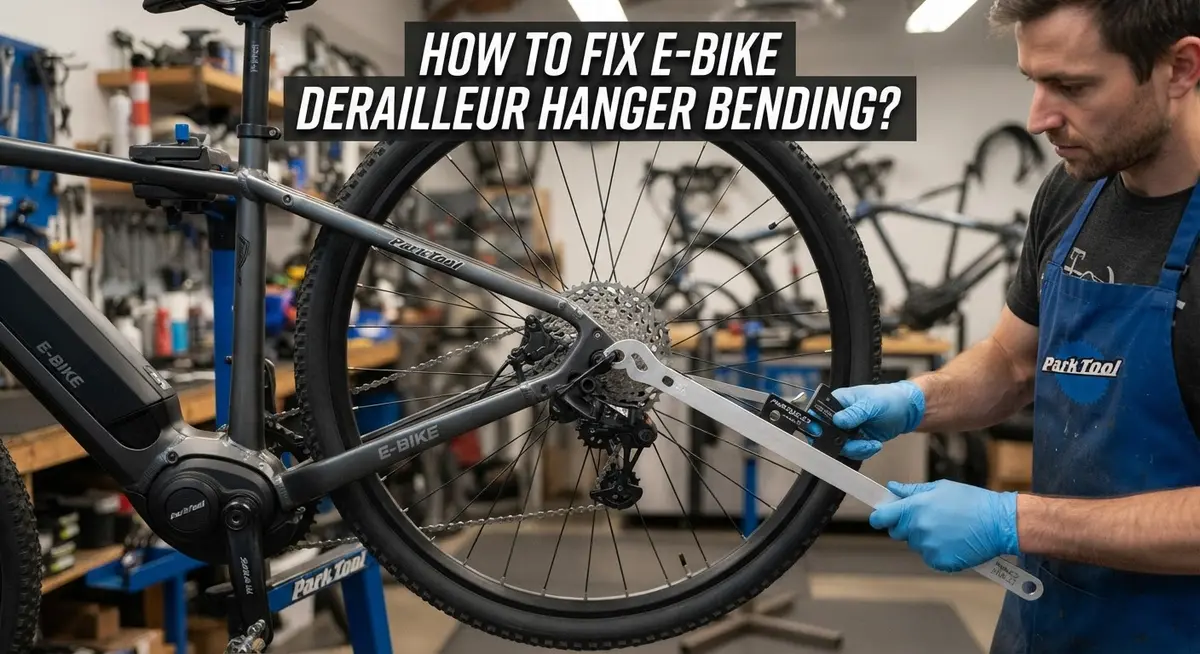
The derailleur alignment gauge is your most important tool. This specialized instrument lets you measure exactly how far your hanger has bent. It works by creating a reference point on your wheel rim, then showing you the gap between that point and your derailleur. Without this gauge, you are basically guessing at the alignment.
A 5mm hex wrench is essential for applying leverage during the straightening process. This wrench fits into the derailleur mounting bolt and gives you the mechanical advantage you need to bend the hanger back into position. Make sure your wrench is in good condition with no stripped edges.
You will also need a basic wrench set to remove and reinstall the derailleur if needed. Some repairs require temporary derailleur removal for better access to the hanger.
A marker or chalk helps you mark your reference point on the rim. This marking system works with your alignment gauge to give you accurate measurements.
Keep a rag or cloth nearby to wipe away dirt and grime. A clean hanger is easier to work with and helps you see the bent areas clearly.
Proper lighting matters more than you might think. Position a flashlight or work light so you can see the derailleur hanger from multiple angles. This helps you spot the exact direction of the bend.
Finally, have a bike stand available if possible. A stable work position makes the entire repair safer and more accurate. You can work on your bike without it, but a stand keeps everything steady while you apply pressure.
Step-by-Step: How to Straighten a Bent Derailleur Hanger
Start by securing your e-bike firmly in a bike stand. This keeps the frame steady while you work. If you don’t have a stand, flip your bike upside down so the handlebars and seat rest on the ground.
Locate the derailleur mounting bolt on your frame. This bolt connects the derailleur to the hanger. You’ll insert your 5mm hex wrench into this bolt to create leverage for straightening.
Before you apply any force, use your alignment gauge to establish a reference point. Slide the gauge onto your rim and note where the derailleur cage sits relative to the tool’s center line. This measurement tells you exactly how much the hanger has bent.
Apply steady, controlled pressure with your hex wrench. Never jerk or force the hanger suddenly. Bent hangers respond better to gradual, gentle pressure applied in small increments.
After each small adjustment, stop and check your alignment with the gauge again. This prevents you from overcorrecting and bending the hanger in the opposite direction.
Work slowly and deliberately. Most bent hangers straighten within minutes when you use proper technique. Rushing this step often causes additional damage.
Once the gauge shows proper alignment, reinstall the derailleur if you removed it. Spin the cranks and test the shifting on all gears. Listen for any rubbing or grinding sounds that indicate misalignment.
Test your work thoroughly before riding. Shift up and down through every gear combination. The chain should move smoothly without skipping or hesitation.
If the hanger still feels misaligned after multiple attempts, you may need professional help. Some damage requires replacement rather than straightening.
Emergency Roadside Fix Without an Alignment Gauge
When you’re stuck on the road without an alignment gauge, you can still straighten a bent derailleur hanger using basic tools. This emergency fix gets you home safely so you can perform a proper repair later.
Start by identifying exactly which way your hanger bent. Stand behind your bike and look at the derailleur cage. Does it angle inward or outward? This tells you which direction to apply pressure.
Locate your 5mm hex wrench. Insert it into the derailleur mounting bolt on your frame. This wrench becomes your lever for gentle adjustments. Never force it suddenly or you’ll cause more damage.
Apply slow, steady pressure in the opposite direction of the bend. Move the wrench gradually, checking your progress every few millimeters. Listen for the hanger to settle into a new position.
Use your chain as a visual reference point. Spin your pedals slowly and watch how close the derailleur cage sits to the chain. The cage should hover about 2 to 3 millimeters away without touching.
Test your shifting after each small adjustment. Shift up and down through several gears. If shifting feels smoother, you’re making progress.
Stop if you feel significant resistance. Pushing too hard risks breaking the hanger completely. At that point, walking your bike to a repair shop becomes your best option.
This roadside method isn’t perfect, but it restores basic function for your ride home. Once you’re back, use a proper alignment gauge for a complete fix. The temporary adjustment buys you time and keeps you mobile until you access professional tools and expertise.
How to Verify Proper Alignment After Repair
After you straighten your bent derailleur hanger, verification is critical. You need to confirm the repair actually worked before you ride your e-bike again.
Start by reinstalling your derailleur on the frame if you removed it during straightening. Tighten the mounting bolt securely, but don’t over tighten it. Your derailleur alignment gauge becomes your verification tool now.
Insert the gauge into the derailleur mounting hole again. Check if the gauge sits flush against your rim without any gaps. The gauge should contact the rim smoothly all the way around.
Spin your wheel slowly by hand while watching the gauge position. The gap between the gauge and rim should remain consistent as the wheel rotates. Any variation means your hanger still has misalignment.
Next, test your shifting manually. Shift through all your gears while the bike is stationary. The chain should move smoothly between cogs without hesitation or noise.
Listen for grinding or clicking sounds during shifting. These noises indicate the derailleur still isn’t perfectly aligned. You may need additional straightening adjustments.
Check your chain line as well. The chain should run straight from your cassette to your chainring. A twisted chain path suggests ongoing alignment problems.
Finally, take your e-bike for a short test ride in a safe area. Shift gears while pedaling at different speeds. The shifting should feel smooth and responsive.
If shifting remains sluggish or the chain struggles to move between gears, your hanger may need professional realignment. Some bends are too severe for basic tools to fix properly. Professional mechanics have specialized equipment that ensures perfect alignment every time.
Common Mistakes to Avoid When Fixing a Hanger
Many people damage their derailleur hanger further by making preventable mistakes during the repair process. Understanding these errors helps you fix the problem correctly the first time.
Don’t skip the alignment gauge. Attempting to straighten your hanger without a proper alignment tool is the biggest mistake riders make. You might think you’ve fixed the bend, but you’re actually guessing. Your eyes can’t detect small misalignments that cause shifting problems later. The gauge gives you exact feedback about hanger position.
Avoid using excessive force. Some riders apply sudden, hard pressure with their hex wrench. This aggressive approach can snap the hanger completely or bend it in a different direction. The hanger is a precision component, not a hammer target. Steady, gentle pressure works better than force.
Don’t rush between adjustments. Make a small movement, then check your alignment immediately. Many people make multiple adjustments before checking, so they can’t identify which movement actually helped.
Never ignore resistance. If you feel significant resistance while bending, stop immediately. This sensation means you’re pushing against the frame or hitting a mechanical limit. Continuing anyway can cause permanent damage.
Don’t reattach your derailleur before verifying alignment. Install the gauge first, confirm the hanger sits straight, then reinstall your derailleur. This order prevents you from reassembling everything only to discover the hanger still needs work.
Finally, avoid riding your e-bike hard after a roadside fix. These temporary adjustments restore basic function only. Professional realignment or replacement might be necessary later. Take your bike to a shop soon to ensure long term performance and safety.
Troubleshooting Persistent Shifting Issues
When your e-bike shifts poorly between gears, a bent derailleur hanger is often the culprit. Persistent shifting issues show up as chain lag, grinding sounds, or the chain refusing to move smoothly across sprockets. You need to diagnose whether your hanger is actually bent before attempting repairs.
Start by spinning your wheel slowly while watching your derailleur. A bent hanger causes the derailleur cage to sit at an angle instead of staying parallel to your wheel. The cage may drift inward toward the spokes or outward away from them. Mark this position mentally so you know which direction to correct.
Next, remove your derailleur from the frame by unbolting it. This step prevents accidental damage during straightening. Look at the hanger itself from different angles. You may see a visible twist or angle compared to the frame’s dropout.
Use a derailleur alignment gauge to measure the exact bend. Insert the gauge into the derailleur mounting hole and note where the reference point sits relative to your rim. This tells you precisely how far the hanger has shifted.
Apply steady, controlled pressure with your 5mm hex wrench inserted into the mounting bolt. Work slowly and check your progress frequently. Small adjustments are better than aggressive bending.
Test your alignment repeatedly as you straighten. Stop when the gauge shows proper centering. Reinstall your derailleur and verify that shifting feels smooth again.
If you encounter heavy resistance during straightening, your hanger may be severely damaged. Professional mechanics have hydraulic tools designed for stubborn cases. Continuing to force a severely bent hanger risks permanent frame damage.
Final Thoughts
Fixing a bent derailleur hanger is easier than most riders think. With the right tools, you can complete this repair in minutes.
A derailleur alignment gauge remains your best friend for this job. It shows you exactly how far off your hanger sits from true.
Your 5mm hex wrench gives you the leverage needed to bend the hanger back safely. Patience matters more than strength here.
Small, steady movements work better than one big push. This approach protects your hanger from snapping under too much force.
Remember that a hanger is designed to bend before your derailleur or frame takes damage. Think of it as a sacrificial part that protects expensive components.
If your hanger bends often, check how you store or transport your e-bike. Falls and bike rack accidents cause most bending issues.
Regular checks help you catch problems early. A quick gauge test every few months keeps your shifting smooth and reliable.
Some hangers bend beyond repair. If yours cracks or breaks during straightening, replacement becomes your only option.
Carrying a spare hanger on longer rides gives you peace of mind. These small parts are affordable and easy to swap out.
Professional help makes sense when you lack tools or confidence. Bike shops handle this repair quickly and affordably.
Your e-bike deserves smooth, accurate shifting for the best riding experience. A properly aligned hanger keeps your drivetrain working as it should.
Don’t let a bent hanger sideline your rides. With basic tools and careful technique, you can fix this common problem yourself.
Trust the process, use proper gauges, and take your time. Your derailleur will thank you with crisp, reliable shifts on every ride.
Frequently Asked Questions
Can I straighten a bent derailleur hanger myself?
Yes, you can fix this yourself. Most bent hangers straighten in just a few minutes with the right tools. You need a derailleur alignment gauge and a 5mm hex wrench. The alignment gauge helps you see exactly how much the hanger bends. Insert the hex wrench into your derailleur mounting bolt for leverage. Apply steady, gentle pressure to bend it back into place.
What happens if I don’t fix a bent derailleur hanger?
Your e-bike will shift poorly between gears. The derailleur sits at an angle when the hanger bends. This makes it hard for the chain to move smoothly across your cogs. You might hear grinding sounds or skip gears randomly. Riding with a bent hanger puts extra strain on your derailleur and chain.
How do I know if my derailleur hanger is actually bent?
Spin your wheel slowly and watch your derailleur. A bent hanger causes the derailleur to move closer to or farther from your wheel. Mark a point on your rim with an O ring from your alignment tool. Watch if the derailleur stays the same distance from that point as your wheel spins. If the gap changes, your hanger has a bend.
Why do derailleur hangers bend so easily?
Hangers bend on purpose. They’re designed to absorb impact and protect your expensive derailleur and frame. When your e-bike falls or hits something, the hanger bends instead of breaking your derailleur. This saves you money and keeps your frame safe. Think of it as a sacrificial part that protects everything else.

Hi, I’m Lola Griffin 👩💻, the voice and creator behind ResizerBox. I’m a passionate tech enthusiast who loves exploring the latest gadgets, smart devices, and trending Amazon electronics. Through my reviews, I share honest insights, real-world testing experiences, and practical buying advice to help readers make confident tech choices.