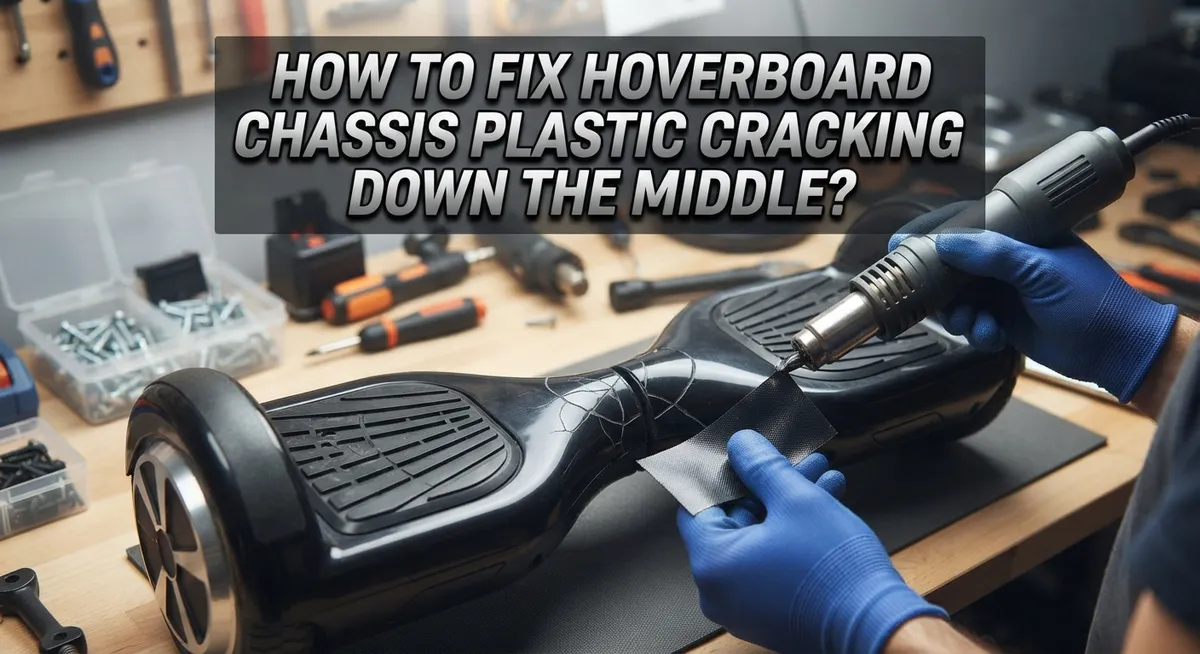
How to Fix Hoverboard Chassis Plastic Cracking Down the Middle?
Seeing a crack down the middle of your hoverboard can feel alarming. You might think the whole board is broken beyond repair. But that crack does not always mean the end of your ride.
In many cases, this issue happens because of loose snap pin washers inside the center frame. These small parts can shift over time. This creates a visible line that looks like a serious break.
The good news is that this fix is often simple. You can inspect and repair it yourself in most cases. No special tools or expensive replacements are usually needed.
In a Nutshell
- First, power off your hoverboard. Remove the battery if you can access it. This keeps you safe during the whole repair process.
- Check the crack type carefully. A surface crack in the plastic is different from a structural break in an alloy frame. This step decides your next move.
- Loose snap pin washers cause most middle cracks. They sit in the center frame and shift over time. Reseating them often solves the problem.
- Open the chassis with care. Take your time separating the two halves. This gives you access to the washers and pins.
- Push the washers back into place. Make sure each one sits snugly against the pin. This small fix makes a big difference.
- Reassemble everything and test it. Snap the chassis back together and check for wobbling. A tight, quiet fit means you fixed it right.
- Cracks in metal alloy frames need welding. That job calls for a professional, not a home fix.
Why Hoverboard Chassis Plastic Cracks Down the Middle
Hoverboard chassis plastic cracks down the middle happen for specific reasons. Understanding the root cause helps you fix the problem correctly.
Loose snap pin washers are the main culprit behind middle cracks. These small metal washers sit inside your center frame and hold everything together. Over time, they shift and loosen. When washers move out of position, they create stress points in the plastic. The chassis then cracks right down the middle where the two halves meet.
Regular use causes this loosening. Every time you ride, vibrations travel through the frame. The washers gradually work their way free. Bumps and impacts speed up this process. Even smooth rides eventually loosen these critical parts.
The difference between crack types matters. A surface crack in plastic looks like a line but doesn’t go deep. A structural break in an alloy frame is more serious and requires professional help. Most middle cracks are surface level caused by washer movement, not actual structural failure.
Weight and riding style also play a role. Heavier riders put more stress on the frame. Aggressive riding or rough terrain increases vibration and loosening. Riders who frequently accelerate hard experience faster washer movement.
Temperature changes affect plastic too. Heat makes plastic expand slightly. Cold makes it contract. This expansion and contraction works washers loose over seasons.
The good news is that loose washers cause most cracks you see. This means your hoverboard isn’t broken. The chassis simply needs reassembly with washers properly seated. Once you reseat them correctly, the crack usually closes or stops spreading. This is why many owners fix this issue themselves with basic tools and patience.
Surface Crack or Structural Break: How to Tell the Difference
A surface crack looks like a thin line running through the plastic shell. You can usually see it clearly when you look at the chassis from the side or bottom. The crack may be shallow, and the plastic around it stays intact.
A structural break is different. This type of damage affects the metal or alloy frame underneath the plastic. You will notice the chassis feels loose or wobbly when you hold it. The frame itself may bend or shift when you apply gentle pressure.
Here’s how to tell them apart. Start by powering off your hoverboard and removing the battery if possible. Look at the crack closely. Run your finger along it gently. A surface crack feels smooth and stays on the plastic layer only.
Next, press gently on both sides of the crack. If the plastic flexes but the frame stays solid, you have a surface crack. If the entire chassis moves or feels unstable, the structural frame is likely damaged.
Surface cracks often come from loose snap pin washers shifting inside the frame. These washers sit in the center and can shift during rides. When they move, they create stress on the plastic shell above them.
Structural breaks happen when the metal frame bends or breaks. This usually occurs from impact, excessive weight, or riding on very rough terrain.
The repair method depends on which type you have. Surface cracks from loose washers need washer reseating. True structural breaks in the frame require professional welding. Knowing the difference helps you choose the right fix and avoid wasting time on the wrong solution.
Tools and Safety Precautions Before You Start
Before you start fixing your hoverboard chassis crack, gather the right tools and take safety steps. This prevents injury and damage to your device.
Essential Tools You’ll Need
Start with a screwdriver set that fits your hoverboard model. Most hoverboards use Phillips head or flathead screws. You may also need a plastic pry tool or old credit card to separate the chassis halves without scratching them.
Have a small container ready. This holds screws and small parts so you don’t lose them during disassembly. A flashlight or headlamp helps you see inside the chassis clearly.
Safety First
Power off your hoverboard completely before touching anything inside. This prevents electrical shock and accidental activation. Remove the battery if you can access it safely.
Work on a clean, flat surface away from water or moisture. Hoverboards contain electrical components that don’t mix well with liquids.
Workspace Setup
Lay down a towel or mat to protect your work area. This also catches any small parts that might fall. Keep your workspace organized so you can find tools quickly.
Before Opening the Chassis
Take clear photos of your hoverboard before you open it. These photos remind you how cables and connectors attach during reassembly. Label each screw location if you remove multiple screws.
Wear safety glasses if you have them. Plastic pieces sometimes pop off with force, and eye protection matters. Keep children and pets away from your work area.
Final Check
Make sure you have good lighting and enough time to complete the job without rushing. A calm, organized approach prevents mistakes and keeps your hoverboard safe.
Step-by-Step: Reseating Loose Snap Pin Washers
Reseating loose snap pin washers is the first fix you should try when your hoverboard chassis cracks down the middle. These small washers hold the frame together at the center point. When they shift out of place, the chassis flexes and creates that telltale crack.
Start by powering off your hoverboard completely. Remove the battery if your model allows it. This keeps you safe while you work inside the device.
Locate the snap pin washers in the center frame area. You’ll find them holding the two chassis halves together. Look closely to see if they’ve shifted or loosened from their original positions.
Gently push each washer back into its proper spot. Press firmly until you feel it sit snugly against the pin. Don’t force it or you might damage the plastic around it.
Check that all washers are evenly seated and tight. Uneven pressure causes new cracks to form later. Make sure none of the washers are bent or damaged.
Snap the chassis back together carefully. Align the two halves properly before pressing them into place. Listen for a solid click sound that tells you they’re connected.
Test your hoverboard on a flat surface. Look for any wobbling or movement between the chassis halves. The crack should stop spreading once the washers are secure.
If the crack remains or gets worse, you likely have a structural break in the frame itself. Surface cracks from loose washers stop growing once you reseat them. Structural breaks require professional welding to fix properly.
This reseating process takes about 15 to 20 minutes for most riders. It’s a practical first step before considering more complex repairs.
Reassembling the Chassis Correctly
Once you’ve confirmed the crack type and reseated your snap pin washers, reassembling the chassis correctly matters most. Proper reassembly prevents the crack from returning or getting worse.
Start by checking all washers one more time. Each washer should sit flat and centered in its slot. Don’t force anything into place. If a washer resists, remove it and clean the slot first. Dirt or plastic debris can prevent proper seating.
Align the chassis halves carefully before snapping them together. Look for alignment marks or notches on both sides. These guides help you position the pieces correctly. Misaligned halves create uneven pressure that reopens cracks.
Press the chassis halves together slowly and evenly. Start at one end and work toward the other. You should hear a soft click as each snap point locks into place. Listen for all the clicks. Missing clicks mean something isn’t seated properly.
Once snapped together, inspect the seam running down the middle. The line should look straight and tight. No gaps should appear between the two halves. If you see gaps, unsnap and realign.
Reinstall your battery carefully. Make sure the battery connector clicks fully into place. Loose battery connections can cause electrical problems later.
Before riding, place your hoverboard on a flat surface and power it on. Let it run for a few minutes without moving. Watch for any unusual sounds or vibrations. These signs indicate reassembly issues.
Take your time during reassembly. Rushing this step causes most reassembly failures. If your crack returns after proper reassembly, you likely have a structural break requiring professional welding services.
When to Consider Professional Plastic or Metal Welding
Professional plastic or metal welding becomes necessary when you have an actual structural crack rather than just loose washers. Understanding when to seek professional help saves you time and prevents further damage.
If your snap pin washers are already seated correctly and the crack still appears, you likely have a genuine fracture. This is your signal to consider professional repair. Surface cracks in plastic may seem minor, but they can spread quickly under the stress of riding.
Plastic welding works best for polymer chassis frames. Professionals use heat and specialized equipment to fuse the plastic back together. This method creates a permanent bond that can last as long as your hoverboard. Metal welding applies to alloy or aluminum frames, which require different techniques and equipment.
The decision between DIY fixes and professional welding depends on crack severity. Small hairline cracks might hold with reseating alone. Deep cracks that go completely through the chassis material need professional attention. Cracks that affect the center frame area are especially important because this region bears most of your weight.
Professional welding typically takes a few days, depending on your local repair shops. The process involves cleaning the cracked area, applying heat or adhesive, and reinforcing the joint. Many professionals add reinforcement strips or plates to prevent future cracking at the same spot.
Cost varies based on crack size and frame material, but professional work guarantees better results than temporary fixes. If your hoverboard is still under warranty, check with the manufacturer before seeking outside repairs. Some warranties cover structural damage, while others require authorized service centers only.
Common Mistakes to Avoid During Repair
When fixing your hoverboard chassis crack, several mistakes can make the problem worse. Avoid rushing through the repair process because speed leads to improper reassembly and missed issues.
One major mistake is skipping the power down step. Always turn off your hoverboard completely before touching internal components. This protects you from electrical hazards and prevents accidental activation during work.
Don’t assume every crack requires professional welding. Many riders jump to expensive solutions when loose snap pin washers cause the problem. Take time to inspect and reseat these washers first, as this simple step fixes most middle cracks.
Another common error is applying excessive force during reassembly. Gentle, even pressure works best when snapping the chassis halves together. Forcing the pieces can crack plastic further or misalign the frame permanently.
Neglecting to check washer alignment is a frequent oversight. Each washer must sit evenly in its slot. Uneven seating creates weak points that lead to recurring cracks after your first ride.
Don’t ignore the crack type either. Surface cracks differ from structural breaks. Misidentifying the damage means choosing the wrong repair method and wasting time on ineffective fixes.
Failing to test your hoverboard after repair is another mistake. Always place it on a flat surface and power it on before riding. This catches reassembly problems early.
Finally, avoid reusing damaged washers if you notice cracks or deformation. Worn washers won’t hold properly and the crack will return quickly. Inspect each component carefully during disassembly to identify what truly needs replacement or repair.
Preventing Future Cracks in Your Hoverboard Chassis
Preventing future cracks in your hoverboard chassis requires understanding what causes them in the first place. Most middle cracks stem from loose snap pin washers, not actual structural failure. Once you’ve repaired your current crack, keeping those washers tight becomes your best defense.
Check your snap pin washers regularly. Make it a habit every few weeks or before long riding sessions. Loose washers shift over time due to vibration and movement. This shifting creates stress points along the chassis center seam.
Ride on smooth, flat surfaces whenever possible. Rough terrain, curbs, and bumps transfer impact directly to your chassis frame. These impacts loosen washers faster and can create new cracks. Avoid jumping or performing tricks if your hoverboard shows any signs of wear.
Store your hoverboard properly during off seasons. Keep it in a cool, dry place away from extreme temperatures. Heat causes plastic to expand and contract, which stresses the snap pin connections. Cold weather makes plastic more brittle and prone to cracking.
Balance your weight evenly while riding. Uneven pressure concentrates stress on one side of the chassis. This unbalanced stress accelerates washer loosening and increases crack risk.
Inspect your chassis monthly. Look for any visible gaps along the center seam or signs of washer movement. Catching loose washers early prevents them from becoming serious cracks.
Replace worn washers before they fail. If washers show signs of cracking or deformation, swap them out immediately. Damaged washers cannot hold the chassis halves together effectively.
These prevention steps keep your hoverboard chassis stable and crack free for years of riding.
Final Thoughts
Fixing a cracked hoverboard chassis does not need to feel overwhelming. Most middle cracks come from loose snap pin washers. This makes the fix simple and quick for most riders.
Start by checking the easy stuff first. Power off your device and remove the battery. Then inspect the crack closely before doing anything else.
If washers are loose, reseat them carefully. This small step often solves the whole problem. Your hoverboard can look and work like new again.
Sometimes the crack goes deeper than washers. In that case, you have a genuine structural issue. Professional welding becomes your best option here.
Plastic welding suits polymer frames well. Metal welding works better for alloy frames. Both methods give permanent results you can trust.
Remember to test your hoverboard after any repair. Ride slowly at first to check stability. This step confirms your fix actually worked.
Regular maintenance helps you avoid future cracks. Check your chassis often for early warning signs. Small problems caught early save you time and money.
Your hoverboard chassis crack does not have to end your riding days. Most fixes are simple and doable at home. Even structural cracks have clear solutions through professional welding services.
Take your time with each step. Patience during repair leads to better results. Rushing often creates new problems you did not have before.
With the right approach, your hoverboard can return to full function. Understanding the cause helps you fix it correctly. Then you can get back to riding with confidence and peace of mind.
Frequently Asked Questions
Is a middle crack on my hoverboard chassis dangerous to ride?
A middle crack needs immediate attention before you ride again. Surface cracks in plastic frames pose less danger than structural breaks in alloy frames. You should power off your device right away and inspect the crack closely. If the crack runs deep through the frame, riding becomes risky because the chassis may fail suddenly. Loose snap pin washers often cause middle cracks, which are easier to fix than actual breaks.
Can I fix a hoverboard chassis crack myself?
Yes, you can handle this repair yourself in many cases. If loose snap pin washers caused the crack, reseating them is straightforward. Power down your hoverboard first and remove the battery if possible. Then carefully access the center frame area and reseat the washers properly.
However, actual cracks in the plastic or metal require different approaches. Surface plastic cracks need plastic welding techniques. Metal frame cracks need metal welding work. These welding repairs demand professional equipment and expertise.
What’s the difference between a surface crack and a structural break?
Surface cracks stay on the outer layer of your chassis. They look like lines on the plastic but don’t go deep. Structural breaks go through the entire frame thickness. You can feel a structural break if you flex the chassis gently.
Surface cracks often result from loose washers pressing on the plastic. Structural breaks indicate frame failure. Identifying which type you have determines your repair method.
How long does it take to fix a cracked chassis?
DIY washer reseating takes about 15 to 30 minutes. You need time to power down, disassemble the chassis, reseat the washers, and reassemble everything carefully. Professional welding repairs take longer, usually several hours or a full day depending on the crack severity.

Hi, I’m Lola Griffin 👩💻, the voice and creator behind ResizerBox. I’m a passionate tech enthusiast who loves exploring the latest gadgets, smart devices, and trending Amazon electronics. Through my reviews, I share honest insights, real-world testing experiences, and practical buying advice to help readers make confident tech choices.