How to Fix a Bread Maker Paddle Stuck in Your Loaf?
You pull your fresh loaf out of the bread maker, ready to slice into it. Then you notice it. The paddle is stuck deep inside your bread, ruining the perfect shape.
This is one of the most common frustrations bread makers face. The paddle spins during mixing and kneading. But sometimes it gets buried in the dough and bakes right into your loaf.
The good news? You can fix this problem easily. You do not need to throw away your bread or damage your machine.
This guide will show you simple steps to remove a stuck paddle safely. You will learn why cooling your bread first matters so much. We will also cover the right way to twist and pull without breaking anything.
Beyond fixing the immediate problem, you will discover easy prevention tips too. These tricks help you avoid this sticky situation next time you bake.
By the end, you will know exactly what to do when this happens again. Let’s get your paddle out and your bread maker working smoothly.
In a Nutshell
Here’s the quick fix for a stuck bread maker paddle, summed up simply:
-
Cool down first. Never touch a hot paddle. Let your loaf rest completely before you attempt anything.
-
Twist, don’t pull. Grab the paddle and gently twist it side to side. Pull upward slowly as you twist.
-
Use a tool for leverage. A chopstick or plastic utensil works well. Slide it around the paddle edges to loosen the grip.
-
Soak if needed. If the paddle stays stuck, fill the pan with warm water. Let it soak for fifteen to thirty minutes.
-
Prevent future trouble. Remove the paddle before the final rise next time. Oil it lightly before each bake.
Patience is your best friend here. Rushing the process often causes more damage than good.
Remember this: prevention beats extraction every time. A little oil and early paddle removal save you from this headache altogether. Keep these steps handy for smooth baking ahead.
Why the Paddle Gets Stuck in the First Place
Your bread maker’s paddle gets stuck for several straightforward reasons. Understanding these causes helps you prevent the problem from happening again.
Dough sticks to the paddle surface. When dough rises and bakes, it naturally adheres to metal. The paddle sits at the bottom of the pan, so hot dough wraps around it tightly. Without a barrier between the dough and paddle, they bond together as they cool. This creates a strong connection that’s hard to break.
The paddle lacks lubrication. A dry paddle surface increases friction with the dough. When you don’t apply any oil or cooking spray beforehand, the dough grips the paddle more firmly. This friction makes removal much more difficult once baking finishes.
You leave the paddle in during the entire cycle. Many bread makers have a removable paddle for good reason. If you forget to take it out before the final rise, the dough completely engulfs it. The bread then bakes with the paddle fully embedded inside. Removing it becomes a real challenge.
Dough seeps into paddle joints. Bread maker paddles have small crevices and connection points. Wet dough works its way into these tiny spaces. Once baked, the dough hardens inside these joints, creating multiple anchor points that hold the paddle firmly in place.
Temperature plays a role too. Hot bread is softer and stickier than cooled bread. Attempting removal while the loaf is still warm means the dough grips the paddle even tighter. As bread cools, it contracts and shrinks slightly, which actually helps release the paddle.
Poor pan cleaning between uses. Old dough residue on the pan or paddle provides extra grip. Bits of previous loaves create sticky spots where new dough clings even more strongly.
These reasons all point to one clear solution: preparation and timing matter most. Remove the paddle early, apply oil beforehand, and always let bread cool completely before attempting removal.
Before You Start: What You’ll Need for Safe Removal
Before you attempt to remove a stuck paddle, gather the right items. Having everything ready prevents frustration and keeps your bread safe.
Cooling tools matter first. Let your bread cool completely. A cooling rack or clean kitchen towel works perfectly. Never rush this step. Hot bread is soft and tears easily when you pull the paddle out.
Soft tools are essential. Grab a wooden chopstick or plastic utensil. These won’t scratch your paddle or damage the bread. Metal tools can dent your paddle or scrape the non stick coating. Avoid anything sharp or rigid.
Lubrication helps tremendously. Keep warm water nearby. You may need to soak the bread pan for 15 to 30 minutes if the paddle resists removal. Warm water loosens the bond between bread and paddle without harming either one.
Protective items protect your bread. Have clean kitchen towels or paper towels available. These catch any crumbs and protect your work surface. They also give you grip if your hands get wet from soaking.
A small bowl is useful. Fill it with warm water for soaking. This keeps your work area contained and organized.
Patience is your real tool. Set aside enough time for this task. Rushing causes you to force the paddle, which damages bread or breaks the paddle connection. Give yourself at least 10 to 15 minutes total.
Optional items help too. A rubber mallet or wooden spoon handle can gently tap the paddle loose. Gentle taps work better than hard hits. A small brush cleans debris around the paddle joint before you pull.
Having these items ready means you can remove your paddle safely and calmly. You protect both your bread and your machine. This preparation takes just two minutes but saves you time and frustration during the actual removal process.
Step-by-Step: How to Remove a Stuck Bread Maker Paddle
Let your bread cool completely before touching anything. Hot bread is soft and sticky, which makes the paddle grip even tighter. Wait at least 30 to 60 minutes after your baking cycle finishes.
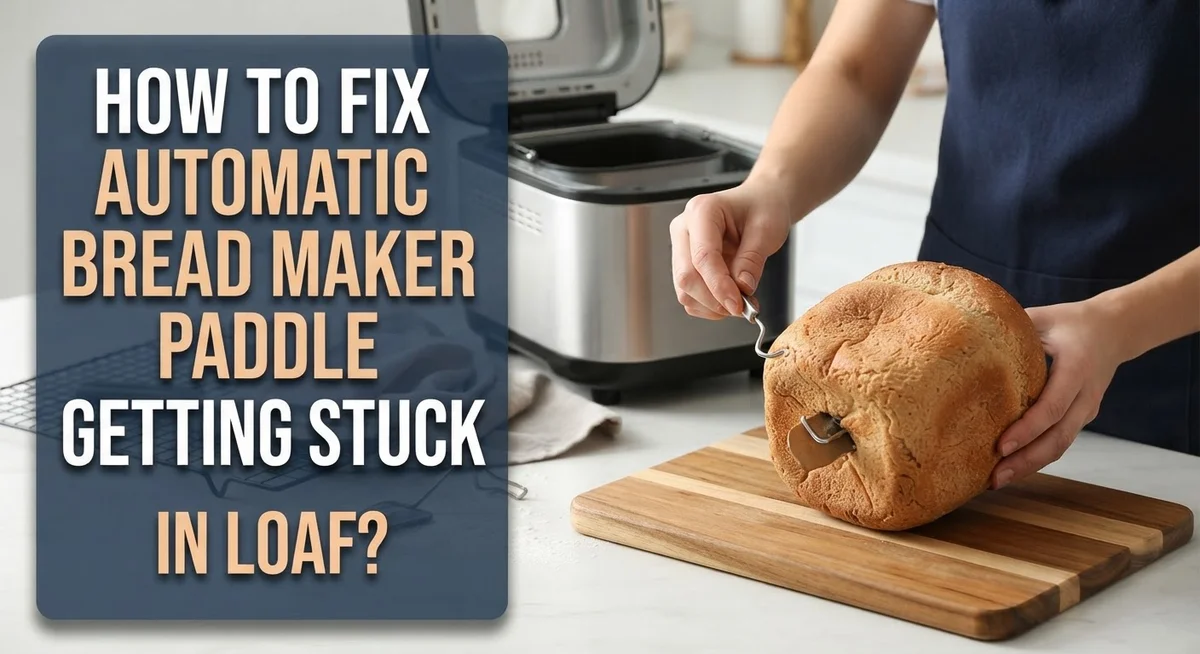
Once the bread cools, gently grasp the paddle handle. Twist it slowly side to side while applying steady upward pressure. The twisting motion breaks the seal between the dough and paddle much better than pulling straight up.
If the paddle resists, stop immediately. Forcing it causes damage to both your bread and the paddle shaft. Instead, use a soft tool to help with leverage.
A wooden chopstick or plastic utensil slides between the bread and paddle edges. Gently work it around the paddle base to loosen stuck dough pieces. This creates small gaps that reduce friction and suction.
For severely stuck paddles, soaking works well. Fill your bread pan with warm water and let it sit for 15 to 30 minutes. The water softens any hardened dough without harming your bread. After soaking, try the twist and pull method again.
Take your time with this process. Rushing leads to torn bread or bent paddles. If the paddle still won’t budge after several attempts, wait another 30 minutes and try again.
Once you remove the paddle, inspect the pan bottom carefully. Dough often hides in corners and connection points. Use your chopstick to clean out any remaining bits before they harden completely.
This removal method works for most stuck paddle situations. The key is patience and gentle pressure rather than force. Your bread stays intact, and your paddle remains undamaged for future baking sessions.
What to Do When the Paddle Won’t Budge
When your paddle won’t budge, staying calm matters most. Don’t force it out while the bread is still hot. Hot bread is softer and stickier, making the paddle grip harder. Wait until your loaf cools completely to room temperature. This simple step prevents tearing your bread and damaging the paddle.
Once cooled, grasp the paddle handle firmly. Twist it gently side to side while pulling upward. This twisting motion breaks the bond between bread and paddle. Pull slowly and steadily. If you feel resistance, stop and try again after a few minutes.
Use a tool to help with leverage. Slide a wooden chopstick or plastic utensil between the bread edge and the paddle. Gently work it around the paddle perimeter. This creates small gaps that release the stuck areas gradually. Never use metal tools that might scratch your bread or damage the pan.
For severely stuck paddles, soaking helps significantly. Fill a bowl with warm water and submerge the bread pan for 15 to 30 minutes. The moisture softens the bread around the paddle edges. After soaking, try the twisting and pulling method again.
Be patient throughout this process. Rushing leads to broken bread or bent paddles. If the paddle still won’t move after several attempts, let it sit longer. Sometimes waiting another 30 minutes makes a real difference.
After successful removal, inspect both the bread and paddle. Look for dough stuck in the paddle’s crevices or joints. Clean these areas thoroughly before your next baking cycle. Proper cleaning prevents future sticking problems.
Remember, prevention beats extraction every time. Apply a light coating of oil to your paddle before starting your next loaf. Remove the paddle before the final rise when possible. These habits keep your paddle moving freely and your bread intact.
Mistakes That Make the Problem Worse
Forcing a stuck paddle while the bread is still hot causes serious damage. Hot bread has a soft, sticky texture that tears easily when you pull hard. The bread breaks apart instead of releasing the paddle cleanly. Your finished loaf ends up ruined, and you waste your baking effort.
Yanking the paddle straight up without twisting creates another common mistake. Direct pulling applies pressure in only one direction. The paddle stays locked in place because it’s designed with a spiral or angled connection. Twisting first loosens the bond before you pull upward. This simple motion makes removal much easier.
Attempting removal immediately after the baking cycle ends is a frequent error. Many people open the bread maker right away and try to extract the paddle. The bread is still steaming and extremely soft at this point. You need patience here. Wait until the bread cools completely to room temperature.
Ignoring the soaking method when the paddle feels truly stuck wastes time and risks damage. Some people keep tugging harder instead of trying warm water. Soaking for 15 to 30 minutes softens old dough around the paddle connection. This simple step often solves the problem without any force required.
Skipping the twisting motion and going straight to leverage tools causes problems too. Using a chopstick or utensil for prying before you twist the paddle can bend or crack it. Always twist gently first. Then use tools only for gentle support if needed.
Not cleaning your bread maker between uses creates stuck paddle situations repeatedly. Old dough residue hardens and acts like glue. This buildup makes every paddle removal difficult. Regular cleaning under and around the paddle prevents this issue from happening in the first place.
These mistakes turn a simple removal into a frustrating experience. Avoiding them keeps your bread and paddle in good condition.
How to Prevent the Paddle From Getting Stuck Next Time
The best approach to preventing stuck paddles is simple: stop the problem before it starts. Most stuck paddles happen because bakers don’t remove the paddle at the right time.
Remove your paddle before the final rise cycle begins. Check your bread maker’s manual to find exactly when this happens. Many machines beep or signal when to remove it. Taking out the paddle early means it cannot sink into the dough as it rises and bakes.
Apply a thin coating of oil or cooking spray to the paddle before each use. This creates a barrier between the metal and dough. The paddle slides out much easier when baking finishes. You only need a light coating—too much oil affects your bread’s texture.
Clean the bread pan thoroughly after every use. Dried dough bits and flour dust build up around the paddle slot. This buildup causes friction and makes removal harder over time. Wipe the pan’s bottom and sides with a damp cloth. Pay special attention to the paddle opening.
Check your paddle for damage regularly. A bent or warped paddle sits unevenly in the pan. Uneven placement causes it to sink deeper into the bread. Replace a damaged paddle to avoid future problems.
Store your bread maker with the paddle removed. Leaving it inside the pan between uses can cause rust or corrosion. These issues make removal difficult later.
Use the correct dough consistency for your recipe. Dough that’s too wet or too dry sticks to the paddle more easily. Follow your machine’s guidelines for liquid and flour ratios.
These prevention steps take just a few extra minutes per use. You’ll avoid the frustration of stuck paddles completely. Prevention always works better than trying to remove a stuck paddle after baking finishes.
Cleaning and Maintaining Your Paddle for Long-Term Use
Regular cleaning keeps your paddle working smoothly and prevents future stuck situations. Start by removing dried dough bits immediately after each use. Let the bread cool first, then gently wipe the paddle with a damp cloth.
For stubborn dough residue, soak the paddle in warm water for 10 to 15 minutes. This softens hardened dough and makes removal easier. Use a soft brush or sponge to clean around the paddle shaft and base where dough accumulates most.
Pay special attention to the connection point where the paddle meets the pan. Dough often hides in this crevice and causes future sticking problems. A small bottle brush works well for reaching tight spaces. Make sure water drains completely from this area before reassembling.
Inspect your paddle regularly for signs of wear or damage. Look for cracks, bent edges, or areas where the coating has worn away. Damaged paddles stick more easily because rough spots catch dough particles. Replace a damaged paddle promptly to avoid ongoing problems.
Store your bread maker with the paddle removed whenever possible. This prevents dough from drying in place and keeps the pan interior dry. A dry environment stops mold growth and reduces corrosion inside your machine.
Clean the bread pan itself thoroughly after each use. Crumbs and flour dust inside the pan can interfere with paddle movement. Wipe the pan interior with a dry cloth, then use a slightly damp cloth for final cleaning. Let everything air dry completely before storing.
Check that your paddle spins freely by hand before each baking cycle. A paddle that feels stiff or resistant needs immediate attention. This simple check catches problems early and prevents future stuck paddle situations.
Proper maintenance takes just a few minutes per use. These small steps save you frustration and extend your bread maker’s life significantly.
Final Thoughts
A stuck paddle feels annoying, but it’s never a big problem. You now know exactly how to handle it.
Cool the bread first. This step matters more than any other. Heat makes everything stick worse, so patience pays off here.
Once cool, twist gently while pulling upward. This simple motion works better than pulling straight up. Add a chopstick or plastic utensil if you need extra leverage.
For paddles that refuse to budge, soaking helps a lot. Fill the pan with warm water and let it sit for fifteen to thirty minutes. The paddle usually loosens on its own after this soak.
Prevention saves you time and stress. Removing the paddle before the final rise stops this issue completely. A light coat of oil keeps things from sticking too.
Small habits make a real difference over time. Cleaning your pan after each bake and checking your paddle for wear keeps everything running smoothly.
Think of paddle care as part of your regular baking routine. It only takes a few extra minutes, but it saves you from frustration later.
Every bread maker owner deals with a stuck paddle at some point. It’s a common hiccup, not a sign that something is broken.
With the right technique, you can remove a stuck paddle without damaging your loaf or your machine. Cool the bread, twist gently, and use tools when needed.
Pair this with good prevention habits, and you’ll rarely face this problem again. Your bread will come out clean, and your paddle will stay in great shape.
Baking should feel enjoyable, not stressful. With these tips in mind, you’re fully equipped to handle any paddle trouble that comes your way.
Frequently Asked Questions
Why does my paddle get stuck in the first place?
Dough naturally expands and rises around the paddle during baking. As the bread cooks, the outer crust hardens while the paddle sits inside. This creates a tight seal that makes removal difficult. The longer the paddle stays in the bread, the more firmly it becomes embedded. Temperature changes also matter because cooling bread contracts slightly, gripping the paddle even tighter.
Can I remove the paddle while the bread is still hot?
No, you should always wait. Hot bread is soft and tears easily when you pull the paddle out. The dough also sticks more strongly to warm surfaces. Let your loaf cool for at least 30 to 45 minutes on a cooling rack. Once completely cool, the bread firms up and releases the paddle more easily. This simple wait saves you from ruining your bread.
What if the paddle still won’t come out after cooling?
Try twisting it gently side to side while pulling upward with steady pressure. Use a wooden spoon or chopstick to create leverage between the paddle and bread. You can also soak the entire bread pan in warm water for 15 to 30 minutes. The moisture softens the bread slightly and helps loosen the paddle’s grip. Never yank or force the paddle straight up, as this damages both the bread and the machine.
How long should I soak the pan if the paddle is really stuck?
Soak for 15 to 30 minutes in warm water. Check progress every 5 minutes by gently attempting removal. If still stuck after 30 minutes, soak for another 15 to 20 minutes. Patience works better than force in these situations. The water gradually softens the bread enough for safe removal without tearing your loaf.

Hi, I’m Lola Griffin 👩💻, the voice and creator behind ResizerBox. I’m a passionate tech enthusiast who loves exploring the latest gadgets, smart devices, and trending Amazon electronics. Through my reviews, I share honest insights, real-world testing experiences, and practical buying advice to help readers make confident tech choices.